标签如下:
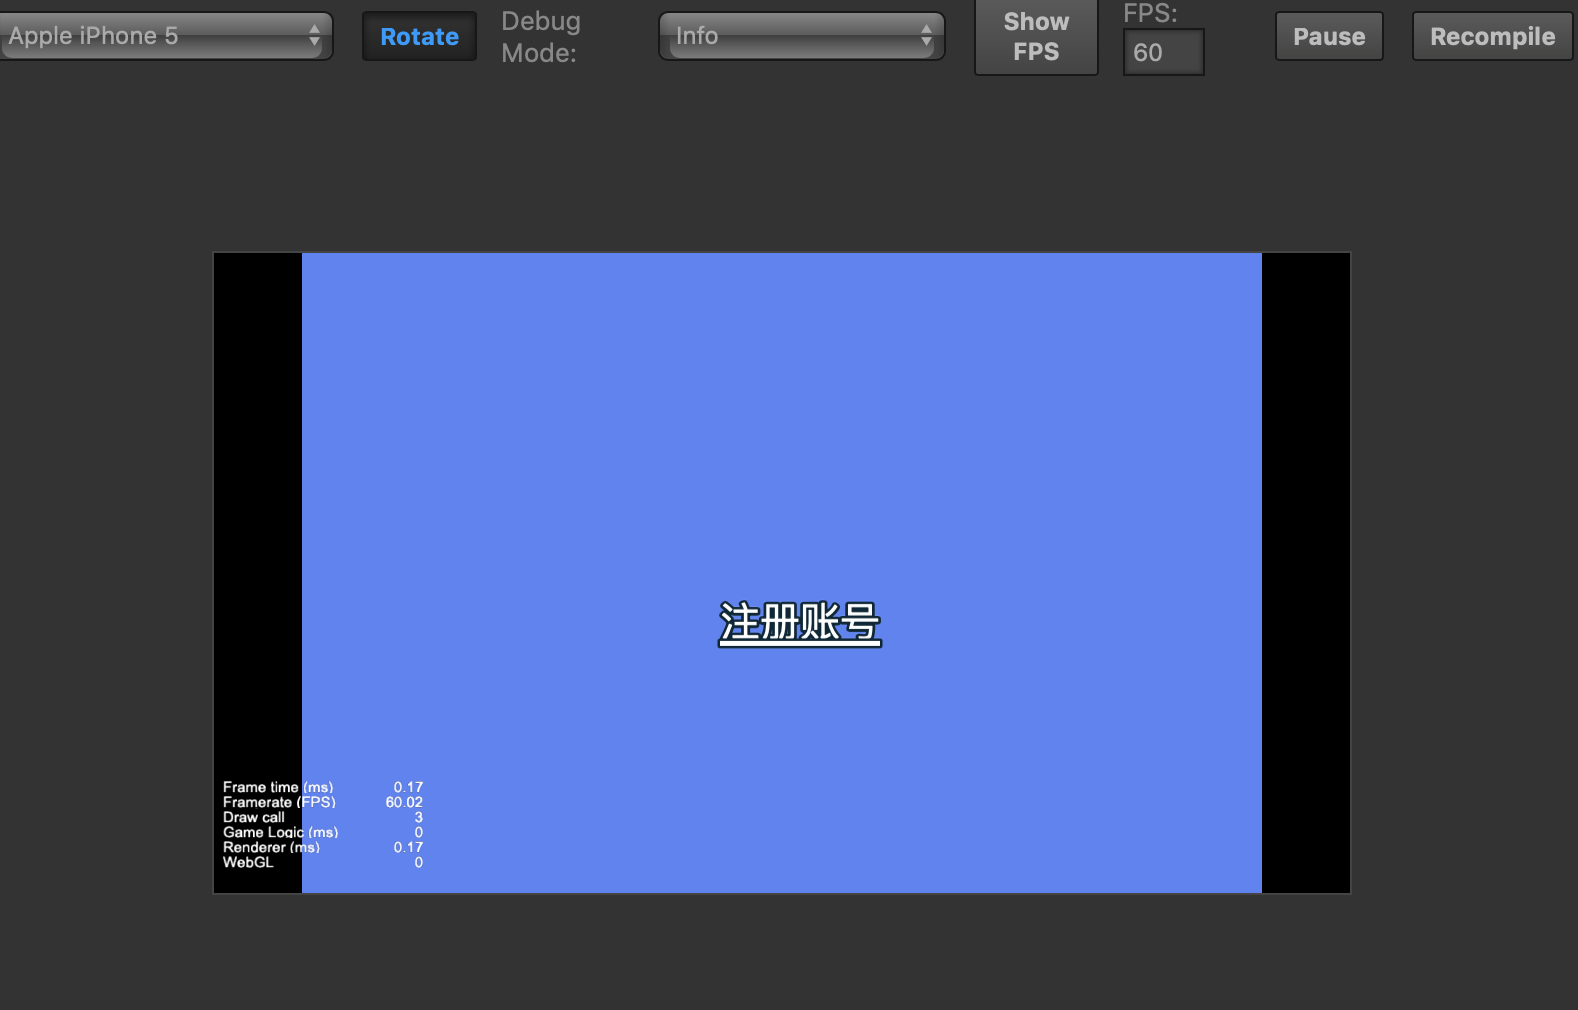
<outline color=#072837 width=3><color=#ffffff><u>注册账号</u></color></outline>
截图如下:

是我标签用的不对吗?

标签如下:
<outline color=#072837 width=3><color=#ffffff><u>注册账号</u></color></outline>
截图如下:
是我标签用的不对吗?
修改引擎cocos2d/core/renderer/utils/label/ttf.js文件
https://github.com/cocos-creator/engine/blob/v2.0.8-release/cocos2d/core/renderer/utils/label/ttf.js#L245
将_updateTexture方法用下面的代码覆盖一下,或者直接用我给的附件文件进行覆盖,我改的是2.0.9的引擎代码。2.1的也是相同的处理
    _updateTexture (comp) {
        _context.clearRect(0, 0, _canvas.width, _canvas.height);
        //Add a white background to avoid black edges.
        //TODO: it is best to add alphaTest to filter out the background color.
        _context.fillStyle = `rgba(${_color.r}, ${_color.g}, ${_color.b}, ${_invisibleAlpha})`;
        _context.fillRect(0, 0, _canvas.width, _canvas.height);
        _context.font = _fontDesc;

        let startPosition = this._calculateFillTextStartPosition();
        let lineHeight = this._getLineHeight();
        //use round for line join to avoid sharp intersect point
        _context.lineJoin = 'round';
        _context.fillStyle = `rgba(${_color.r}, ${_color.g}, ${_color.b}, 1)`;

        let underlineStartPosition;
        //do real rendering
        for (let i = 0; i < _splitedStrings.length; ++i) {
            if (_isOutlined) {
                let strokeColor = _outlineColor || WHITE;
                _context.strokeStyle = `rgba(${strokeColor.r}, ${strokeColor.g}, ${strokeColor.b}, ${strokeColor.a / 255})`;
                _context.lineWidth = _outlineWidth * 2;
                _context.strokeText(_splitedStrings[i], startPosition.x, startPosition.y + i * lineHeight);
            }
            _context.fillText(_splitedStrings[i], startPosition.x, startPosition.y + i * lineHeight);

            if (_isUnderline) {
                underlineStartPosition = this._calculateUnderlineStartPosition();
                _context.save();
                _context.beginPath();

                _context.lineWidth = _fontSize / 8;

                let measureText = this._measureText(_context);
                let underlinewidth = measureText(_splitedStrings[i])
                if (_isOutlined) {
                    let strokeColor = _outlineColor || WHITE;
                    _context.strokeStyle = `rgba(${strokeColor.r}, ${strokeColor.g}, ${strokeColor.b}, ${1})`;
                    _context.strokeRect(underlineStartPosition.x, underlineStartPosition.y + i * lineHeight - 1,underlinewidth, _context.lineWidth);
                }
                _context.fillStyle = `rgba(${_color.r}, ${_color.g}, ${_color.b}, ${1})`;
                _context.fillRect(underlineStartPosition.x, underlineStartPosition.y + i * lineHeight - 1,underlinewidth, _context.lineWidth);

                _context.restore();
            }
        }

        _texture.handleLoadedTexture();
    },
ttf.js.zip (4.5 KB)

感谢大佬回复!
编辑器里下划线有描边了,
但是,运行游戏后在网页里,还是没有描边。
我的是v2.1.0正式版,我是这样改的:
将 E:\CocosCreator\resources\engine\cocos2d\core\renderer\utils\label\ttf.js
下的 _updateTexture 函数替换为你修改的。
由于这个修改,同时还添加了 const _invisibleAlpha = (1 / 255).toFixed(3);
除此之外,没有任何修改了。
然后删除 E:\CocosCreator\resources\engine\bin\.cache 目录、重启 Creator,
再看项目,编辑器内的下划线是有描边的了。但是运行游戏后,还是没有。
我这个操作是不是不对?
补充:
构建发布后运行是可以的,下划线有描边。
但在 WebStorm 中调式运行时没有描边。
再补充:
是 E:\CocosCreator\resources\engine\bin\cocos2d-js-for-preview.js 还是旧的的原因。
我去看看 引擎定制 的文档
你直接改引擎源文件,没有在项目设置中设置自定义引擎的话是不会进行quick complier的,需要手动编译引擎。
参考:https://docs.cocos.com/creator/manual/zh/release-notes/upgrade-guide-v2.0.html#26-自定义引擎-quick-compile
感谢大佬指导!这回构建发布运行和调试运行都好了!