
CCEffect %{
  techniques:
  - name: opaque
    passes:
    - vert: unlit-vs:vert
      frag: unlit-fs:frag
      properties: &props
        _FadeOutDistNear: { value : 10, inspector : { displayName : "Near fadeout dist" } }
        _FadeOutDistFar: { value : 10000, inspector : { displayName : "Far fadeout dist" } }
        _Multiplier: { value : 1, inspector : { displayName : "Color multiplier" } }
        _Bias: { value : 0, inspector : { displayName : "Bias" } }
        _TimeOnDuration: { value : 0.5, inspector : { displayName : "ON duration" } }
        _TimeOffDuration: { value : 0.5, inspector : { displayName : "OFF duration" } }
        _BlinkingTimeOffsScale: { value : 5, inspector : { displayName : "Blinking time offset scale (seconds)" } }
        _SizeGrowStartDist: { value : 5, inspector : { displayName : "Size grow start dist" } }
        _SizeGrowEndDist: { value : 50, inspector : { displayName : "Size grow end dist" } }
        _MaxGrowSize: { value : 2.5, inspector : { displayName : "Max grow size" } }
        _NoiseAmount: { value : 0, inspector : { displayName : "Noise amount (when zero, pulse wave is used)" } }
        color:        { value: [1, 1, 1, 1], inspector: { type: color } }
        tilingOffset: { value: [1, 1, 0, 0] }
        mainTexture:  { value: grey         }
        alphaTexture:  { value: grey         }
  - name: transparent
    passes:
    - vert: unlit-vs:vert
      frag: unlit-fs:frag
      blendState:
        targets:
        - blend: true
          blendSrc: src_alpha
          blendDst: one_minus_src_alpha
          blendSrcAlpha: src_alpha
          blendDstAlpha: one_minus_src_alpha
      properties: *props
  - name: one
    passes:
    - vert: unlit-vs:vert
      frag: unlit-fs:frag
      blendState:
        targets:
        - blend: true
          blendSrc: one
          blendDst: one
          blendSrcAlpha: one
          blendDstAlpha: one
      properties: *props
}%

CCProgram unlit-vs %{
  precision mediump float;
  #include <cc-global>
  #include <cc-local-batch>
  #include <input>

  in vec4 a_color;
  out float v_color;
  in vec3 a_normal;
  in vec2 a_texCoord;
  out vec2 v_uv;
  uniform TexCoords {
    vec4 tilingOffset;

    float _FadeOutDistNear;
    float _FadeOutDistFar;
    float _Multiplier;
    float _Bias;
    float _TimeOnDuration;
    float _TimeOffDuration;
    float _BlinkingTimeOffsScale;
    float _SizeGrowStartDist;
    float _SizeGrowEndDist;
    float _MaxGrowSize;
    float _NoiseAmount;
  };

  float saturate(float x) {
    if(x >= 1.0) return 1.0;
    if(x <= 0.0) return 0.0;
    return x;
  }


  highp vec4 vert () {
    vec4 position;
    CCVertInput(position);

    highp mat4 matWorld;
    CCGetWorldMatrix(matWorld);

    float   time      = cc_time.x + _BlinkingTimeOffsScale * a_color.b;
    vec4    viewPos   = (cc_matView * matWorld) * position;
    float   dist      = length(viewPos.xyz);
    float   nfadeout  = saturate(dist / _FadeOutDistNear);
    float   ffadeout  = 1.0 - saturate(max(dist - _FadeOutDistFar,0.0) * 0.2);
    float   fracTime  = mod(time / (_TimeOnDuration + _TimeOffDuration), 1.0);
    float   wave      = smoothstep(0.0, _TimeOnDuration * 0.25, fracTime)  * (1.0 - smoothstep(_TimeOnDuration * 0.75, _TimeOnDuration, fracTime));
    float   noiseTime = time * (6.2831853 / _TimeOnDuration);
    float   noise     = sin(noiseTime) * (0.5 * cos(noiseTime * 0.6366 + 56.7272) + 0.5);
    float   noiseWave = _NoiseAmount * noise + (1.0 - _NoiseAmount);
    float   distScale = min(max(dist - _SizeGrowStartDist, 0.0) / _SizeGrowEndDist, 1.0);


    if(_NoiseAmount >= 0.01) {
      wave = noiseWave;
    }

    distScale = distScale * distScale * _MaxGrowSize * a_color.a;

    wave += _Bias;

    ffadeout *= ffadeout;

    nfadeout *= nfadeout;
    nfadeout *= nfadeout;

    nfadeout *= ffadeout;

    vec4  mdlPos = position;

    mdlPos.xyz += distScale * a_normal;

    highp vec4 pos = cc_matProj * (cc_matView * matWorld) * mdlPos;

    v_uv = a_texCoord;
    #if FLIP_UV
      v_uv.y = 1.0 - v_uv.y;
    #endif
    v_uv = v_uv * tilingOffset.xy + tilingOffset.zw;

    v_color = nfadeout * _Multiplier * wave;

    return pos;
  }
}%

CCProgram unlit-fs %{
  precision mediump float;
  #include <output>

  #if USE_COLOR
    uniform Constant {
      vec4 color;
    };
  #endif

  in vec2 v_uv;
  in float v_color;
  uniform sampler2D mainTexture;

  #if USE_ALPHAIMAGE
    uniform sampler2D alphaTexture;
  #endif

  vec4 frag () {
    vec4 o = texture(mainTexture, v_uv);
    o *= v_color;


    #if USE_COLOR
      o *= color;
    #endif
    #if USE_ALPHAIMAGE
      o.a = texture(alphaTexture, v_uv).r;
    #endif


    return CCFragOutput(o);
  }
}%
还有一个简化版本的,不带动画的,有需要的话可以自行翻译一下。
雾与体积光.zip (31.4 KB)
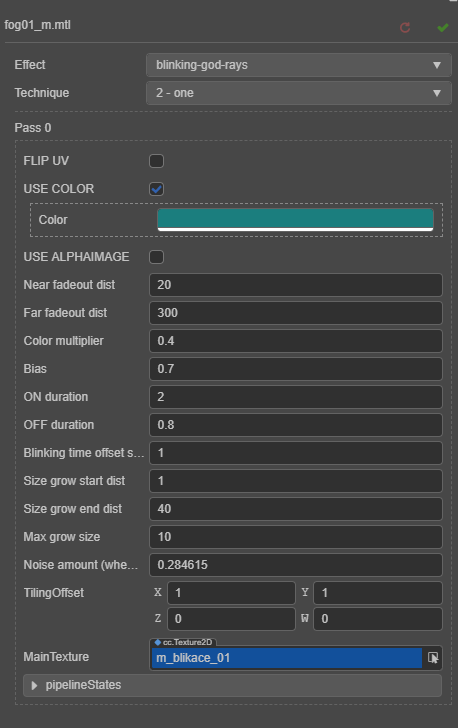

参数设置。
这个shader的应用还是挺多的,其它的效果与模型可以在shadowgun项目里找到更多。
使用办法:
- 在项目资源里创建一个Effect文件,然后把上面的的shader代码全放进去
- 再创建一个Material文件,然后选中Material文件,在右边属性栏处,Effect选择第1步创建的Effect
- 再把贴图拉进MainTexture里面。其它参数可以自行修改试试,会出现不同的效果。
- 最后再把这个材质拉到你的对象材质上。
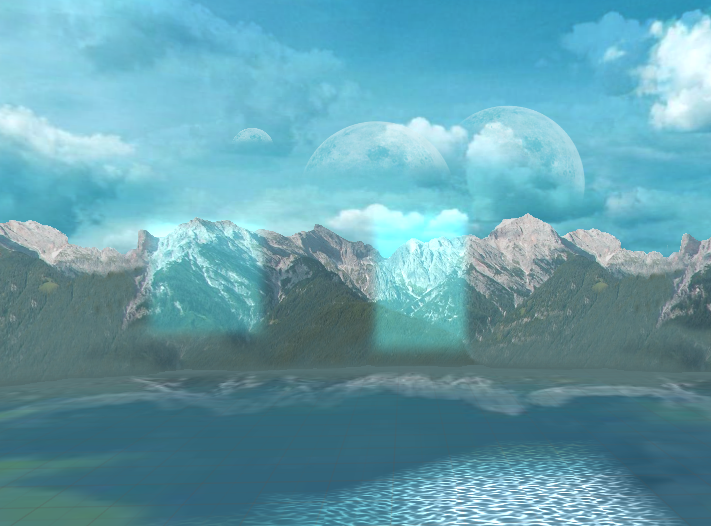
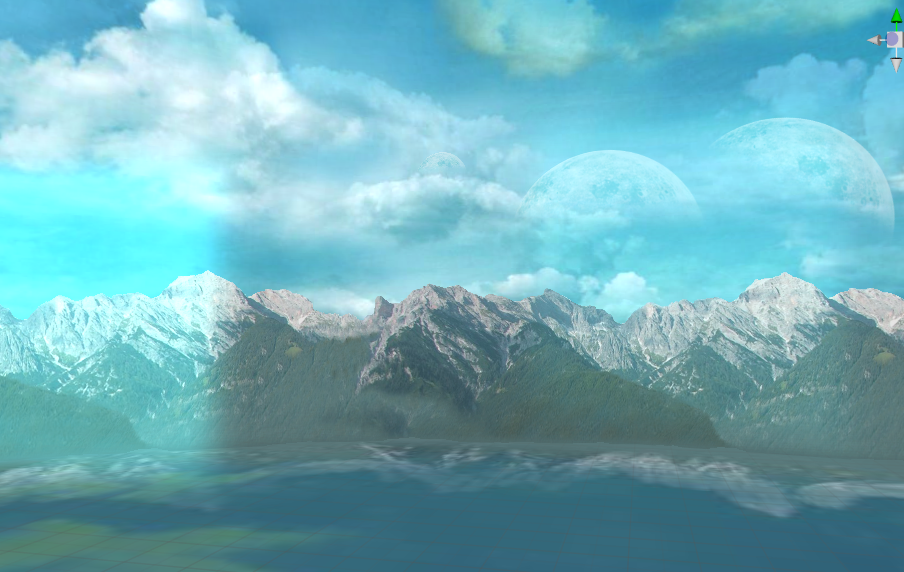
Blinking GodRays用于各种blingbling的光效,它是应用最广的一个shader,包括了光锥的闪烁、水面反光、仪表盘的灯光闪烁(图中的绿色发光部分)、金属表面的反光闪烁、顶棚的阳光闪烁、火焰及火光的闪烁(地面上的火光闪烁和飞船后发射器的火焰)、光雾效果(背景的蓝绿色光雾)等等。
具体原理请百度:shadowgun 雾与体积光
