从零开始的标题只是用惯了,下面的代码需要实验的话,请确保之前真正的从零开始的帖子 你能看明白或者你已经联系过。

准备工作
smoothstep
smoothstep没闹明白的点开先看下
本来想写一下的,没找到画图软件,上面链接挺好的,省事了。
直接改一个片元着色器main函数出来
void main() {
vec2 uv = v_uv0;
vec3 color = vec3(0.);
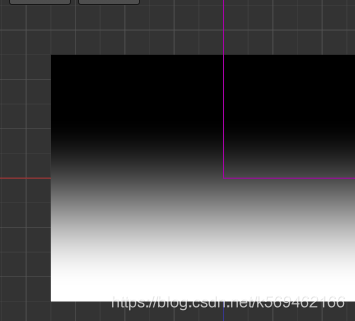
// 三个渐变值 分别显示到屏幕上看一下,更直观
float p1 = smoothstep(0.,.7,v_uv0.y);
float p2 = smoothstep(0.,.7,v_uv0.y - .25);
float p3 = smoothstep(0.,.7,v_uv0.y - .4);
color = vec3(p1);
gl_FragColor = vec4(color,1.);
}
color = vec3(p1);
color = vec3(p2);
color = vec3(p3);
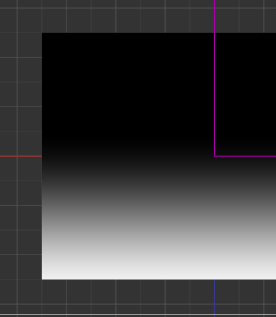
三个渐变值线放下。
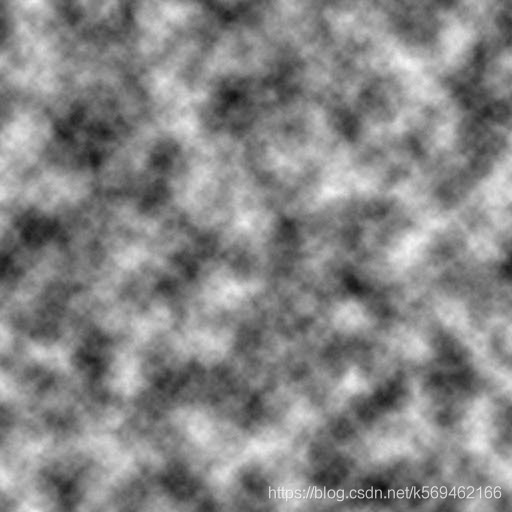
噪声图
不局限于这一个噪声图,手里有别的噪声图的可以换上试试
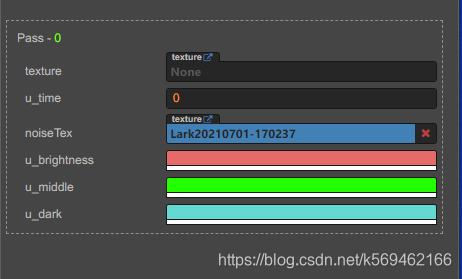
先把需要传入的参数都定义一下。
 // 下面是要添加的内容
      properties:
        texture: {  value: white }
        u_time: {value: 0.0}
        noiseTex: { value: white }
        u_brightness: {value: [1,1,1,1], editor: { type: "color"}}
        u_middle: {value: [1,1,1,1], editor: { type: "color"}}
        u_dark: {value: [1,1,1,1], editor: { type: "color"}}

 // 上面是要添加的内容
........

CCProgram fs %{
precision mediump float;

uniform sampler2D texture;

 // 下面是要添加的内容
uniform sampler2D noiseTex;
uniform Constants1 {
  vec4 u_brightness;
  vec4 u_middle;
  vec4 u_dark;
  float u_time;
};

 // 上面是要添加的内容

varying mediump vec2 v_uv0;
varying lowp vec4 v_color;
varying lowp vec4 v_wp;
准备工作结束了,上正餐
讲一下火焰造型原理
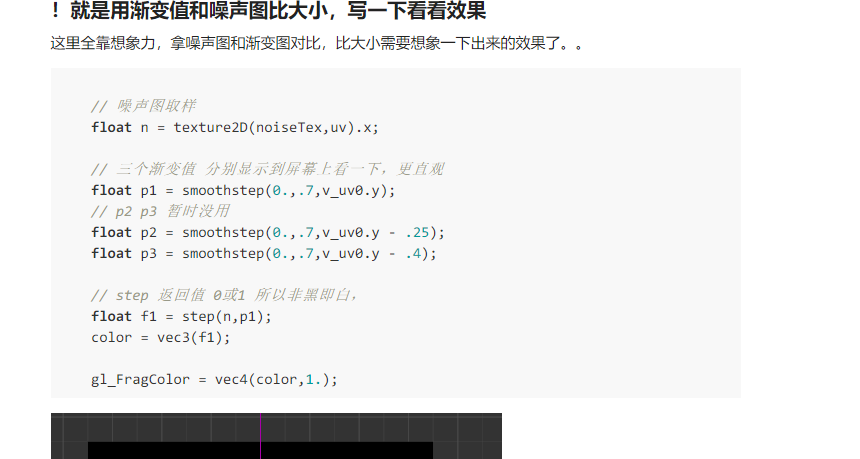
!就是用渐变值和噪声图比大小,写一下看看效果
这里全靠想象力,拿噪声图和渐变图对比,比大小需要想象一下出来的效果了。。
// 噪声图取样
float n = texture2D(noiseTex,uv).x;
// 三个渐变值 分别显示到屏幕上看一下,更直观
float p1 = smoothstep(0.,.7,v_uv0.y);
// p2 p3 暂时没用
float p2 = smoothstep(0.,.7,v_uv0.y - .25);
float p3 = smoothstep(0.,.7,v_uv0.y - .4);
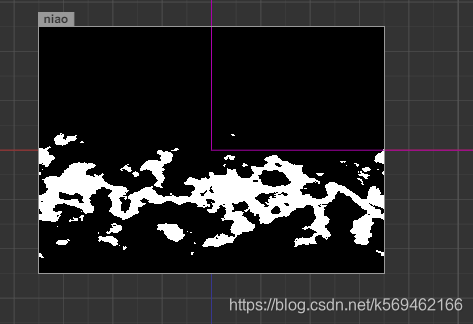
// step 返回值 0或1 所以非黑即白,
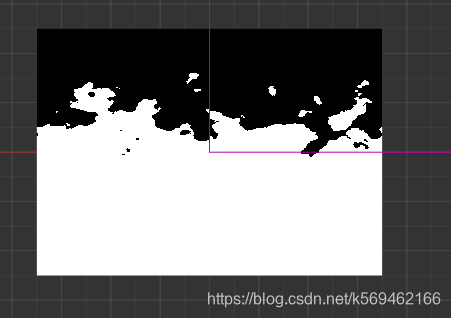
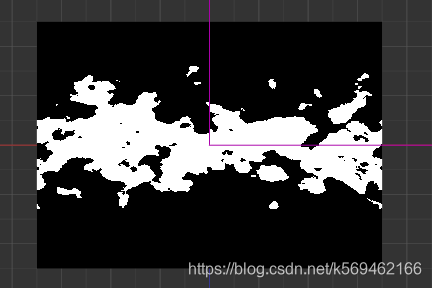
float f1 = step(n,p1);
color = vec3(f1);
gl_FragColor = vec4(color,1.);
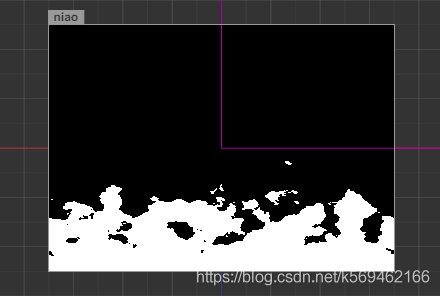
float f1 = step(n,p2);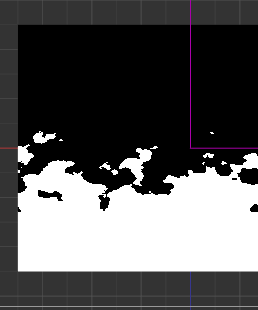
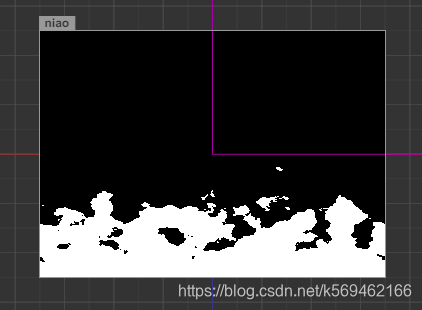
float f1 = step(n,p3);
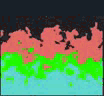
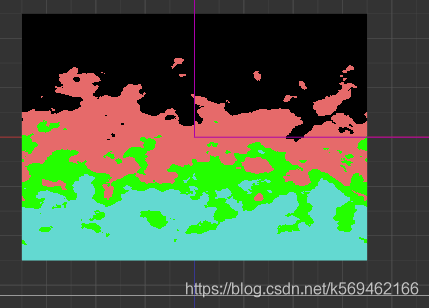
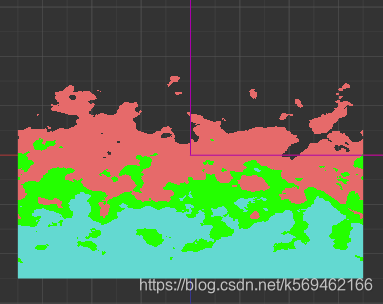
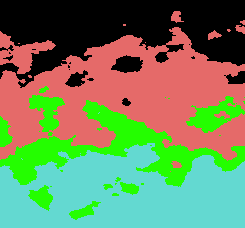
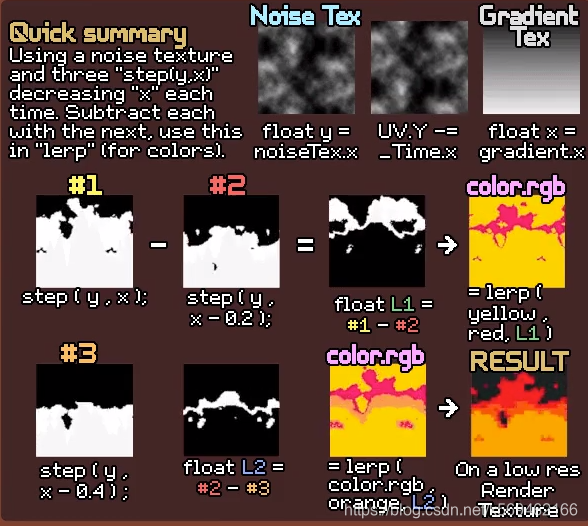
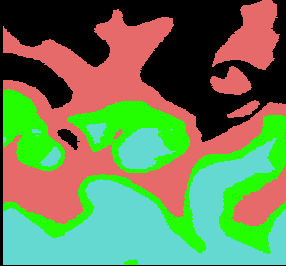
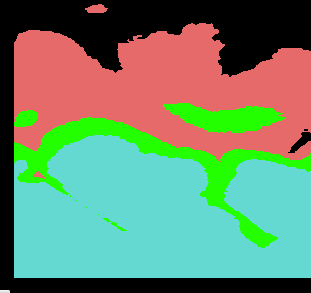
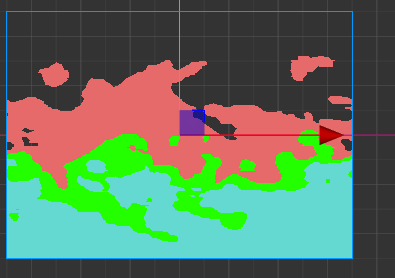
把上面三层火分别上色,其实就是最终效果了。
直接叠加颜色会叠加,处理一下,把真正的层做出来
    float f1 = step(n,p1);
    float f2 = step(n,p2);
    float f3 = step(n,p3);

    float r1 = f1 - f2;
    float r2 = f2 - f3;
    float r3 = f3;

    color = vec3(r1);
第一层 color = vec3(r1);
第二层 color = vec3(r2);
第三层 color = vec3(r3);
上色
color = (u_dark * r3 + u_middle * r2 + u_brightness * r1).rgb;
去背景
用f1做透明通道值就好了。
    color = (u_dark * r3 + u_middle * r2 + u_brightness * r1).rgb;

    gl_FragColor = vec4(color,f1);
动起来
//包含头文件来使用cc_time
#include <cc-global>

void main() {
    vec2 uv = v_uv0;
    // 让uv的y动起来
    uv.y += cc_time.x * .6;
原帖地址 需要梯子,而且是unity的语法
https://www.febucci.com/2019/05/fire-shader/
但是原帖配色是值得参考的。。


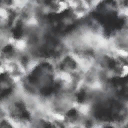
 上一个效果好看点的噪声图。。