-
Creator 版本: 2.4.2
-
目标平台: 谷歌浏览器 别的没试过
-
重现方式:
-
首个报错: 无
-
之前哪个版本是正常的:
-
手机型号:
-
手机浏览器:null
-
编辑器操作系统: windows
-
重现概率: null
官方教程中 未能提供更丰富的例子,很多跟我一样的从事后端工作,且对游戏感兴趣的朋友都习惯于直接撸代码的方式写东西的朋友可能遇到我该如何通过代码方式编写UI 的问题。我想通过这个例子来向大家分享我的理解
前题知识:
- 需要深刻理解 ecs 模型,当然,后端兄弟不懂也没关系,反正你肯定接触过类似的,大家叫法不一样。
- 理解 节点 和 组件 之间的不同点。 cc.Node 以及继承这个类的统称为节点,在IDE的左边的层级管理器中,这里的都是节点。addComponent 方式添加的叫组件,组件在IDE右边的导航栏里头,别搞错了两者。节点是通过 addChild 加入的。
- 官方IDE中给出的拖拽UI组件,实质上都是通过节点和组件组合而成,我们在自行通过代码仿写的过程,就是将整个官方UI拖拽组件进行组装的过程。
官方拖拽Button组件分析:
- 顶层为一个name=button 的cc.Node。该node 上有组件 cc.Button (很多同学以为这个就是按钮,其实不是,这只是组件,并不是官方拖拽按钮)
- button节点下有子节点 name=Background 的 cc.Node。该子节点上挂载组件cc.Sprite 和 cc.Widget
- Brackground 节点下 有 name=Label 的 cc.Node。该子节点上挂在的组件有 cc.Label
- 以上为整个拖拽组件的结构。
|父节点|节点|节点挂载组件|

代码和演示
/**
-
代码创建button
-
梅小春 476984957@qq.com
*/
export default class MyButton {
protected name: string = null;//cc.Node.name
protected width: number = null; //节点 的 width
protected height: number = null; //节点 的 height
protected x: number = null; //坐标 x
protected y: number = null; //坐标 y
protected bgColor: cc.Color = null; //背景颜色
protected color: cc.Color = null; //字体颜色
protected button: cc.Node = null; // 最外层的 父节点
protected Background: cc.Node = null; // 子节点
protected Label: cc.Node = null; // 文字节点
protected buttonWords: string = null;
protected fontSize: number = 18; //字体大小
protected lineHeight: number = 18; //行高
protected count:number = 0; //计数器
public constructor(name:string){
this.name = name;
this.width = 200;
this.height = 30;
this.x = 100;
this.y = 100;
this.bgColor = new cc.Color(255, 255, 255, 255);
this.color = new cc.Color(255, 0, 0, 255);
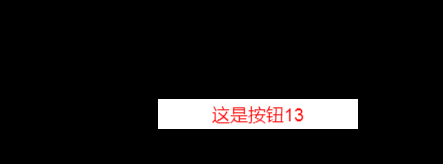
this.buttonWords = "这是按钮";
}
//挂在节点到 界面
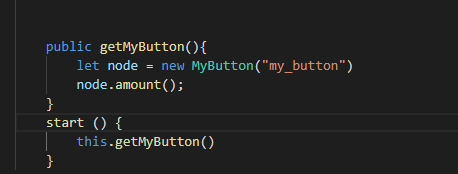
public amount(){
this.init();
this.click();
cc.find("Canvas").addChild(this.button)
}
/**
* 点击事件
*/
protected click(){
this.button.on(cc.Node.EventType.MOUSE_UP,(e)=>{
this.count++;
this.Label.getComponent(cc.Label).string = this.buttonWords+this.count;
},this)
}
protected initButton(){
this.button = new cc.Node();
this.button.setAnchorPoint(0.5, 0.5)
this.button.name = this.name;
this.button.width = this.width;
this.button.height = this.height;
this.button.color = this.bgColor;
this.button.x = this.x;
this.button.y = this.y;
let button: cc.Button = this.button.addComponent(cc.Button);
button.interactable = true;
button.transition = cc.Button.Transition.SPRITE
button.normalColor = this.bgColor;
button.normalSprite = this.getSprite(this.width, this.height, this.bgColor);
button.pressedColor = new cc.Color(255, 255, 255, 255);
button.pressedSprite = this.getSprite(this.width, this.height, new cc.Color(255, 255, 255, 255));
button.hoverColor = new cc.Color(255, 255, 255, 120);
button.hoverSprite = this.getSprite(this.width, this.height, new cc.Color(255, 255, 255, 120));
button.disabledColor = new cc.Color(100, 100, 100, 120);
button.disabledSprite = this.getSprite(this.width, this.height, new cc.Color(100, 100, 100, 120));
}
protected initBackground(){
this.Background = new cc.Node();
this.Background.name = "Background";
this.Background.color = this.bgColor;
this.Background.width = this.width;
this.Background.height = this.height;
let img = this.Background.addComponent(cc.Sprite)
img.spriteFrame = this.getSprite(this.width, this.height, this.bgColor);
let widget: cc.Widget = this.Background.addComponent(cc.Widget);
widget.isAlignTop = true;
widget.isAlignBottom = true;
widget.isAlignLeft = true;
widget.isAlignRight = true;
widget.top = 0;
widget.bottom = 0;
widget.left = 0;
widget.right = 0;
}
protected initLabel(){
this.Label = new cc.Node(); //label 的逻辑节点
this.Label.name = "Label";
this.Label.color = this.color
this.Label.width = this.width;
this.Label.height = this.height;
let label: cc.Label = this.Label.addComponent(cc.Label);
label.horizontalAlign = cc.Label.HorizontalAlign.CENTER;
label.verticalAlign = cc.Label.VerticalAlign.CENTER;
label.fontSize = this.fontSize;
label.lineHeight = this.lineHeight;
label.string = this.buttonWords;
}
/**
* 初始化 Button
*/
protected init(){
this.initButton();
this.initBackground();
this.initLabel();
let button:cc.Button = this.button.getComponent(cc.Button)
button.target = this.Background;
this.Background.addChild(this.Label)
this.button.addChild(this.Background)
}
/**
* 生成图片
*/
protected getSprite(imgWidth, imgHeight, color: cc.Color) {
var count = imgWidth * imgHeight * 4;
var imgData = new Uint8Array(count);
for (var j = 0; j < count; j += 4) {
imgData[j] = color.r;
imgData[j + 1] = color.b;
imgData[j + 2] = color.g;
imgData[j + 3] = color.a;
}
var myTexture2D = new cc.Texture2D();
myTexture2D.initWithData(imgData, cc.Texture2D.PixelFormat.RGBA8888, imgWidth, imgHeight);
let spriteFrame = new cc.SpriteFrame();
spriteFrame.setTexture(myTexture2D)
return spriteFrame;
}
}