
记录开发过程中的小问题,请多指教
由于是直接从微信文制过来,文章样式格式有点乱·····
完整样式请阅读微信原文
更多笔记和源码请访问公众号

原作者不愿留下联系方式,有什么疑问可由我代为转述
准备工作
环境配置:
Win10 64 位操作系统
cocos creator v2.2.1 +
NodeJS v10.16.1 +
Yarn v1.19.2 +
VSCode
git
第一步 新建 cocos creator typescript 工程
全点一遍
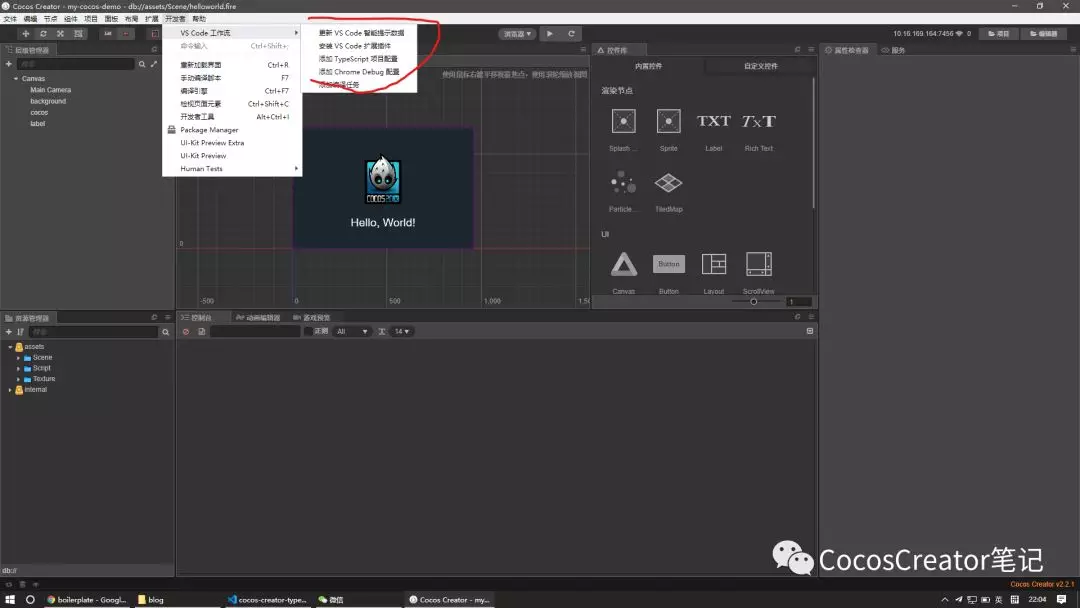
至此, 一个干净的 Hello typescript 项目创建完成
第二步 初始化 npm 项目
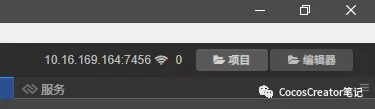
编辑器右上角打开项目所在位置, 在 VSCode 中打开项目根目录
在项目根目录执行命令(后续操作如无特殊说明均在项目根目录进行)
yarn 初始化工程
yarn init -y
根目录下生成 package.json 文件
{
“name”: “my-cocos-demo”,
“version”: “1.0.0”,
“main”: “index.js”,
“license”: “MIT”
}
对 .gitignore 进行修改
删除
#//////////////////////////
VS Code
#//////////////////////////
.vscode/
将 vscode 项目配置加入版本控制
添加
dependencies
node_modules
we use yarn
package-lock.json
misc
npm-debug.log
yarn-error.log
lerna-debug.log
将 node 模块, npm 锁文件, 和一些 log 文件排除在外
执行
git init
初始化 git 仓库
执行
git add .
git commit -m ‘first commit’
进行第一次提交
至此, npm 项目初始化完成
第三步 添加项目配置
VSCode 安装插件
ESlint // 代码格式检查
Prettier // 代码格式美化
EditorConfig for VS Code // 编辑器统一配置
EditorConfig 的安装及配置
根目录创建 .editorconfig
http://editorconfig.org
root = true
[{assets}/**.{ts,json,js}]
end_of_line = lf
charset = utf-8
trim_trailing_whitespace = true
insert_final_newline = true
indent_style = space
indent_size = 2
Prettier 的安装及配置
执行
yarn add -D prettier
安装 prettier
创建 .prettierrc
module.exports = {
endOfLine: “lf”,
proseWrap: “always”,
singleQuote: true,
trailingComma: “es5”
};
创建 .prettierignore
lib/
build/
*.html
至此, Prettier 配置完毕
ESlint 的安装及配置
airbnb-config 官方给出的安装方法是
npx install-peerdeps --dev eslint-config-airbnb-base
在我这里要么跳过安装要么报连接错误, 只好手动安装
执行
npm info “eslint-config-airbnb-base@latest” peerDependencies
输出类似以下内容, 版本号可能不同
{ “eslint”: “^5.16.0 || ^6.1.0”, “eslint-plugin-import”: “^2.18.2” }
按照此版本安装 eslint-config-airbnb-base 及其依赖
yarn add -D eslint@6.1.0 eslint-plugin-import@2.18.2 eslint-config-airbnb-base
执行
yarn add -D babel-eslint eslint-config-prettier
安装 babel-eslint 解析器和 eslint-config-prettier ESlint Prettier 配置插件
执行
yarn add -D @typescript-eslint/eslint-plugin @typescript-eslint/parser
安装 ESlint typescript 插件
此处遇到一个问题, latest 的 typescript-eslint 版本使用了 eslint 的新方法 function-call-argument-newline 在 ESlint@^6.2 才有, 而之前与 airbnb 同时安装的版本是 6.1.0 报错, 于是重新安装了最新的 ESlint
执行
yarn add typescript
安装 typescript
创建 .vscode/settings.json 来打开 VSCode 对 eslint 的支持
{
“eslint.enable”: true,
“typescript.tsdk”: “node_modules/typescript/lib”,
“eslint.validate”: [
“javascript”,
{
“language”: “typescript”,
“autoFix”: true
}
]
}
创建 .eslintrc
{
“extends”: [“airbnb-base”, “prettier”],
“parser”: “babel-eslint”,
“globals”: {
“cc”: true
},
“rules”: {
“no-underscore-dangle”: “off”
},
“parserOptions”: {
“ecmaFeatures”: {
“legacyDecorators”: 1
}
}
}
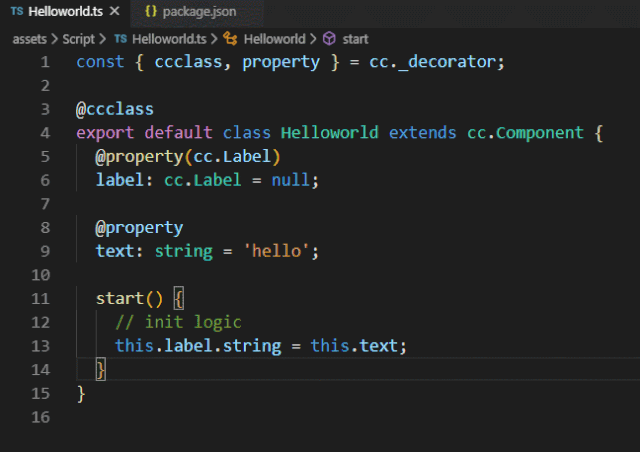
此时已完成 ESlint + cocos creator 的基本配置, 打开 assets/Script/Helloworld.ts
在 start() {} 中输入

已经可以看到 ESlint 的报错了
至此, ESlint 的基本配置完成
修改 ESlint 规则
airbnb 的 ESlint 配置对代码有严格的要求, 在使用过程中会有许多摸不着头脑的错误, 可以通过修改 .eslintrc 文件自定义规则
ESlint 有非常多的规则, 此处仅贴出一份我自用的, 根据平时写前端的 .eslintrc 修改而来的规则, 不再详细列举每一条的意义, 可以自行百度每一条规则的名字查看详细信息
{
“extends”: [“airbnb-base”, “prettier”],
“parser”: “babel-eslint”,
“env”: {
“browser”: true,
“node”: true,
“jest”: true,
“es6”: true
},
“globals”: {
“cc”: true,
“VERSION”: true,
“TimeoutID”: true,
“object”: true,
“DEV”: true
},
“rules”: {
“import/no-extraneous-dependencies”: 0,
“import/no-cycle”: “warn”,
“arrow-parens”: 0,
“prefer-destructuring”: 0,
“no-async-promise-executor”: “warn”,
“import/prefer-default-export”: 0,
“class-methods-use-this”: 0,
“no-console”: 0,
// “no-console”: [“warn”, { “allow”: [“error”, “warn”] }],
“prefer-template”: “off”,
“no-plusplus”: 0,
“no-underscore-dangle”: “off”,
“no-nested-ternary”: “warn”,
“import/no-named-default”: 0,
“import/no-webpack-loader-syntax”: 0,
“import/extensions”: [
“error”,
“always”,
{
“ts”: “never”,
“tsx”: “never”,
“js”: “never”
}
],
“import/default”: “error”,
“no-param-reassign”: [
“error”,
{
“props”: false
}
],
“camelcase”: 0,
“no-bitwise”: “off”,
“arrow-body-style”: [“error”, “as-needed”],
“no-restricted-globals”: “off”,
“lines-between-class-members”: [
“error”,
“always”,
{
“exceptAfterSingleLine”: true
}
]
},
“overrides”: [
{
“files”: ["**/*.ts"],
“parser”: “@typescript-eslint/parser”,
“parserOptions”: {
“ecmaVersion”: 2018,
“sourceType”: “module”,
“warnOnUnsupportedTypeScriptVersion”: true
},
“plugins”: ["@typescript-eslint"],
“rules”: {
“default-case”: “off”,
“no-dupe-class-members”: “off”,
“no-array-constructor”: “off”,
“@typescript-eslint/no-array-constructor”: “warn”,
“@typescript-eslint/no-namespace”: “error”,
“no-use-before-define”: “off”,
“@typescript-eslint/no-use-before-define”: [
“warn”,
{
“functions”: false,
“classes”: false,
“variables”: false,
“typedefs”: false
}
],
“no-unused-vars”: “off”,
“@typescript-eslint/no-unused-vars”: [
“error”,
{
“args”: “none”,
“ignoreRestSiblings”: true
}
],
“no-useless-constructor”: “off”,
“@typescript-eslint/no-useless-constructor”: “warn”,
“import/extensions”: 0,
“import/no-unresolved”: 0
}
}
],
“parserOptions”: {
“ecmaFeatures”: {
“legacyDecorators”: 1
}
}
}
至此, 对 ESlint 的配置已经完成
提交代码时自动检查
我们使用 git 进行版本控制
利用 husky + lint-staged 可以进行代码质量的自动化检测
执行
yarn add -D husky lint-staged pretty-quick cross-env
安装相关依赖
在 package.json 中添加相关配置
“scripts”: {
“lint”: “cross-env LINT=1 eslint --ext .js,.ts assets”
},
“husky”: {
“hooks”: {
“pre-commit”: “lint-staged”
}
},
“lint-staged”: {
“*.{js,jsx,ts,tsx}”: [
“cross-env LINT=1 eslint --fix”,
“pretty-quick --staged”,
“git add”
]
}
检验配置
打开 assets/Script/Helloworld.ts
写下 let test = 1;
不出意外的话保存文件会自动修复 let 声明未变动量, 还有一个未使用变量的错误无法自动修复, 此时在根目录执行
yarn lint
检查代码
会报
C:\projectpath\assets\Script\Helloworld.ts
14:11 error ‘test’ is assigned a value but never used @typescript-eslint/no-unused-vars
 1 problem (1 error, 0 warnings)
error Command failed with exit code 1.
ESlint 检出了这个错误
此时执行
git add .
git commit -m ‘lint test’
也会报错并阻止你本次提交, 说明配置成功
根据报错提示修改代码后提交才能成功
至此, cocos creator + typescript + ESlint + Prettier 的团队代码检测一条龙配置完成
其他配置(可选)
为了进一步保证团队环境一致和代码整洁, 还有如下配置文件可以选择性添加
.gitattributes 提交时统一使用 lf 换行
- text=auto eol=lf
.nvmrc nvm NodeJS 版本限制, 配合下面的 engine 配置使用
v10.16.2
package.json 添加如下配置
“engines”: {
“node”: “^10.0.0”
}
统一控制团队 NodeJS 版本
.yarnclean 每次安装完模块后清除 node_modules 内多余的配置, 测试,说明等不必要文件缩小项目体积
test directories
tests
test
tests
powered-test
asset directories
docs
doc
website
images
examples
example
examples
code coverage directories
coverage
.nyc_output
build scripts
Makefile
Gulpfile.js
Gruntfile.js
configs
appveyor.yml
circle.yml
codeship-services.yml
codeship-steps.yml
wercker.yml
.tern-project
.gitattributes
.editorconfig
.*ignore
.eslintrc
.jshintrc
.flowconfig
.documentup.json
.yarn-metadata.json
.travis.yml
misc
*.md
代价是安装时多花费一点时间, 反正是自动的
进阶
再在最后讲一下使用 lerna 进行 monorepo 包管理
代码写多了以后, 经常想封装成模块以复用, 使用 lerna 可以方便地管理多个包及其之间的依赖关系
太长了, 算了, 再说吧