更多笔记,请关注公众号:

// 演示 //
// 实现 //
1 编写 effect
声明相关属性,既可以通过代码赋值,也可以通过编辑器修改
CCEffect %{
  techniques:
  - passes:
    - vert: vs
      frag: fs
      blendState:
        targets:
        - blend: true
      rasterizerState:
        cullMode: none
      properties:
        texture: { value: white }
        alphaThreshold: { value: 0.5 }
        u_color: { value: [1,1,1,1], editor: {type: color} }
        u_rate: { value: 1 }
}%
顶点着色器,我们这里 spine 和 sprite 使用的是同一份材质,所以会存在两者相关的宏定义
CCProgram vs %{
  precision highp float;

  #include <cc-global>
  #include <cc-local>

  in vec3 a_position;
  in vec4 a_color;
  out vec4 v_light;

  #if USE_TINT
    in vec4 a_color0;
    out vec4 v_dark;
  #endif

  #if USE_TEXTURE
    in vec2 a_uv0;
    out vec2 v_uv0;
  #endif

  void main () {
    mat4 mvp;

    #if CC_USE_MODEL
      mvp = cc_matViewProj * cc_matWorld;
    #else
      mvp = cc_matViewProj;
    #endif

    #if USE_TEXTURE
      v_uv0 = a_uv0;
    #endif

    v_light = a_color;
    #if USE_TINT
      v_dark = a_color0;
    #endif

    gl_Position = mvp * vec4(a_position, 1);
  }
}%
片段着色器,通过 mix 函数获得最终色值
CCProgram fs %{
  precision highp float;

  #include <alpha-test>
  #include <texture>

  in vec4 v_light;
  #if USE_TINT
    in vec4 v_dark;
  #endif

  #if USE_TEXTURE
    in vec2 v_uv0;
    uniform sampler2D texture;
  #endif

  uniform ARGS {
    vec4 u_color;
    float u_rate;
  };

  void main () {
    vec4 texColor = vec4(1.0);

    #if USE_TEXTURE
      CCTexture(texture, v_uv0, texColor);
    #endif

    vec4 finalColor;

    #if USE_TINT
      finalColor.a = v_light.a * texColor.a;
      finalColor.rgb = ((texColor.a - 1.0) * v_dark.a + 1.0 - texColor.rgb) * v_dark.rgb + texColor.rgb * v_light.rgb;
    #else
      finalColor = texColor * v_light;
    #endif

    ALPHA_TEST(finalColor);

    vec3 result = mix(u_color.rgb, finalColor.rgb, u_rate);
    gl_FragColor = vec4(result.rgb, finalColor.a);
  }
}%
2编写脚本组件
在 onLoad 中初始化所需属性
onLoad() {
    this._median = this.duration / 2;
    // 获取材质
    if (this.node.getComponent(cc.Sprite)) {
        this._material = this.node.getComponent(cc.Sprite).getMaterial(0);
    } else {
        this._material = this.node.getComponent(sp.Skeleton).getMaterial(0);
    }
    // 设置材质对应的属性
    this._material.setProperty("u_rate", 1);
}
在 update 中计算时间流逝,依此来计算差值,并赋值给片段着色器
update(dt) {
    if (this._time > 0) {
        this._time -= dt;
        this._time = this._time < 0 ? 0 : this._time;
        let rate = Math.abs(this._time - this._median) * 2 / this.duration;
        this._material.setProperty("u_rate", rate);
    }
}
3 我来组成头部
将材质文件拖拽到 spine/sprite 的材质位置,脚本文件也拖到该节点下,设置闪烁的时间
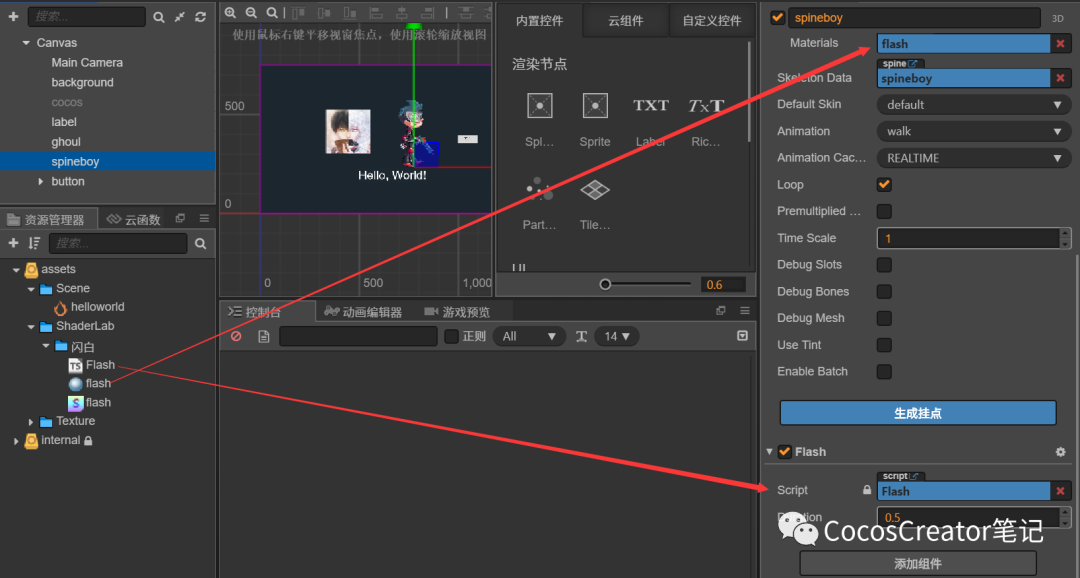
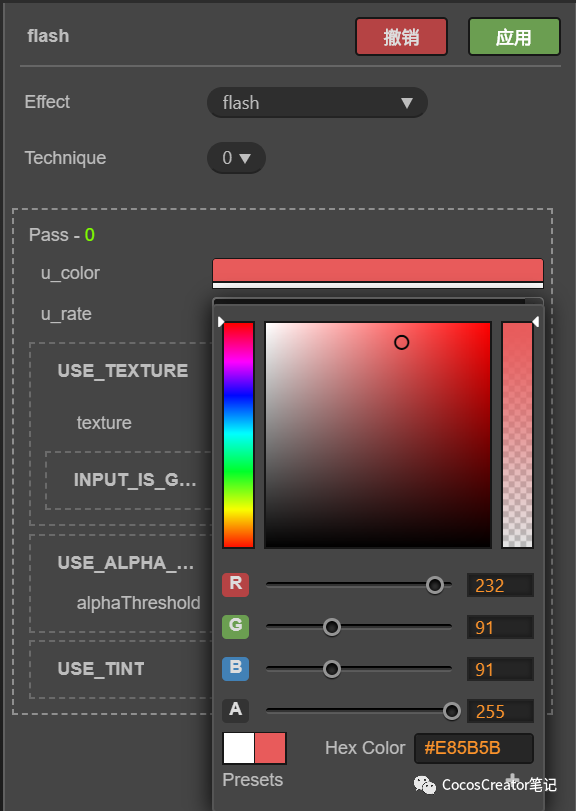
也可以在材质中设置相关参数,比如目标色值等
[
—END—
获取源码请在公众号回复:
受击闪白