
先看了文档
https://docs.cocos.com/creator/manual/zh/render/camera.html#截图
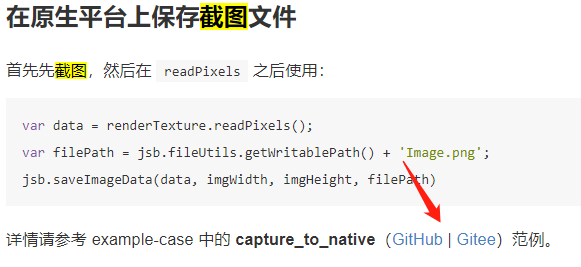
点进去范例
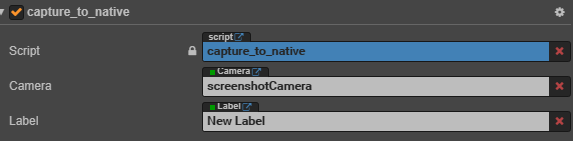
assets/cases/07_capture_texture/textureRenderUtils.js
assets/cases/07_capture_texture/capture_to_native.js
这2个文件拷贝进项目中
capture_to_native.js直接挂在场景上
新建一个用于截图的摄像机挂载上去
下图红框内的代码是官方示例里面没有的,官网里面示例只保存到本地,要在相册中看到,还需要调用原生方法
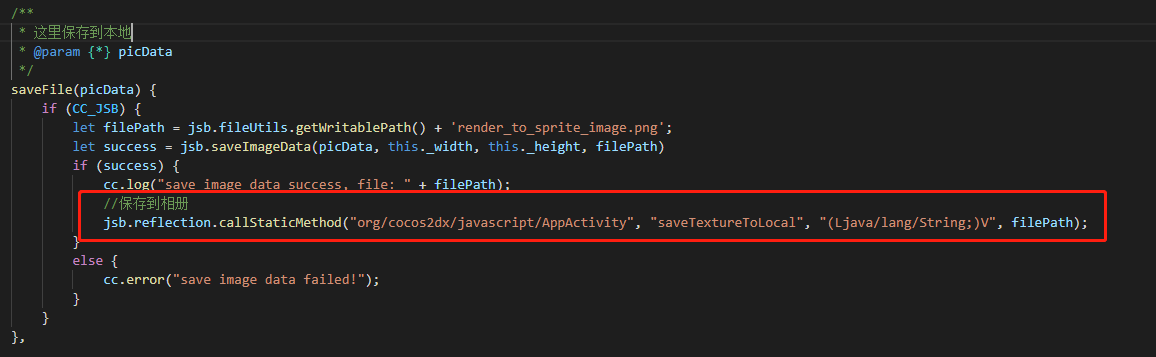
原生代码如下
public static void saveTextureToLocal( String pngPath) {

    Bitmap bmp = BitmapFactory.decodeFile(pngPath)//从路径中读取 照片
    // fileName ==textureName  尽量和JS保存的一致
    String fileName = "textureName";
    File file = new File(pngPath);
    try {
        FileOutputStream fos = new FileOutputStream(file);
        bmp.compress(Bitmap.CompressFormat.PNG, 100, fos);
        fos.flush();
        fos.close();
        Log.d("保存成功",pngPath );

    } catch (FileNotFoundException e) {
        Log.d("保存错误1",e.toString());

        e.printStackTrace();
    } catch (IOException e) {
        Log.d("保存错误2",e.toString());

        e.printStackTrace();
    }

    // 其次把文件插入到系统图库
    try {
        MediaStore.Images.Media.insertImage(AppActivity.getContext().getApplicationContext().getContentResolver(),
                file.getAbsolutePath(), fileName, null);
    } catch (FileNotFoundException e) {
        e.printStackTrace();
    }
    // 最后通知图库更新
    AppActivity.getContext().getApplicationContext().sendBroadcast(new Intent(Intent.ACTION_MEDIA_SCANNER_SCAN_FILE, Uri.parse(file.getAbsolutePath())));

}
把代码贴在AppActivity.java脚本里就行了
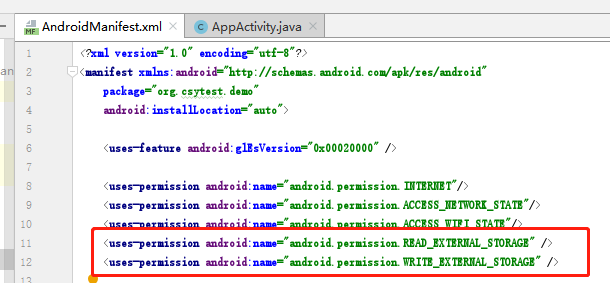
还需要动态申请两项权限
在AndroidManifest.xml中静态添加
这样子就OK了