
https://air.rokid.com/userguide
在Rokid Air app 1.9.1版本上有部分不兼容问题,请确认不要使用此版本的Rokid Air app进行调试和发布,之前的版本和1.9.2或以后的版本将不受影响;
直接从官网上下载,各大应用市场可能更新有滞后。
https://air.rokid.com/download
安装配置安卓环境
https://docs.cocos.com/creator/manual/zh/editor/publish/setup-native-development.html
XR 插件:
https://store.cocos.com/app/detail/4117
adb tcpip + scrcpy
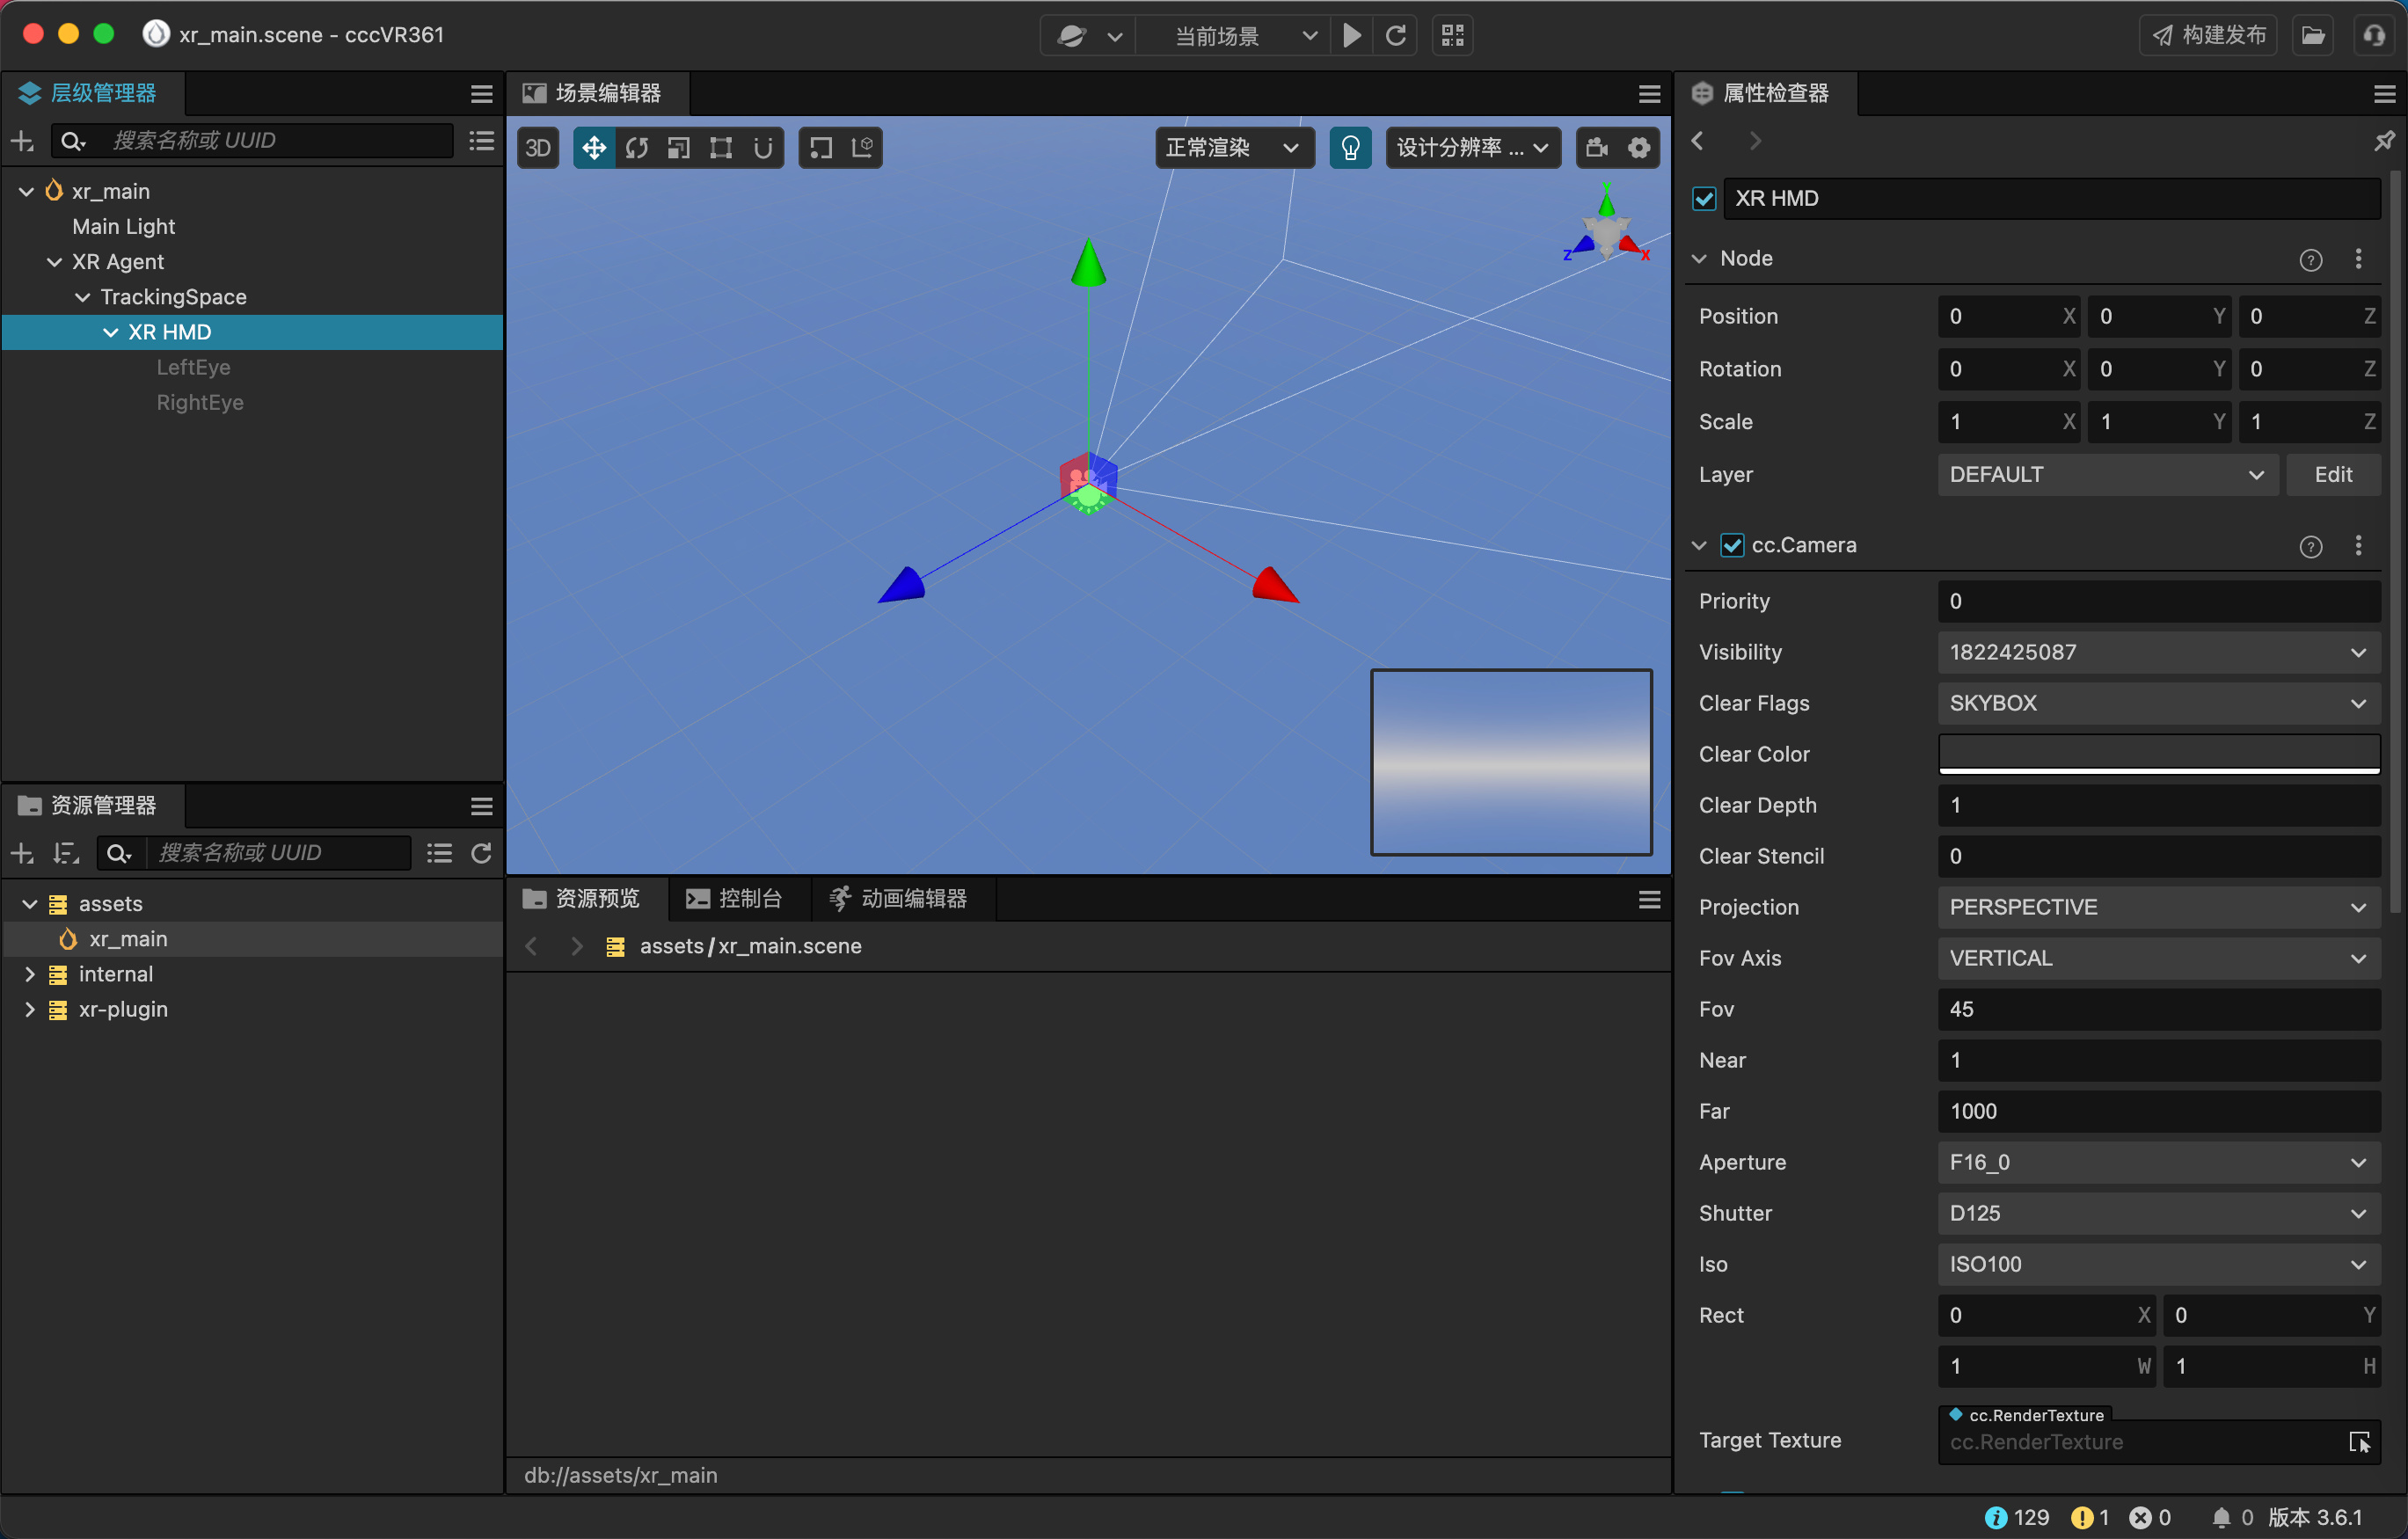
打开 xr_main 场景,可以看到相机是挂在 XR HMD 这个节点下
场景空空,有点孤单,可以随意添加一些3d物体,调节成你喜欢的角度和位置,确保在相机视野内。
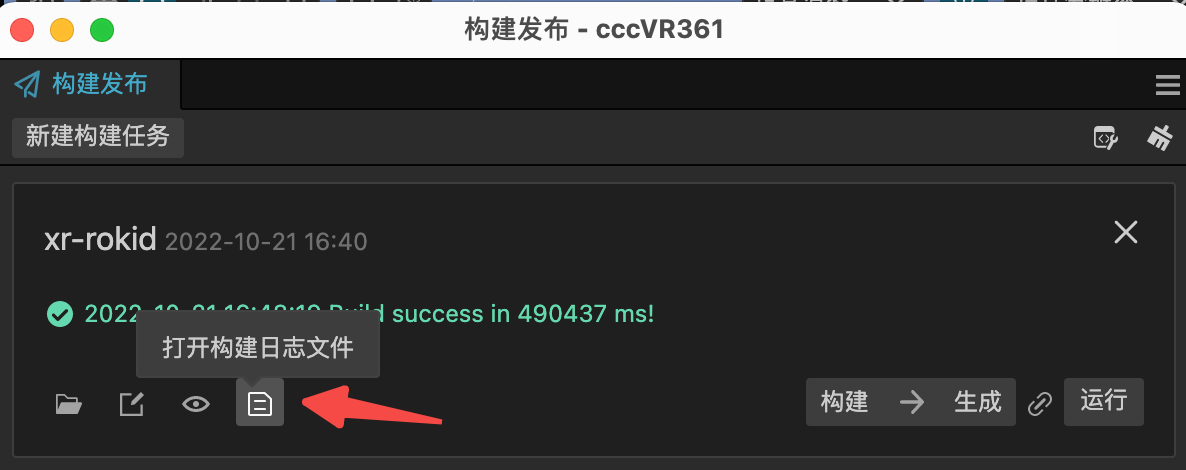
在菜单栏选择 项目->构建发布,发布平台选择 XR Rokid Air,第一次发布还需填上包名。首次构建可能会慢点,后面再构建就会更快了。
如果出现异常的话,一般来说是安卓环境相关配置有异常,可以查看构建日志定位问题。
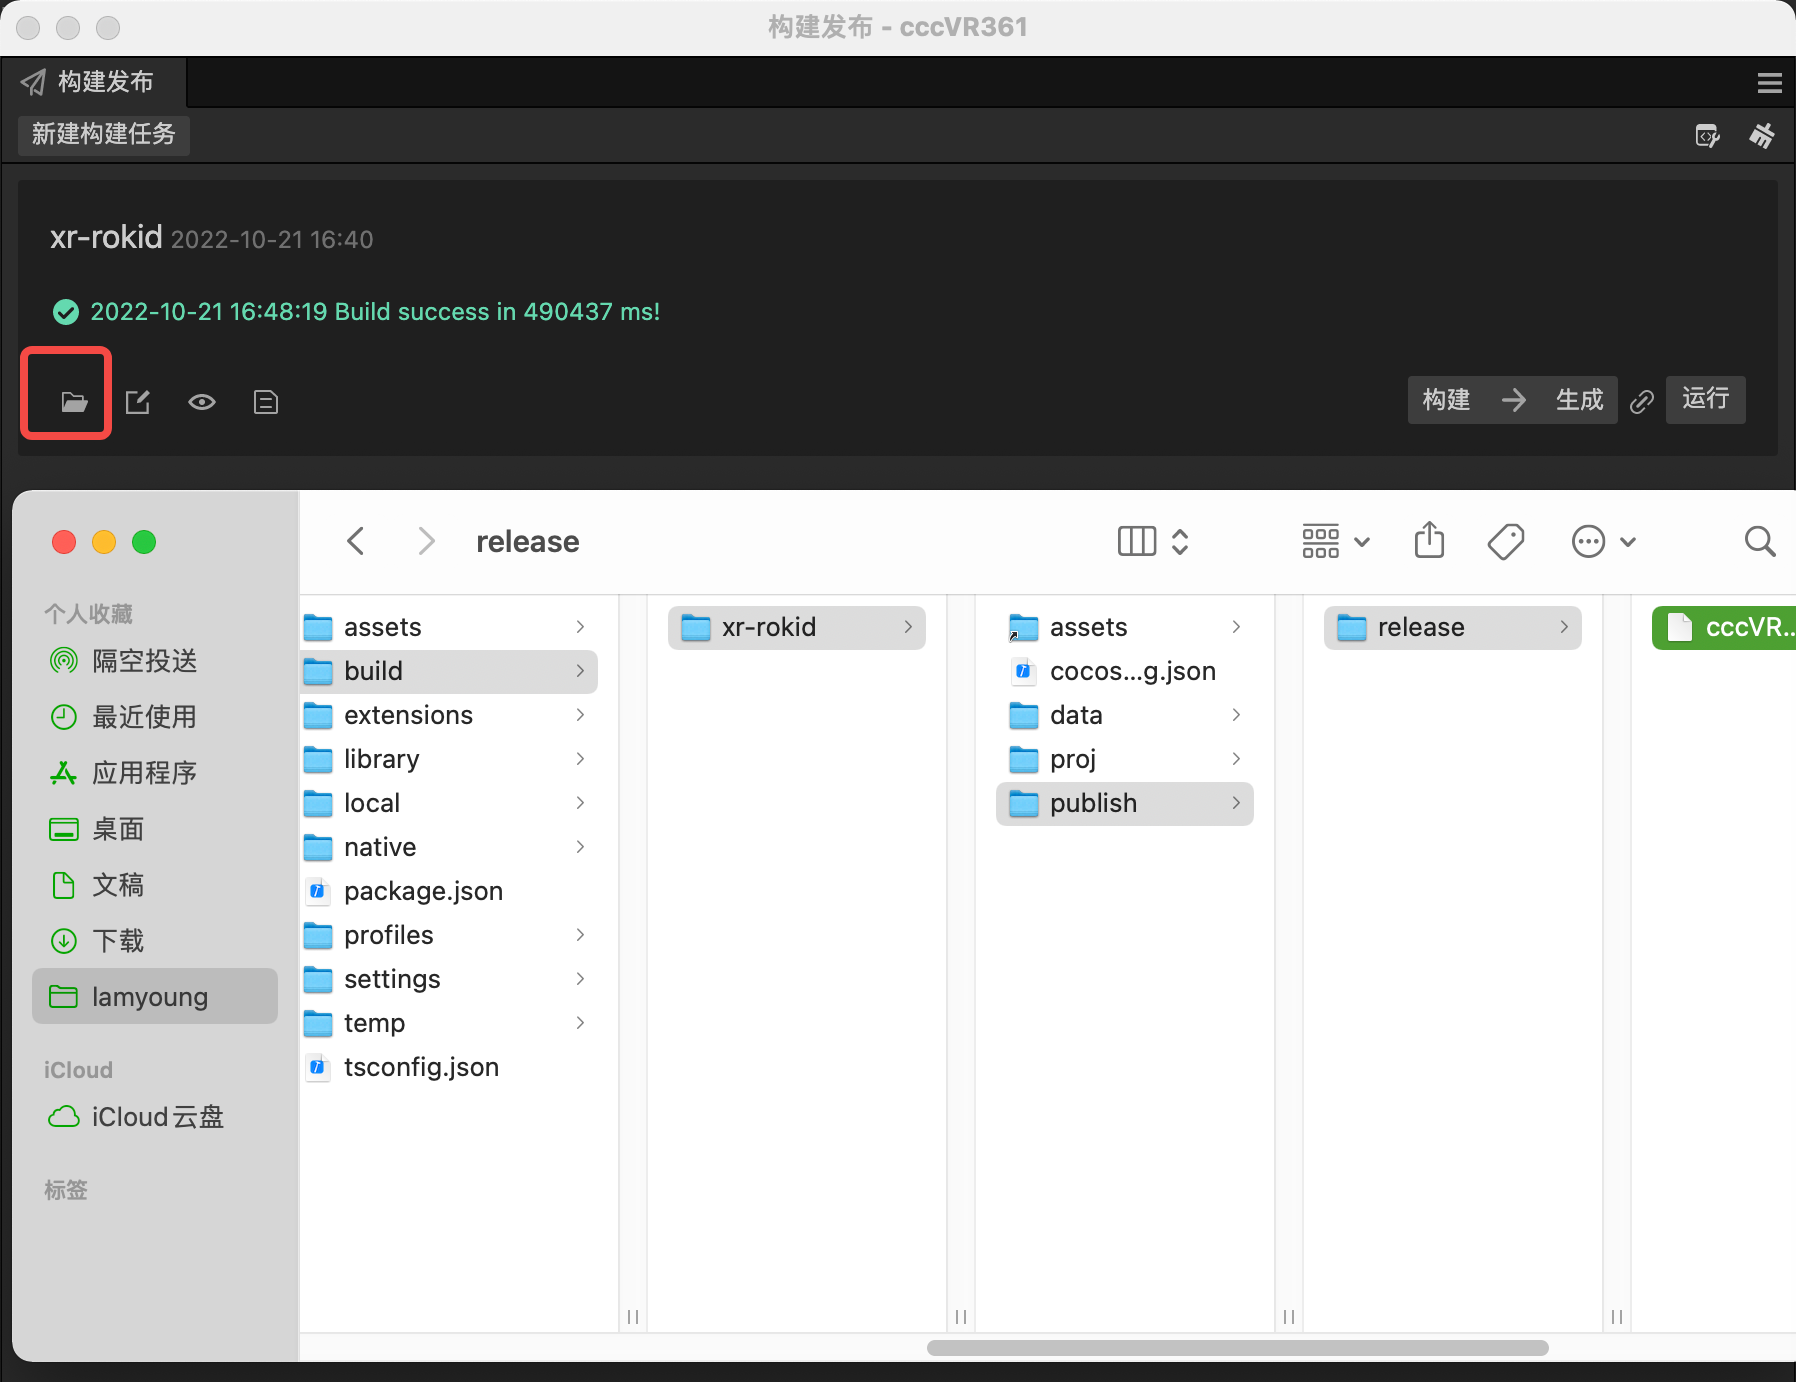
打开 {当面项目}/build/xr-rokid/publish/release ,将包安装到手机上。
安装应用后,直接打开是这样的
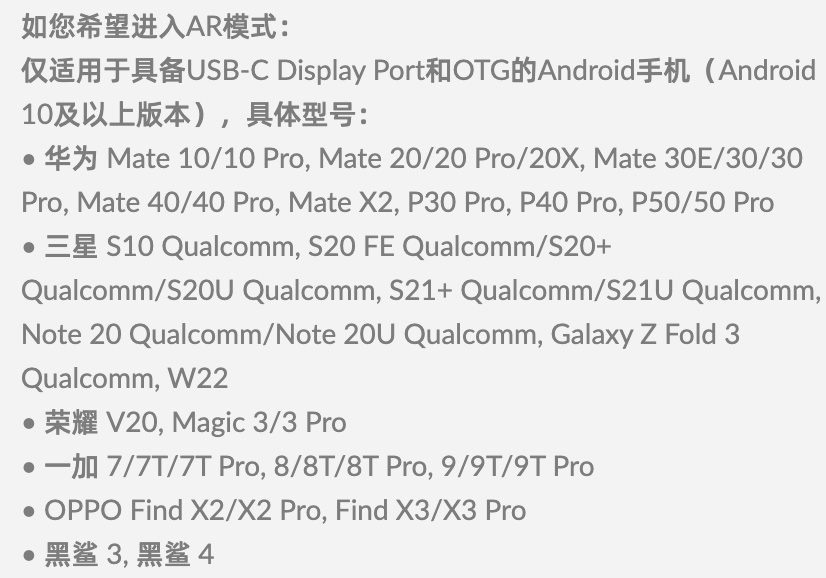
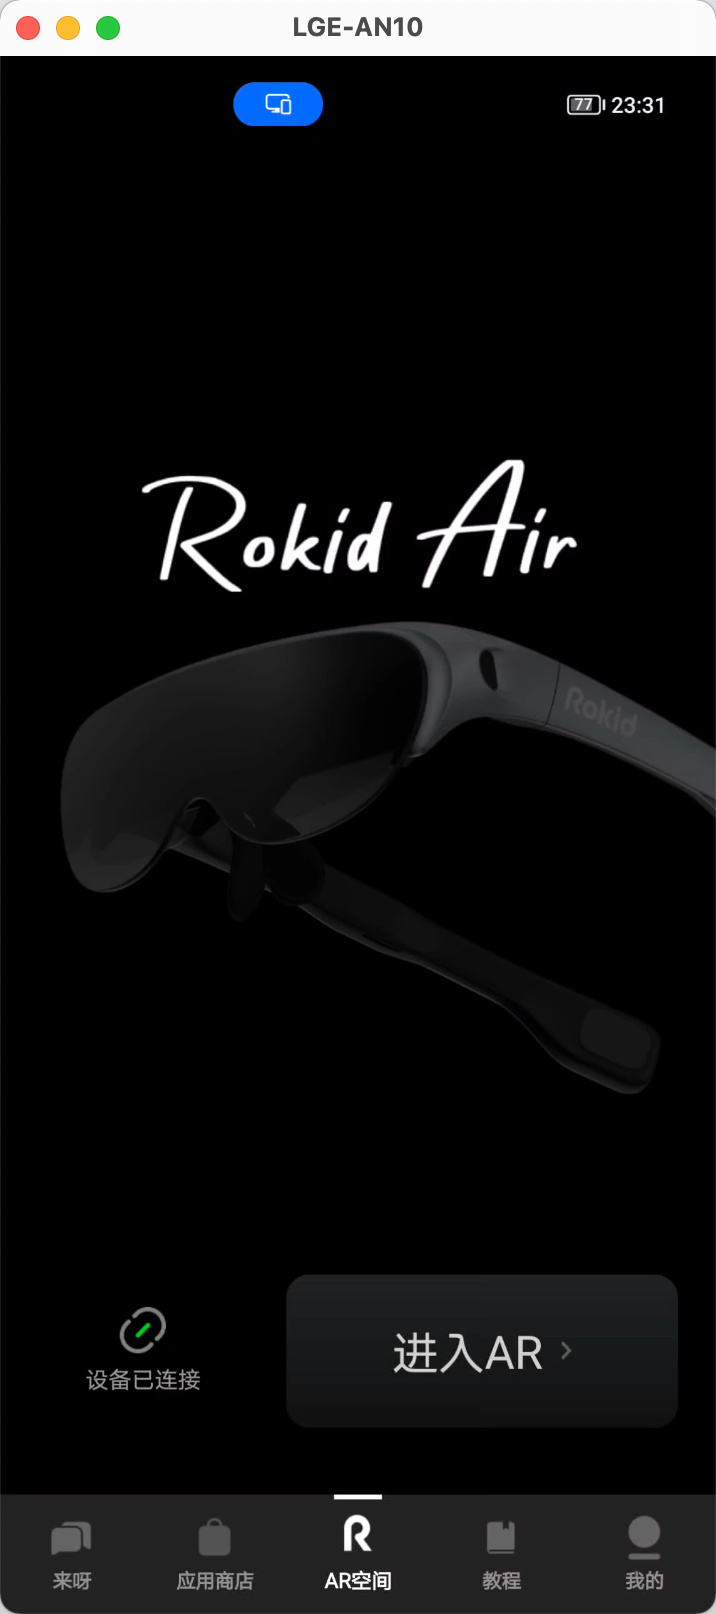
需要接上AR眼镜,在 Rokid Air App 中进入 AR 模式。
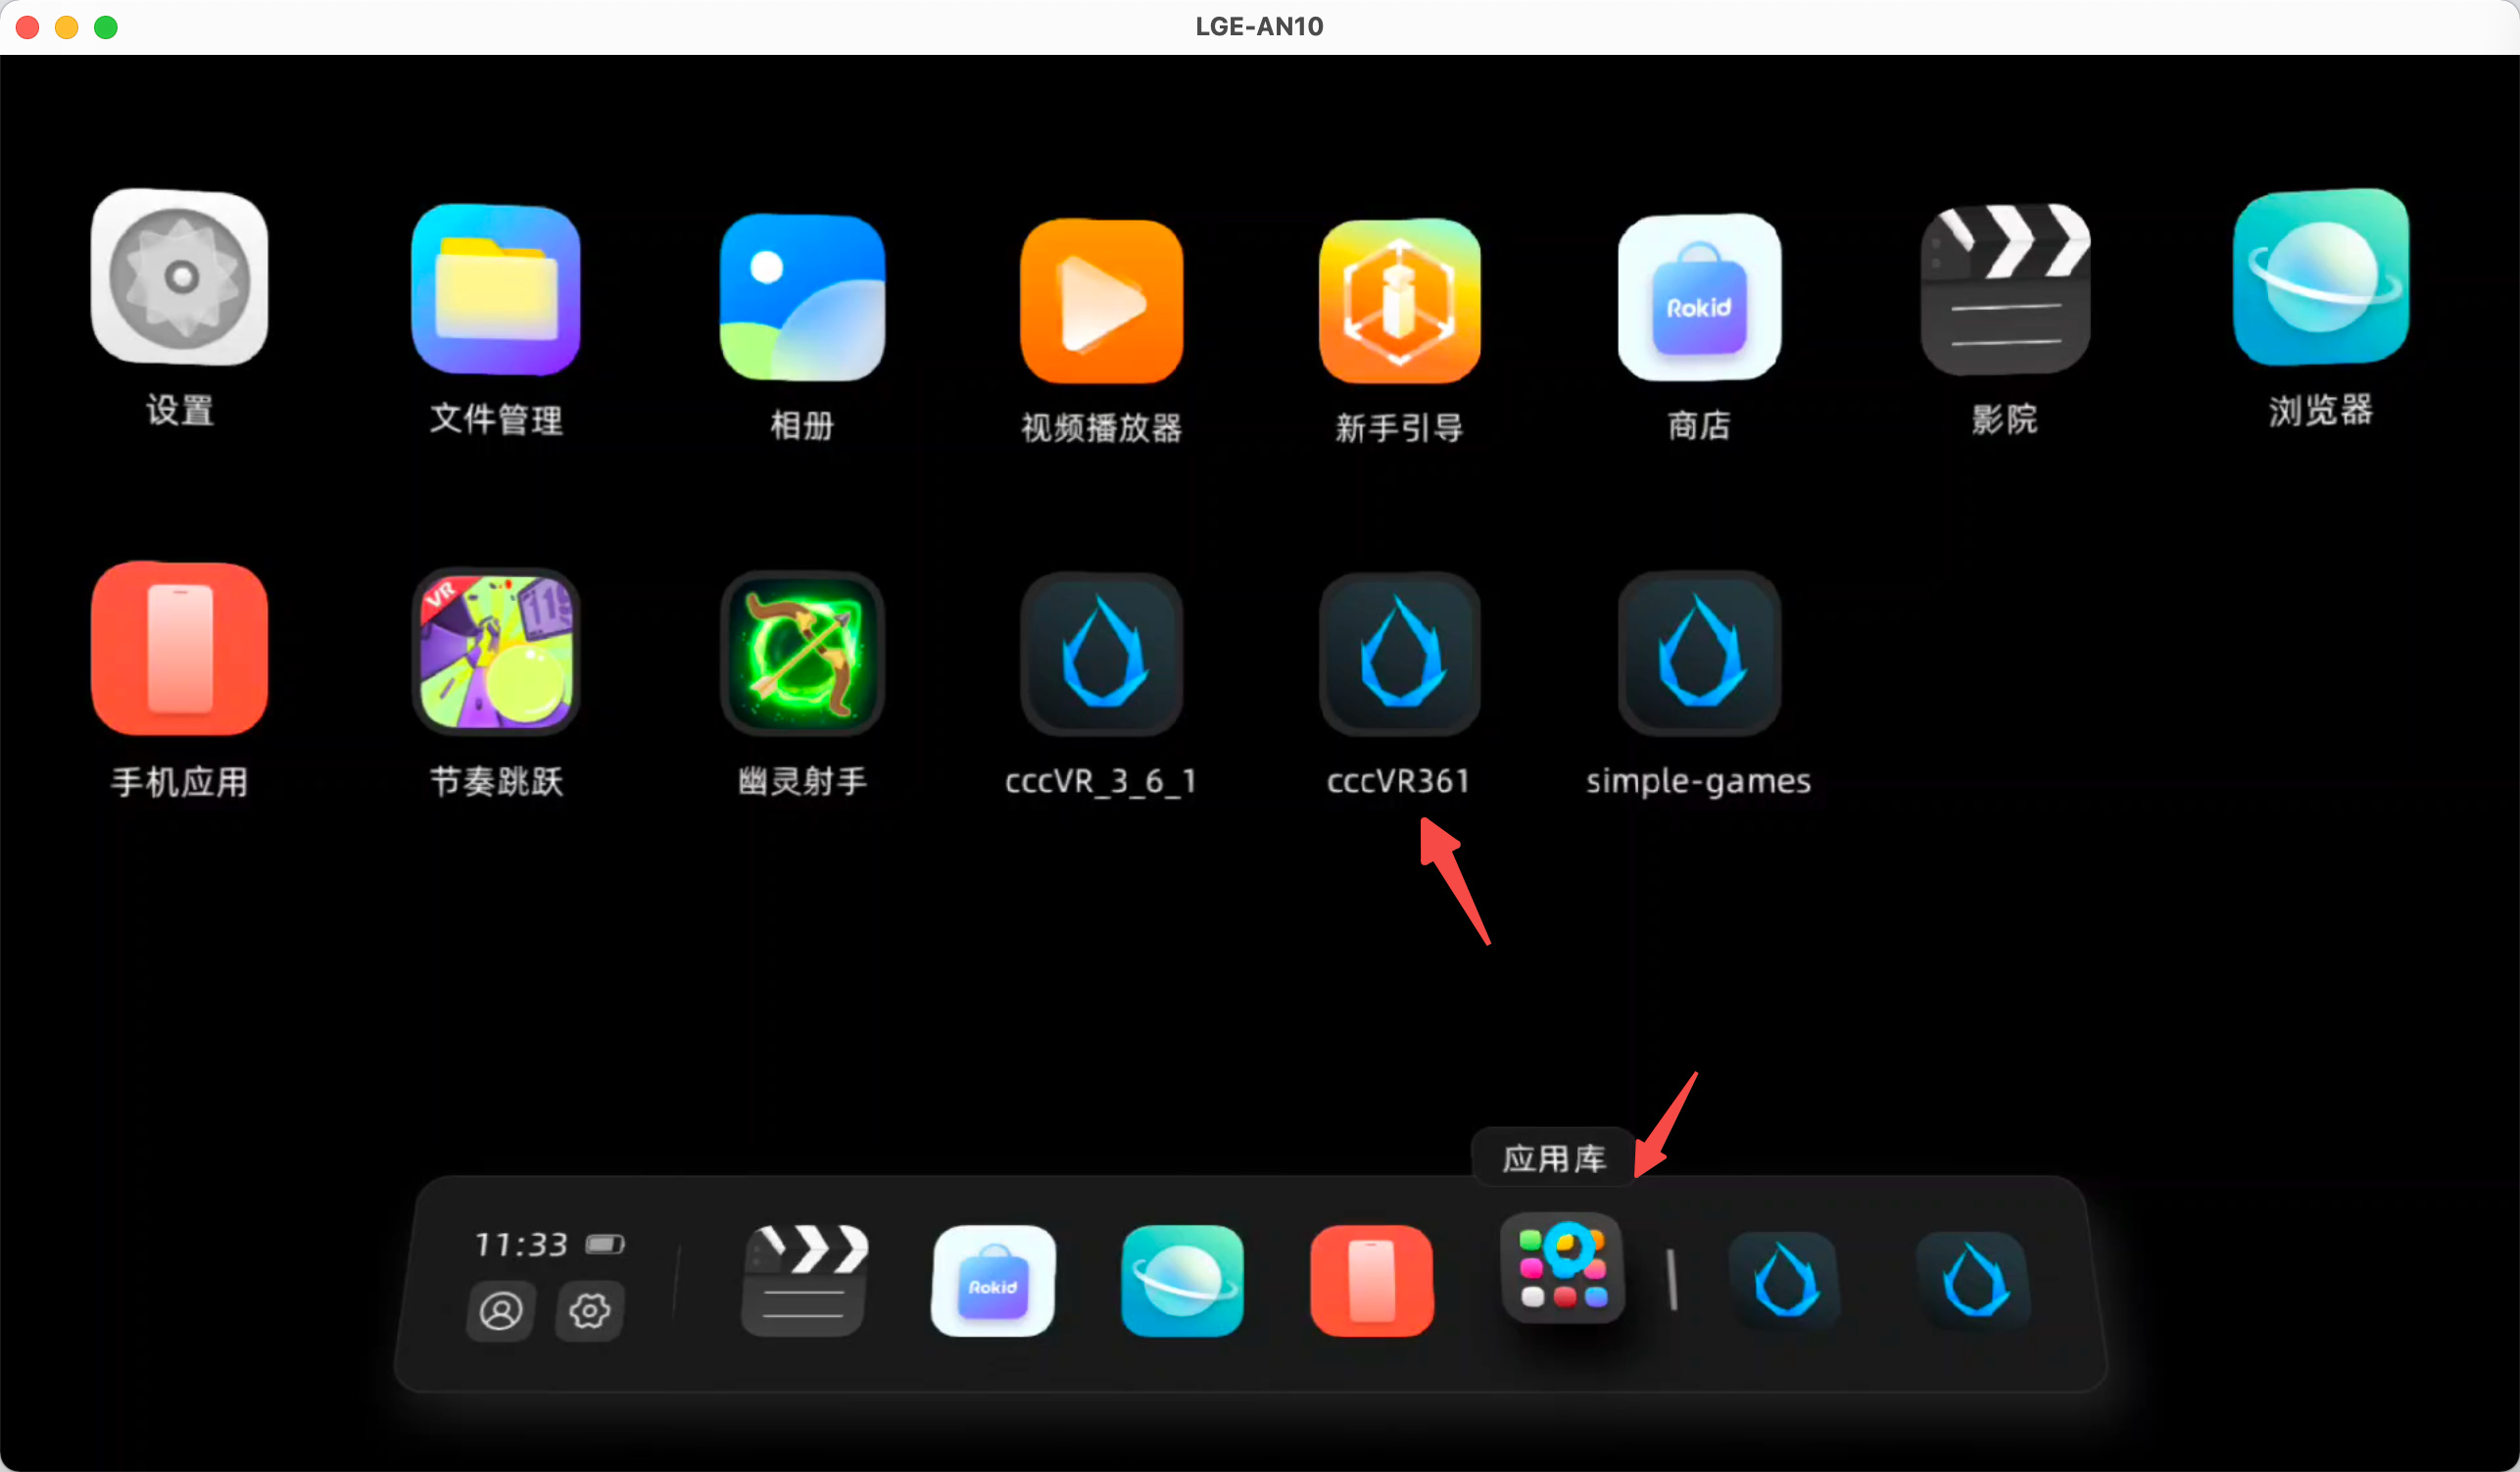
在其应用库可以找到刚才安装好的包。
打开后,晃动脑袋,可以看到我们之前添加的物体

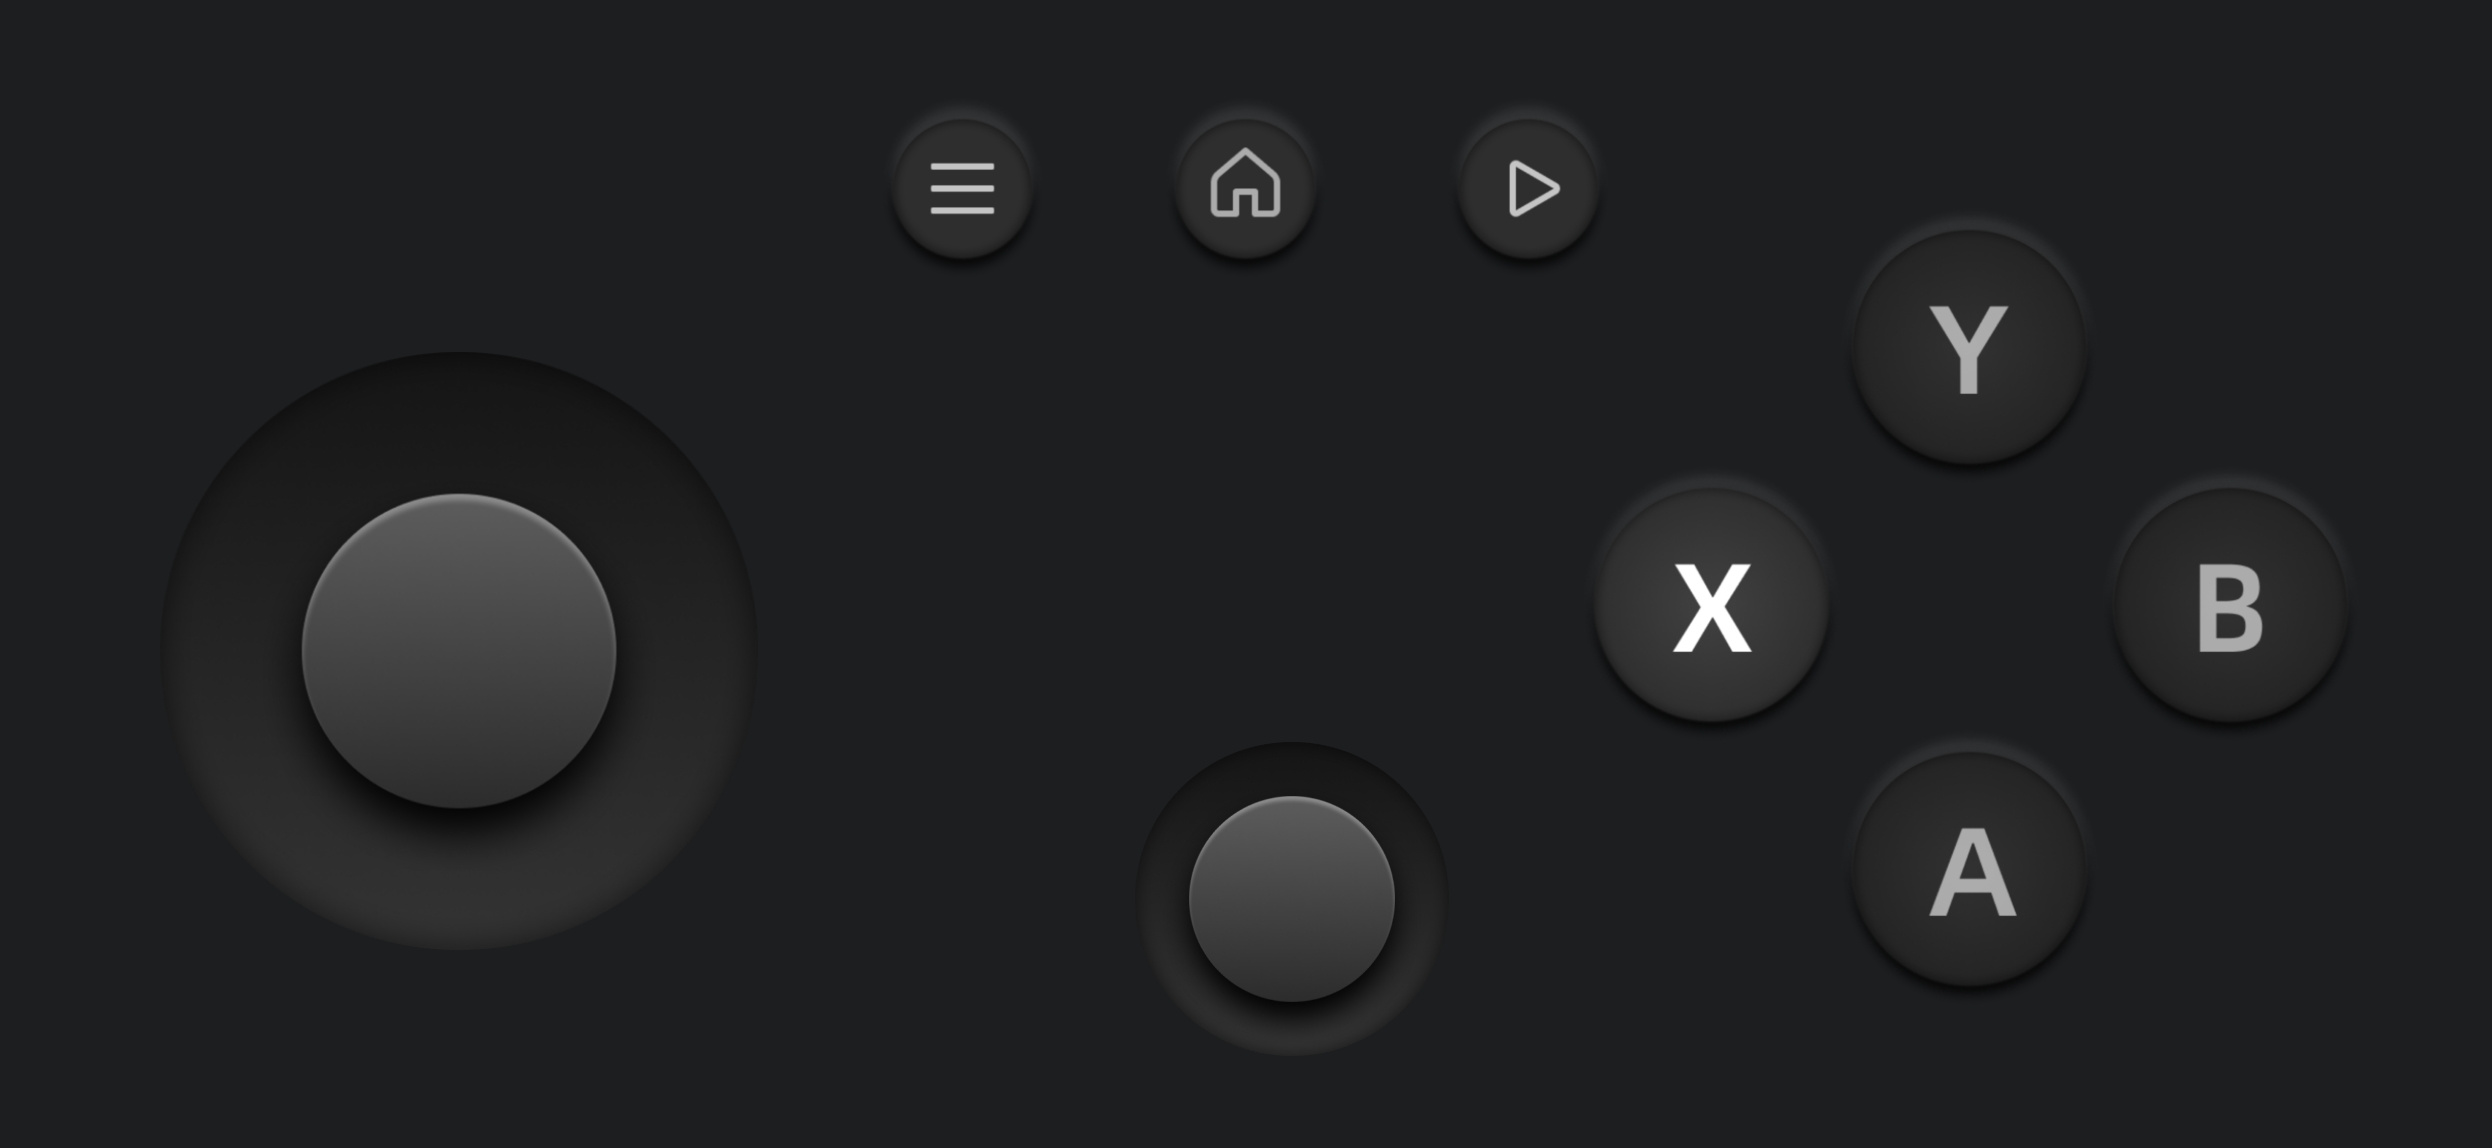
此时手机上显示的是游戏手柄
目前的资源包参考如下
helloworld.zip (24.2 KB)
为了更好的控制游戏,需要知道手机中的手柄事件。
Cocos Creator 中的监听事件代码如下:
input.on(Input.EventType.GAMEPAD_INPUT, this._gamepadEvent, this);
获取手柄输入参数如下
private _gamepadEvent(event: EventGamepad) {
    const gamepad = event.gamepad;
}
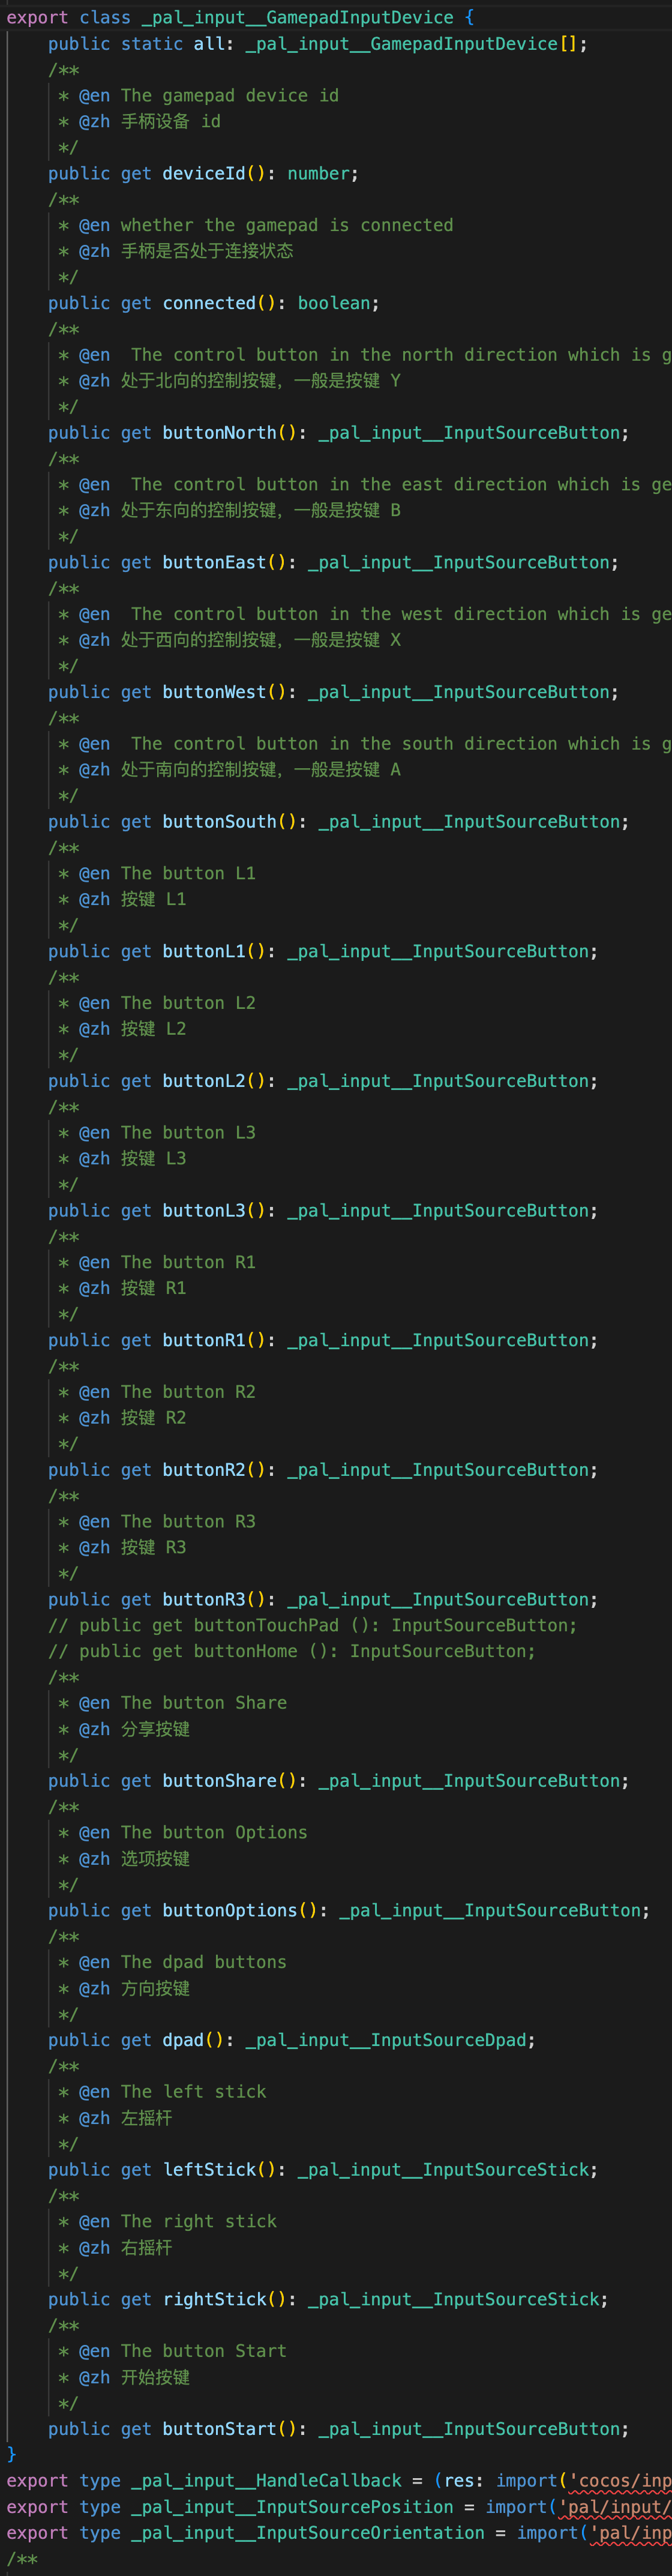
gamepad 的成员可以在 cc.d.ts中看到。
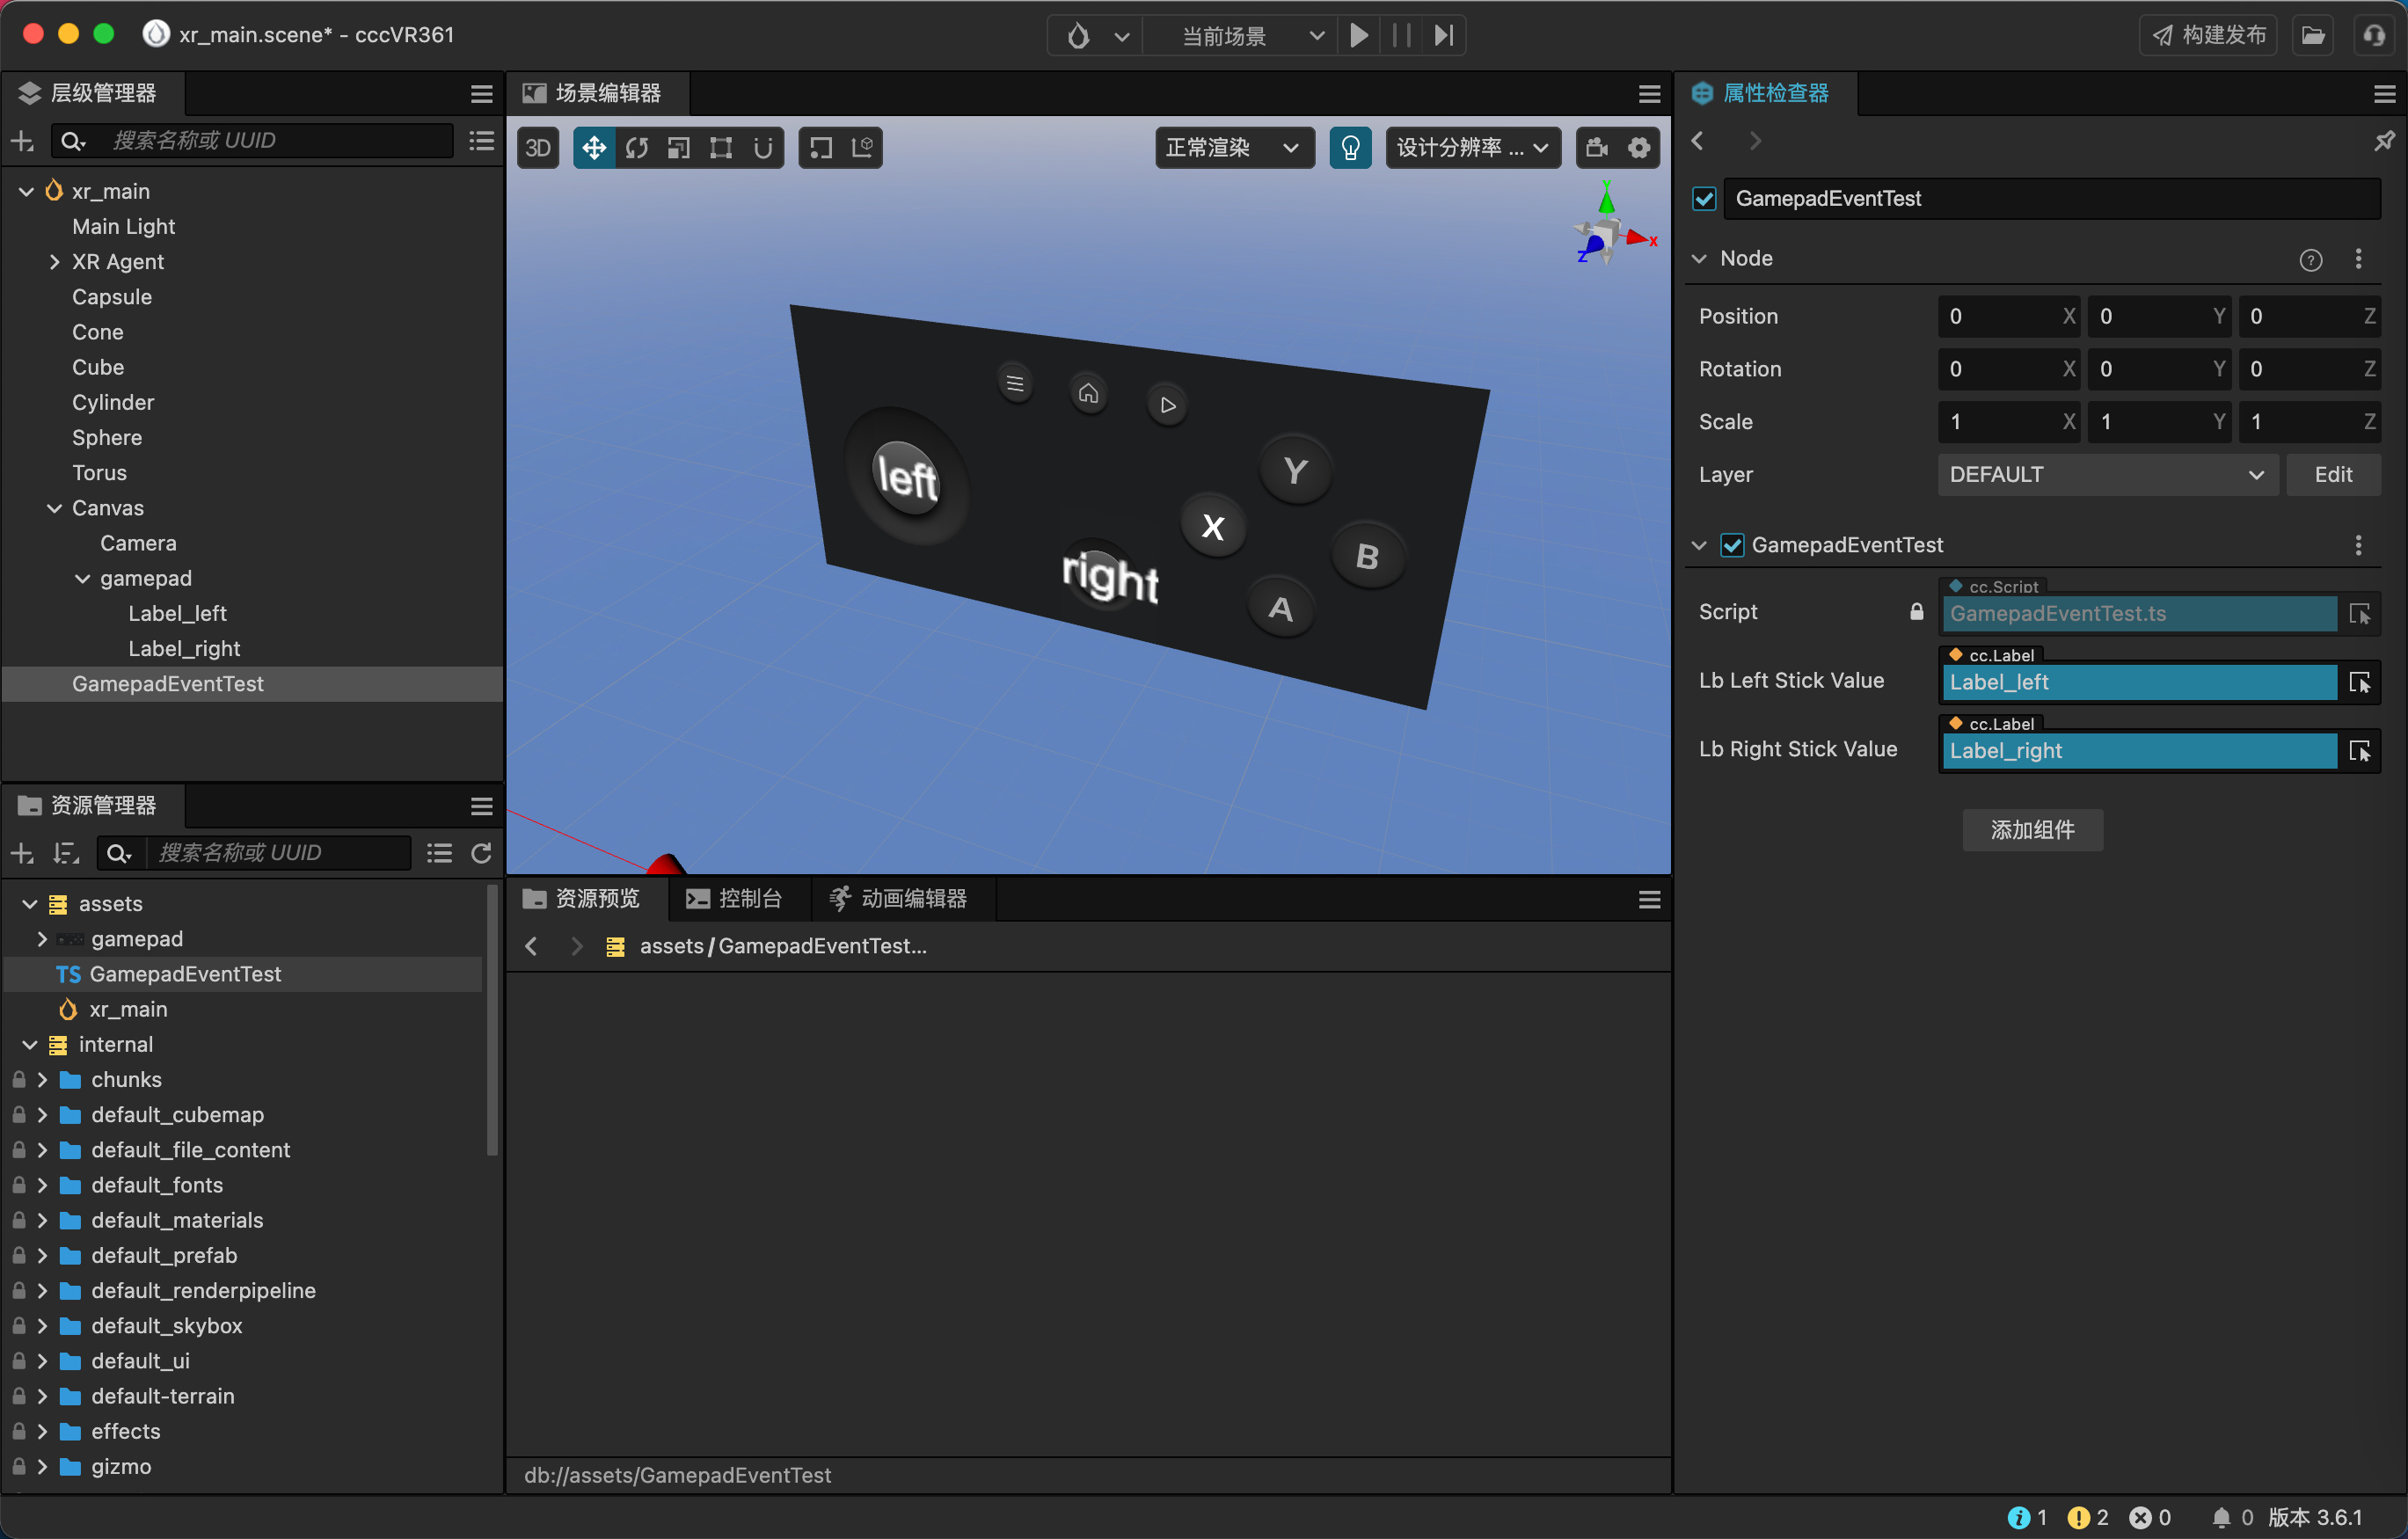
可以简单写个脚本,验证摇杆参数返回。
import { _decorator, Component, input, Input, EventGamepad, Vec2, Label } from 'cc';
const { ccclass, property } = _decorator;

@ccclass('GamepadEventTest')
export class GamepadEventTest extends Component {
    @property(Label)
    lb_leftStickValue: Label = null!

    @property(Label)
    lb_rightStickValue: Label = null!

    start() {
        input.on(Input.EventType.GAMEPAD_INPUT, this._gamepadEvent, this);
    }

    private _gamepadEvent(event: EventGamepad) {
        const gamepad = event.gamepad;
        const leftStickValue = gamepad.leftStick.getValue() as Vec2;
        this.lb_leftStickValue.string = `${leftStickValue.toString()}`;

        const rightStickValue = gamepad.rightStick.getValue() as Vec2;
        this.lb_rightStickValue.string = `${rightStickValue.toString()}`;
    }
}
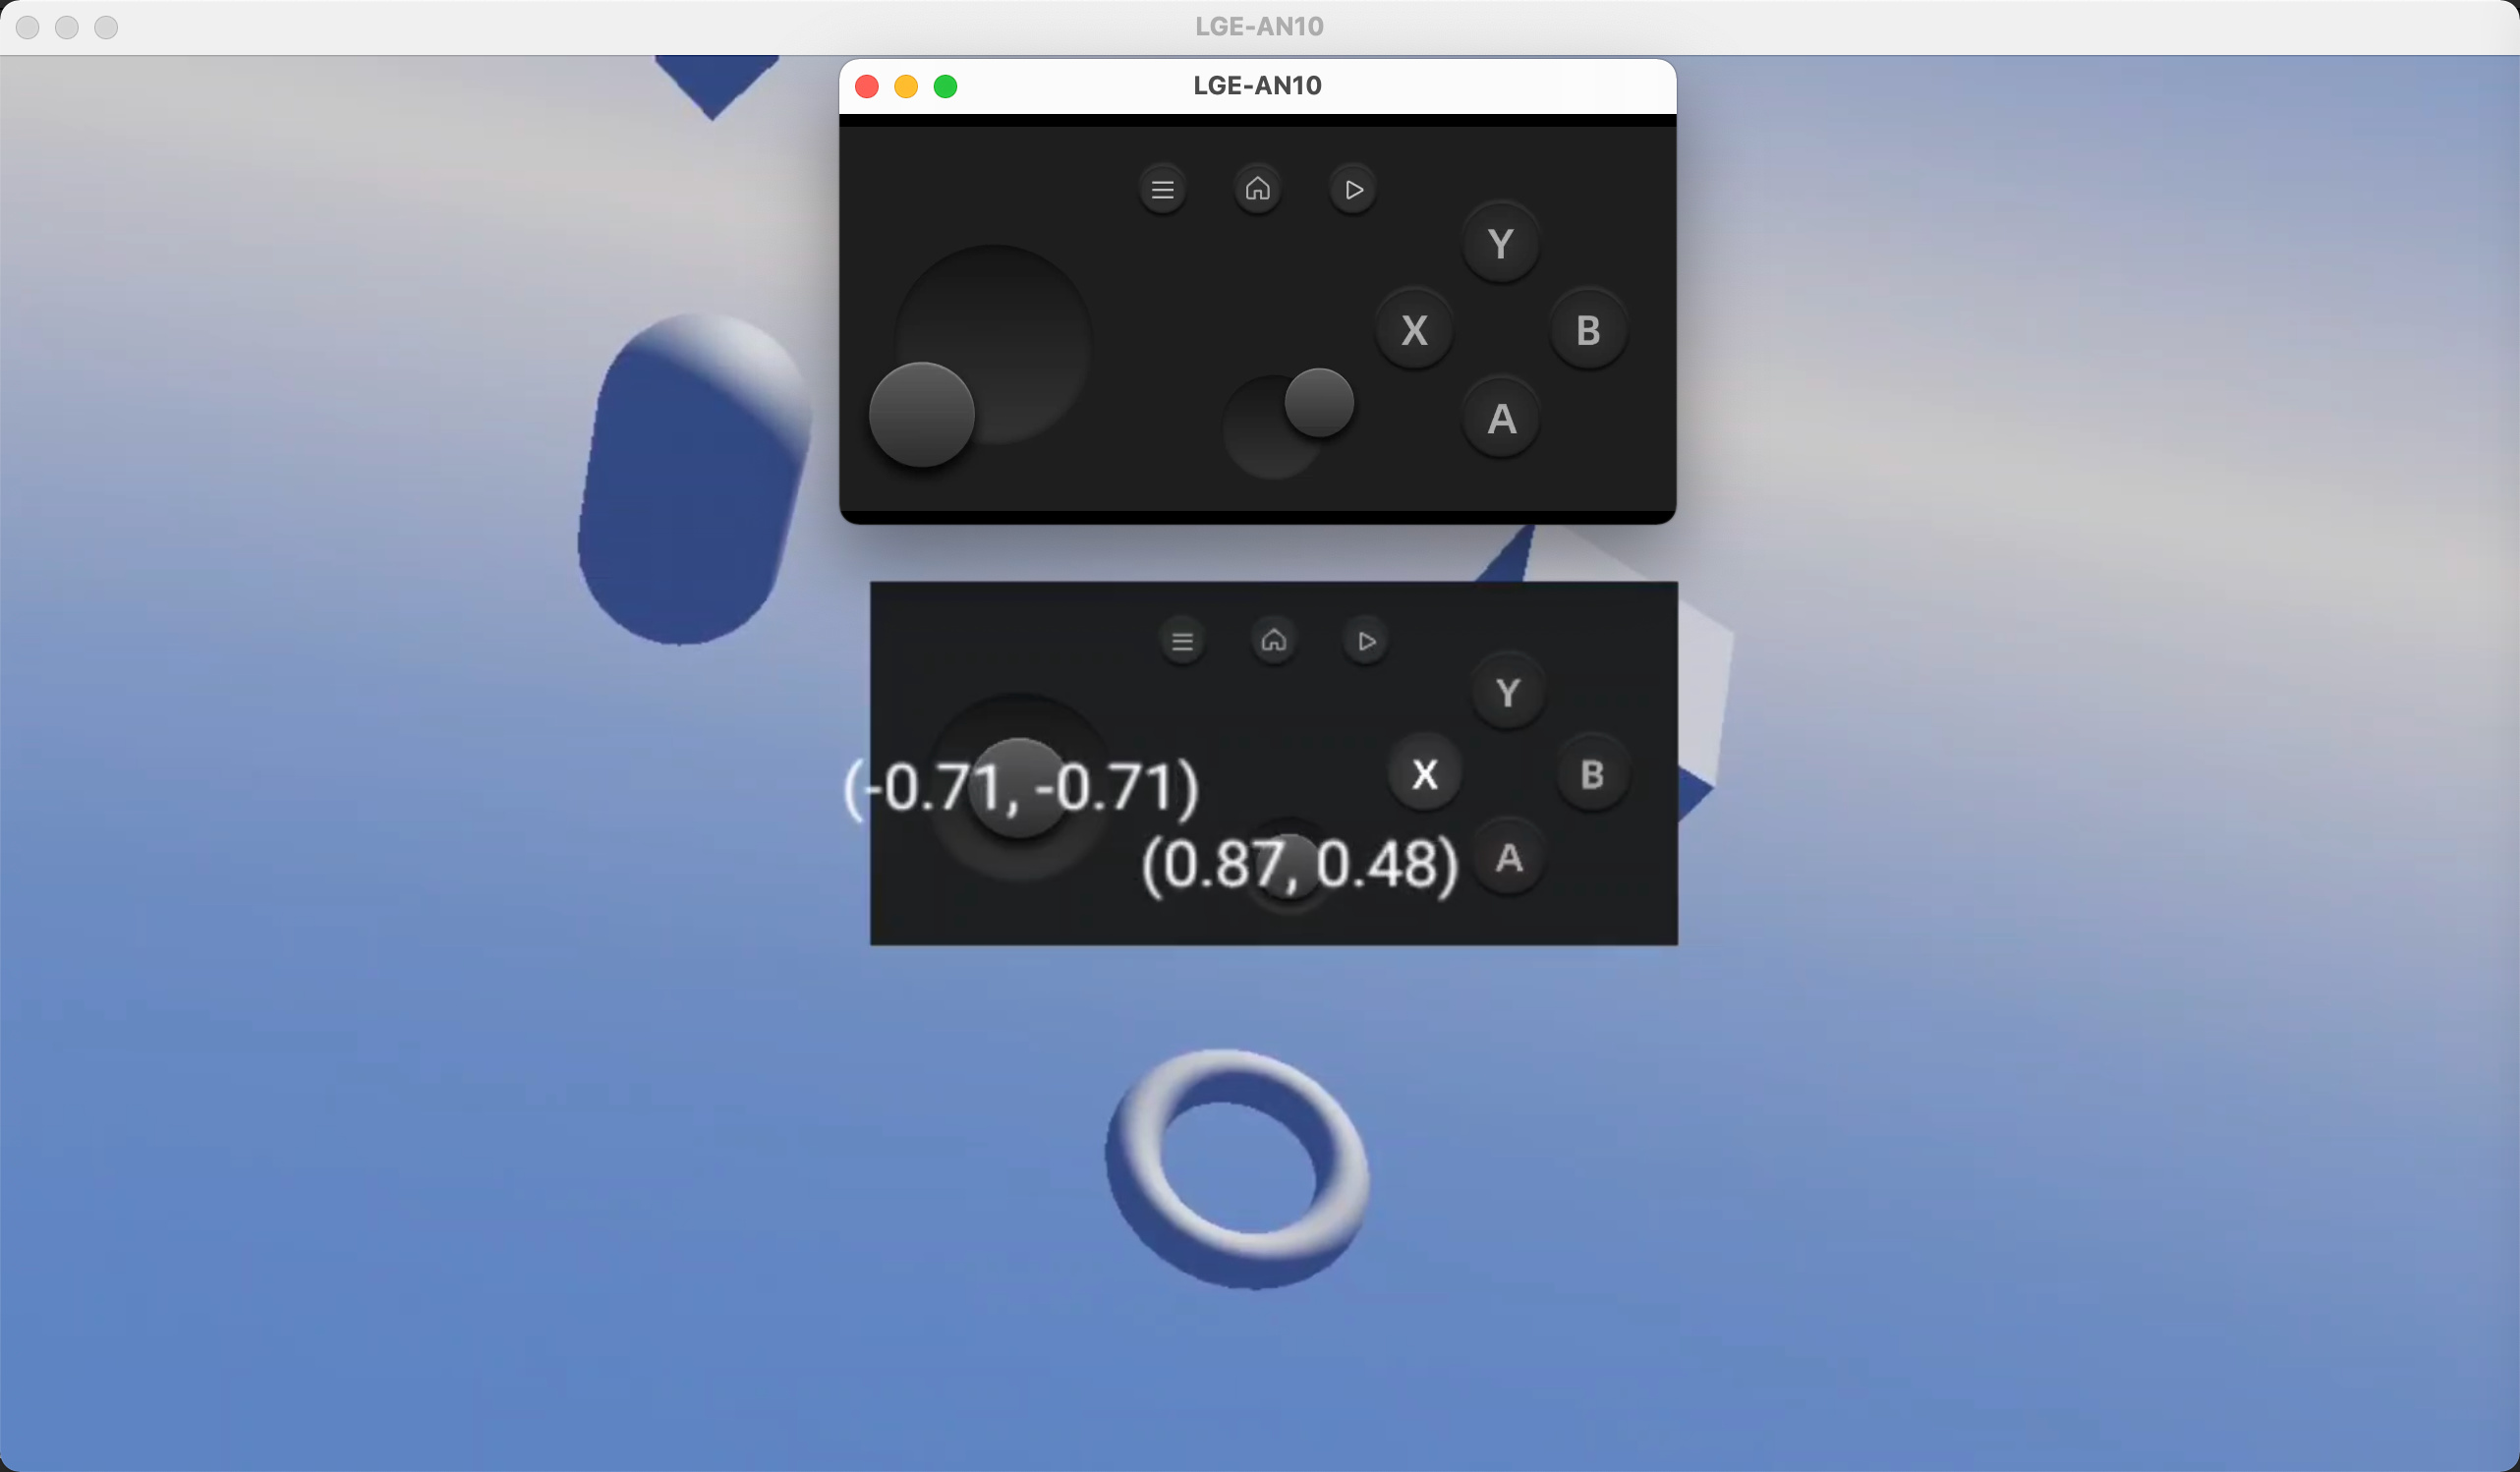
并在场景中加入label节点验证输出。
重新打包后预览效果,可以看出摇杆的输出结果
资源包如下:
helloworld-gamepad-event-test.zip (194.1 KB)
这个事件可以获取到眼镜的一些重要参数,如旋转角度,在定制眼镜交互时可能会用到。
Cocos Creator 中的监听事件代码如下:
input.on(Input.EventType.HMD_POSE_INPUT, this._dispatchEventHMDPose, this);
获取输入参数如下
private _dispatchEventHMDPose(eventHMD: EventHMD) {
    const hmdInputDevice = eventHMD.hmdInputDevice;
}
相关的逻辑可以参考插件中的代码 extensions/xr-plugin/assets/xr/component/device/pose-tracker.ts
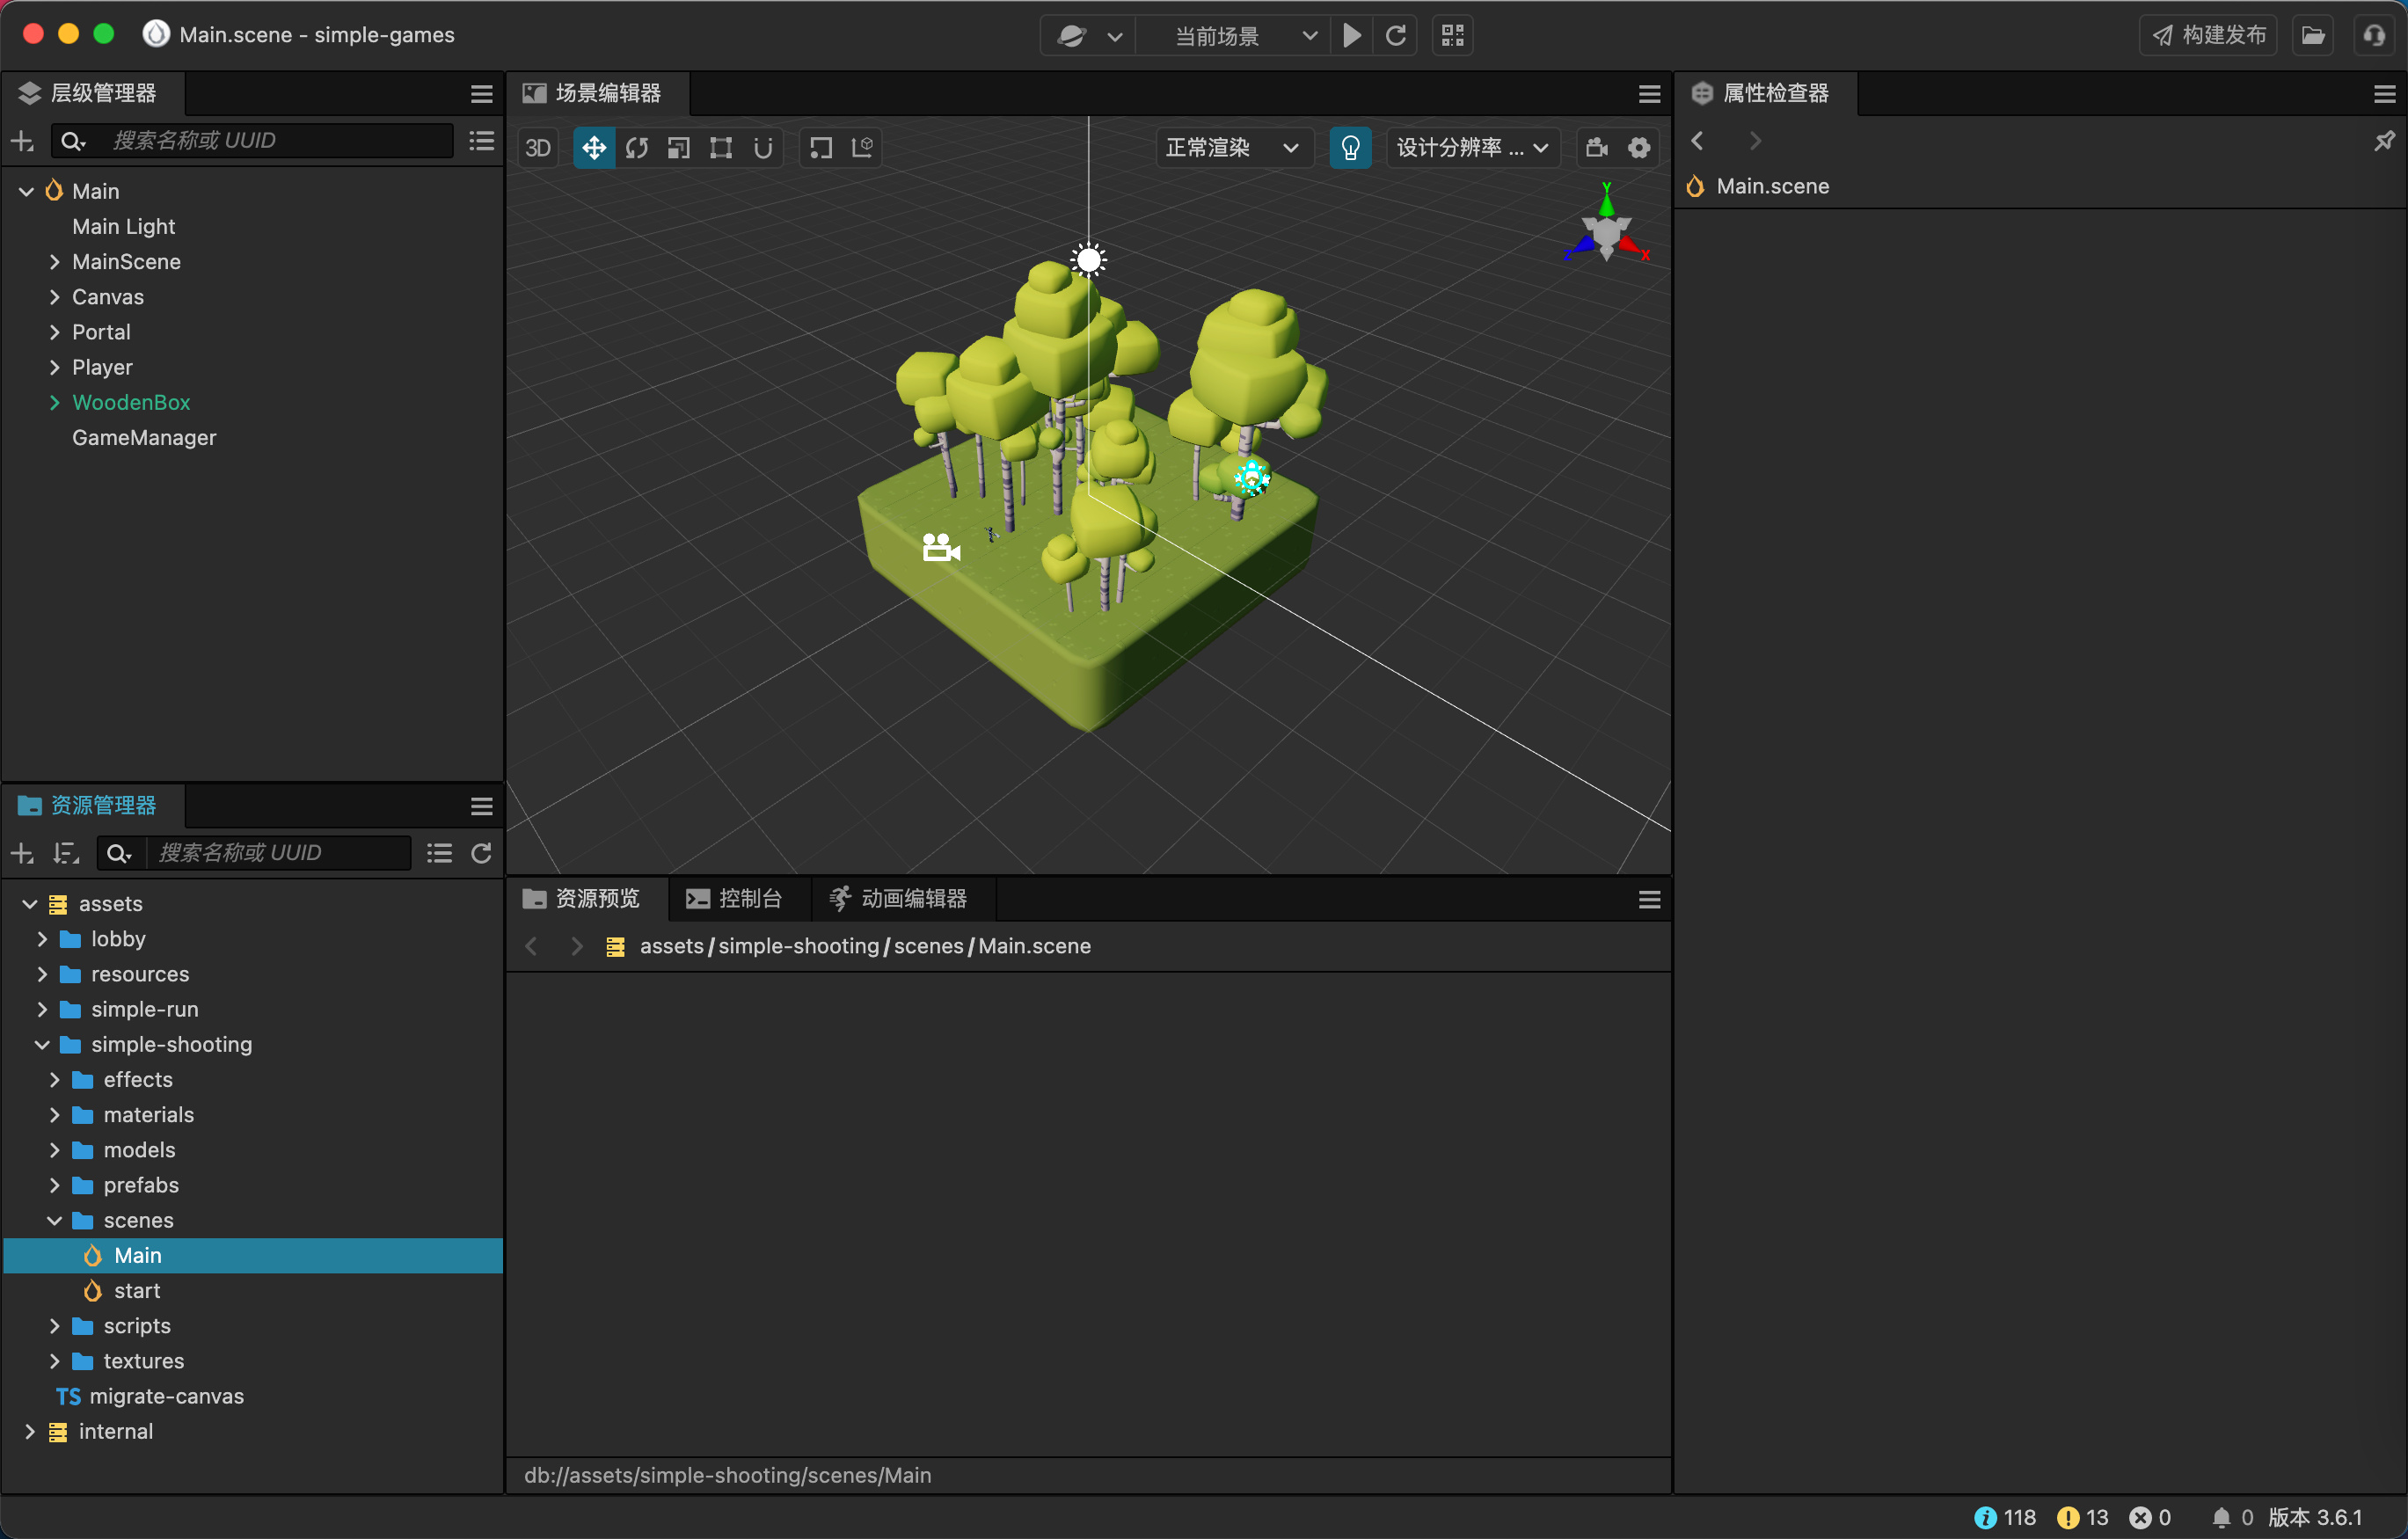
将现有的游戏移植到 Rokid Air 眼镜,用的是 cocos-example-projects/simple-games/assets/simple-shooting at v3.6 · cocos/cocos-example-projects · GitHub 这个demo
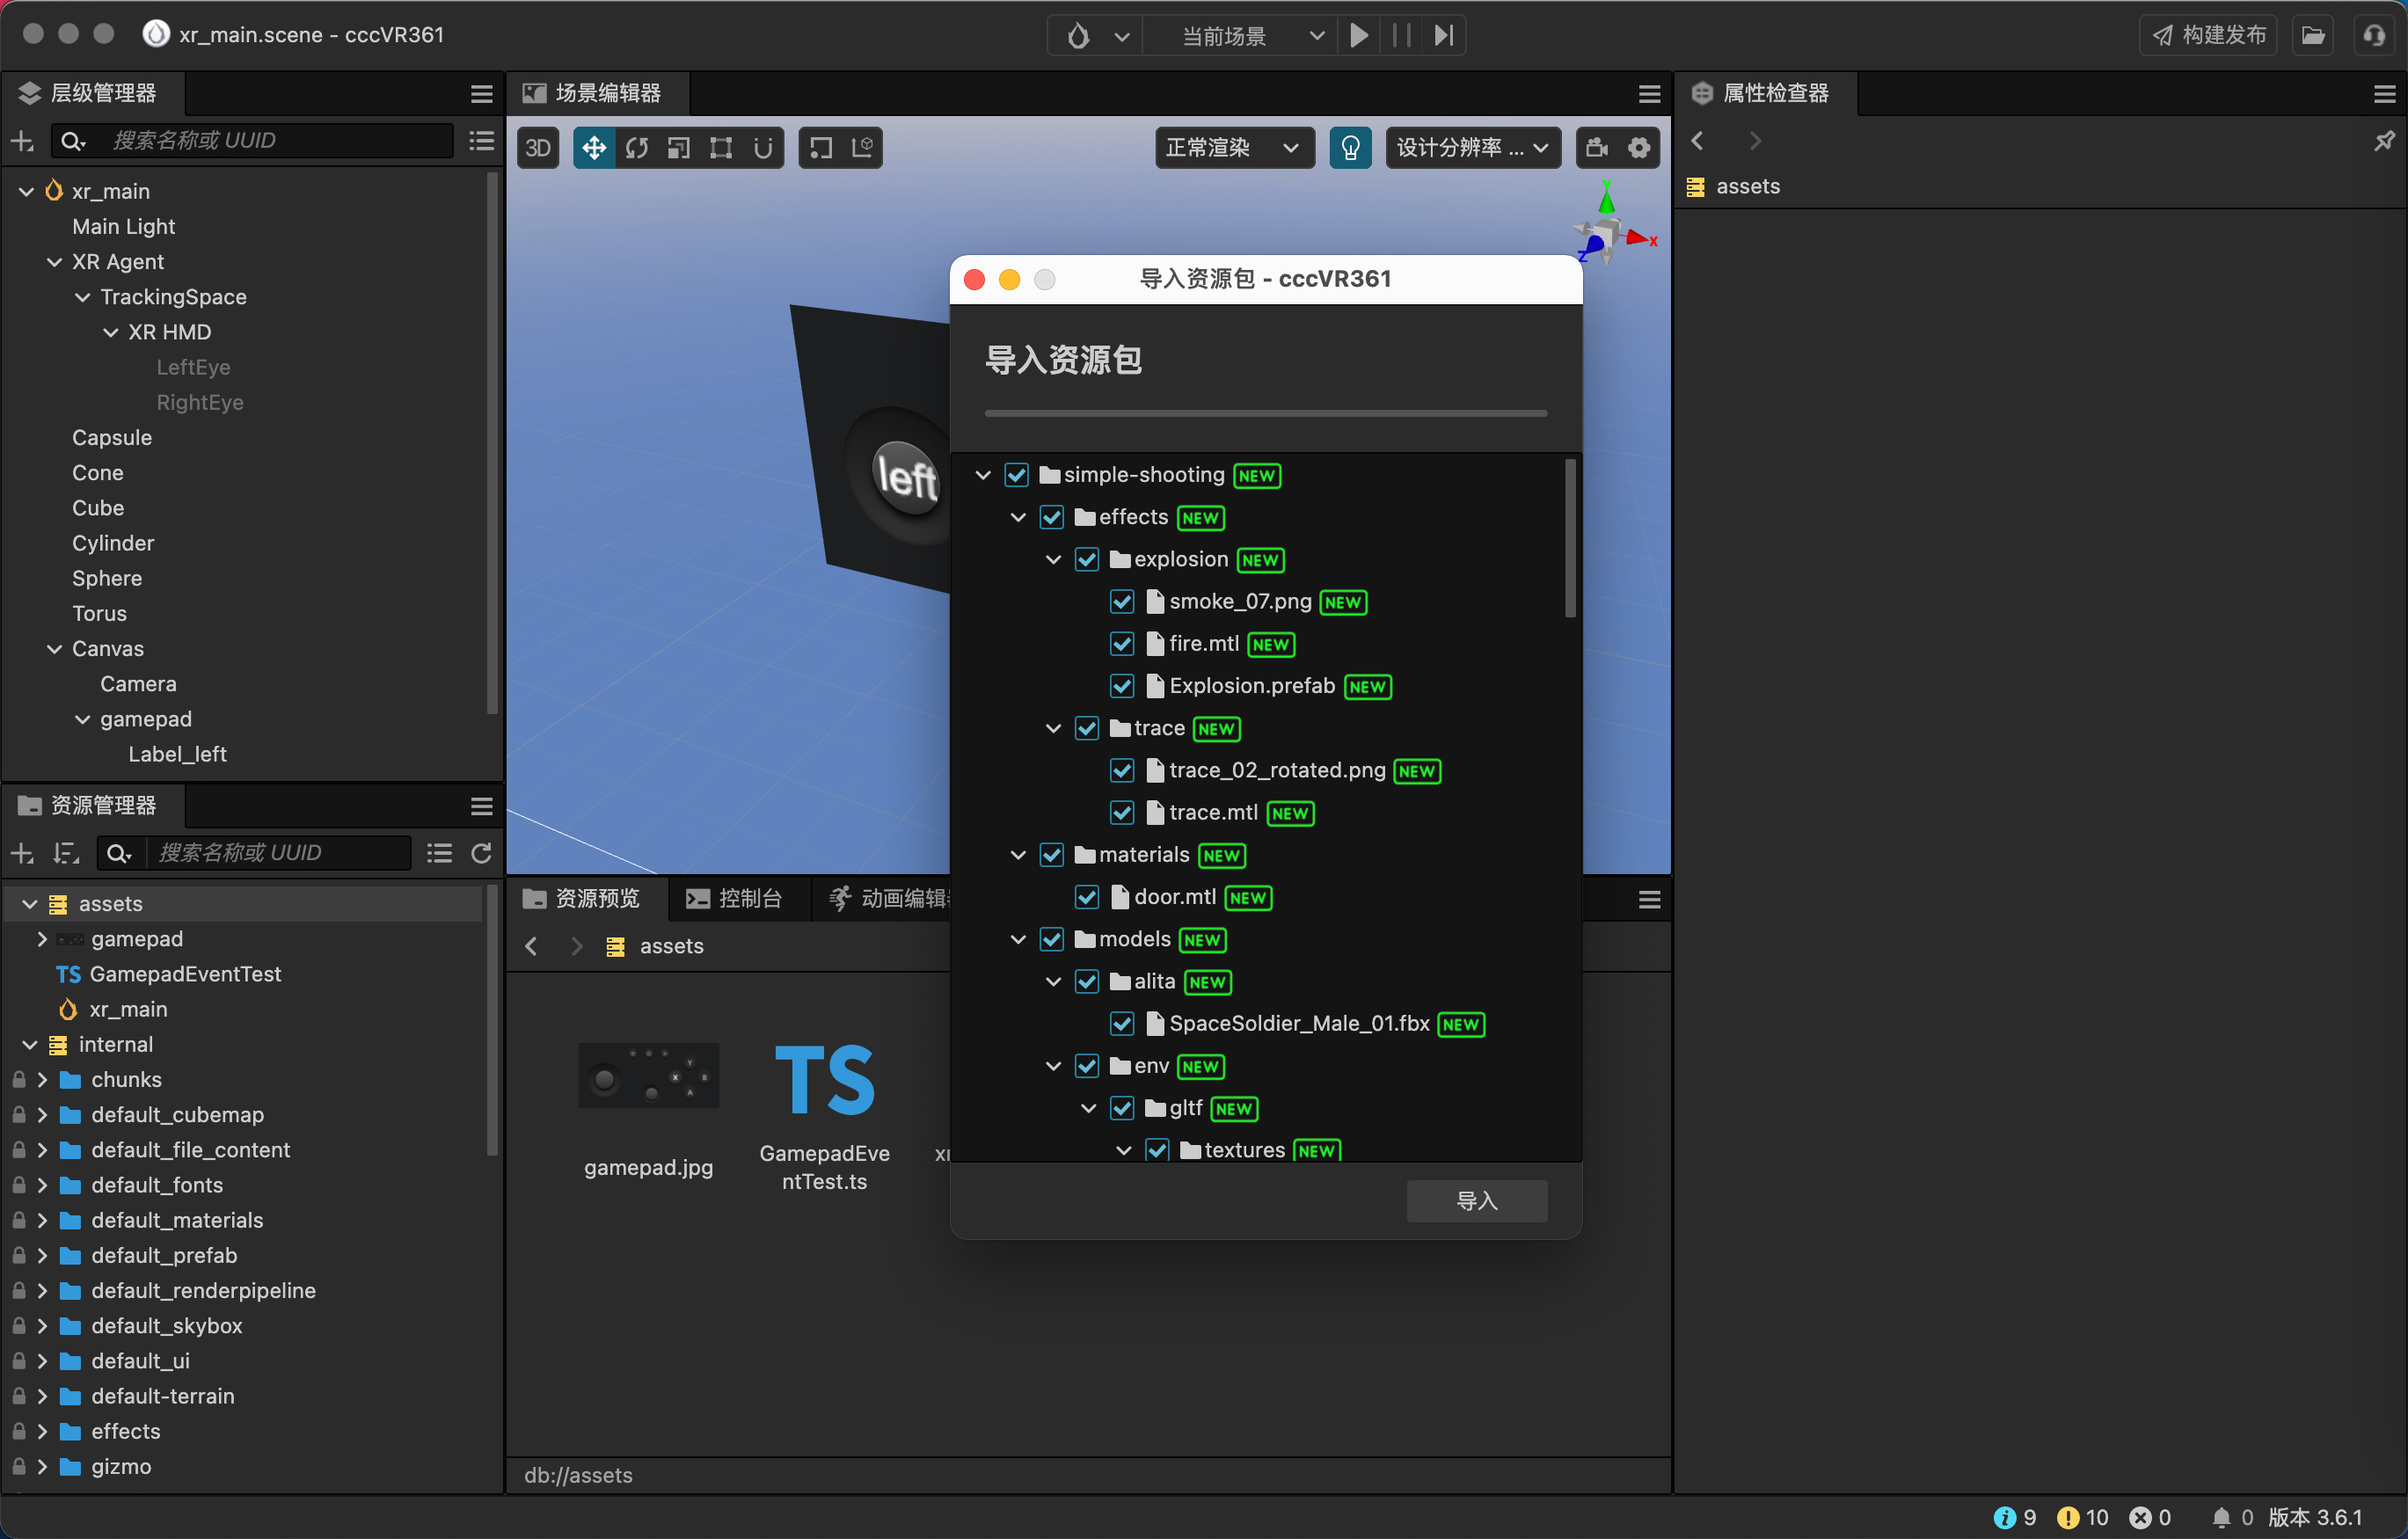
下载好工程后,找到主场景,导出资源包。
这里已经导出了资源包,如下所示:
链接: https://pan.baidu.com/s/1VRZyn3gAWF0Y6vsYdImFmg?pwd=6qce 提取码: 6qce 复制这段内容后打开百度网盘手机App,操作更方便哦
再导入到helloworld 中
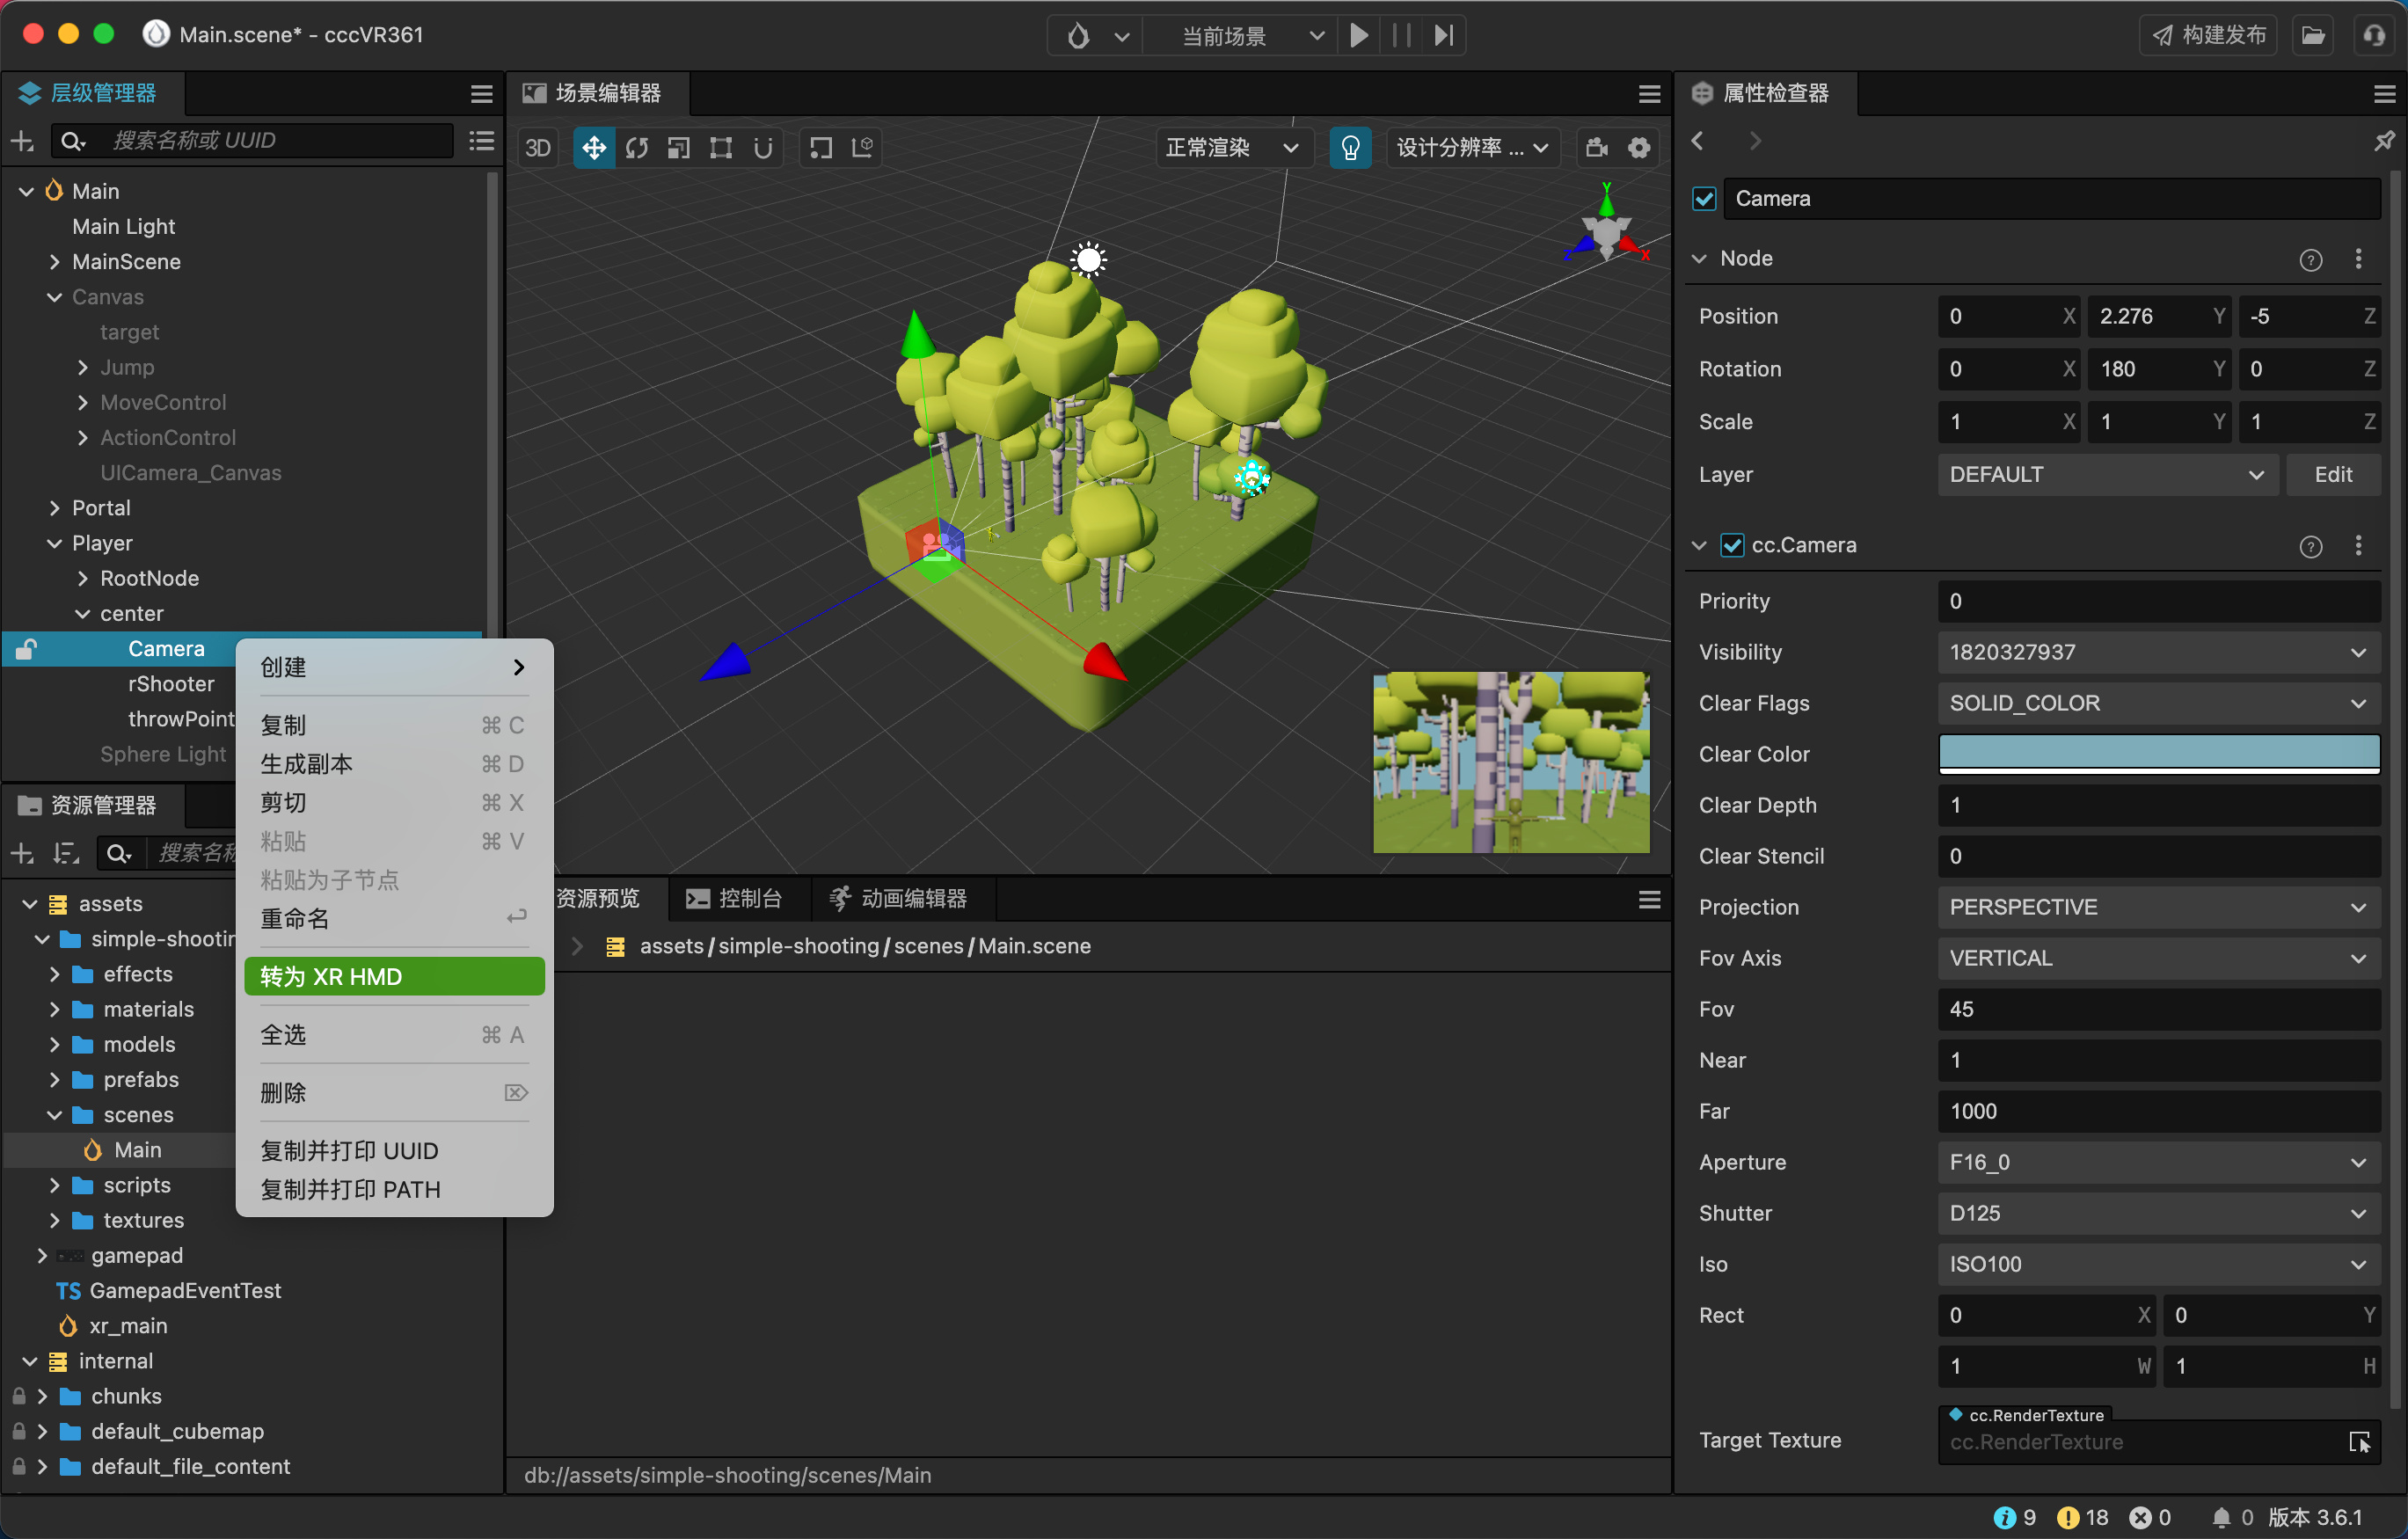
切换到shooting game 的场景中,找到主相机,转成 XR HMD
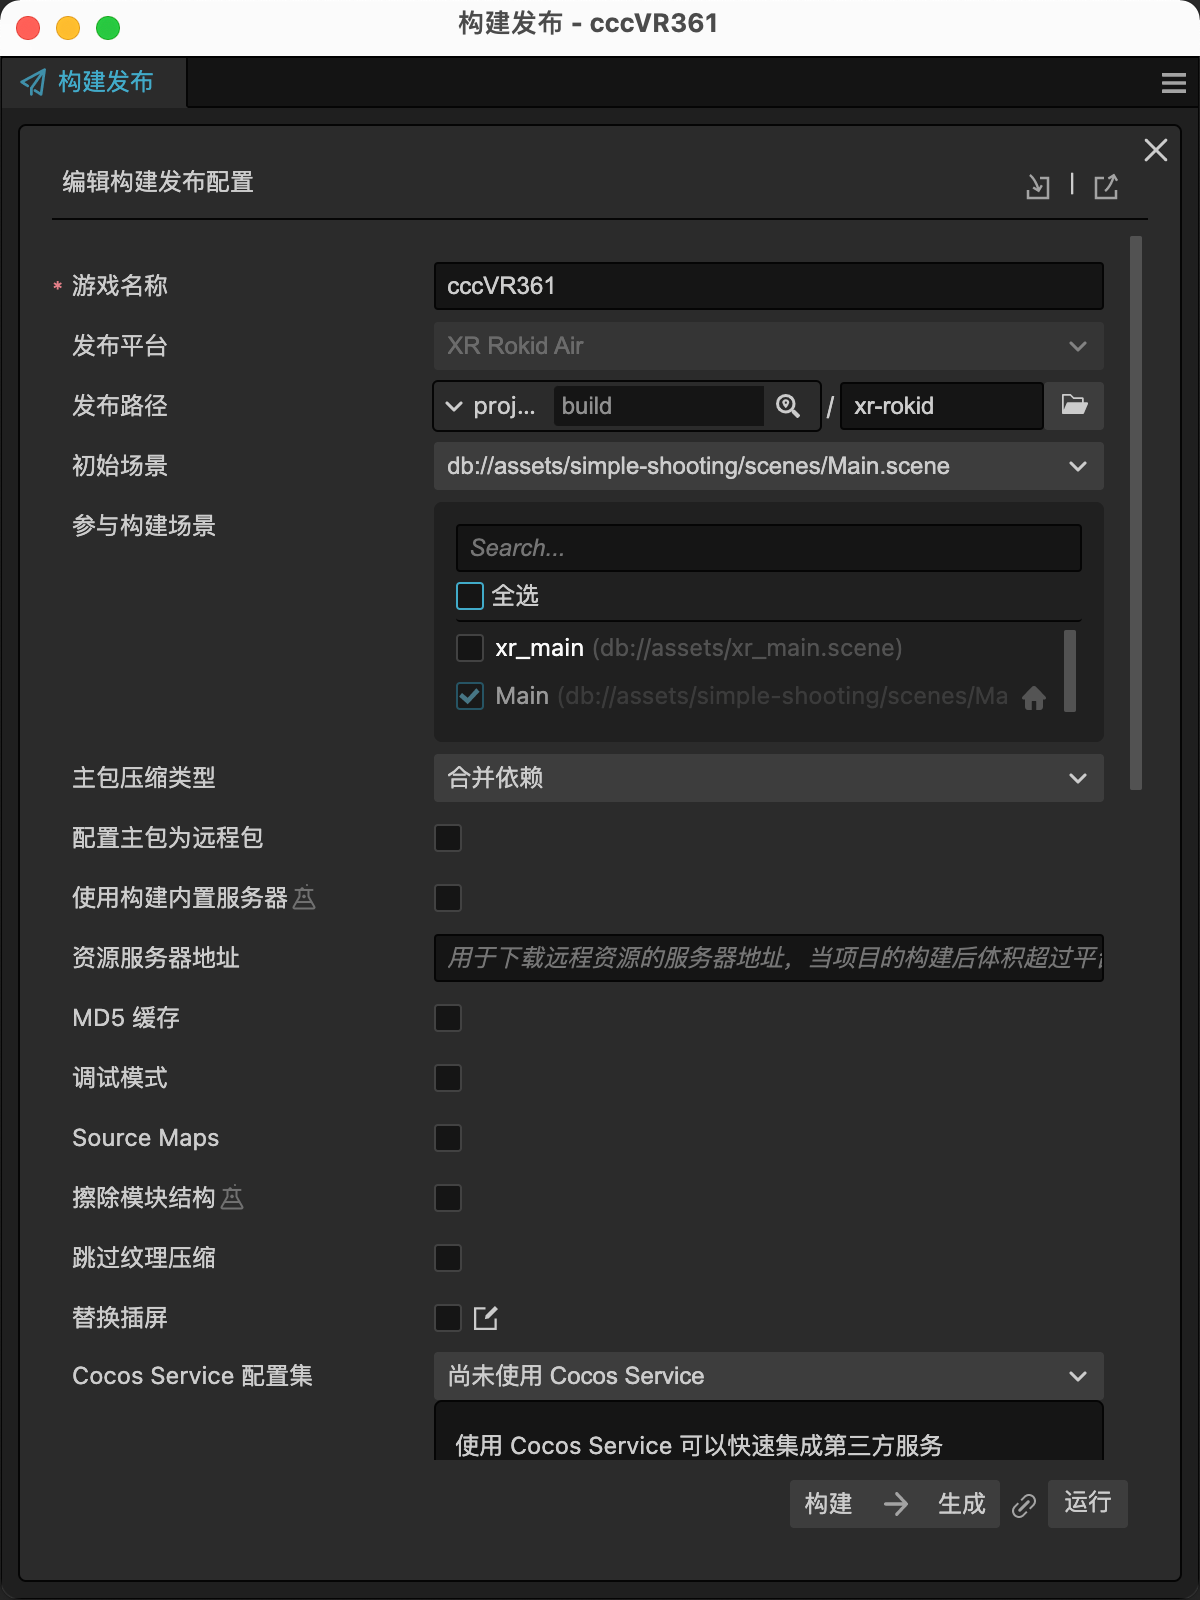
构建参数选择当前新的场景
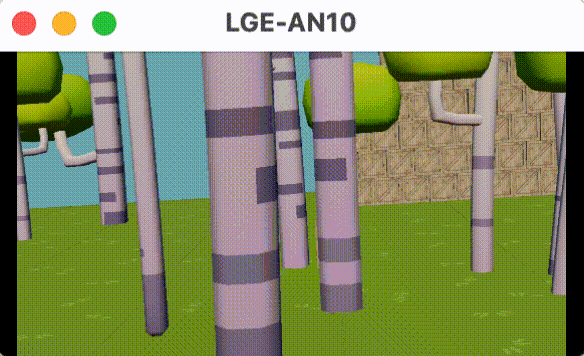
连接眼镜,打开应用后,效果如下图所示:
剩下的问题就是调整参数,接入输入事件,修改脚本assets/simple-shooting/scripts/ShootingPlayerController.ts 核心参考代码如下:
        //input.on(Input.EventType.GAMEPAD_INPUT, this._gamepadEvent, this);
        //input.on(Input.EventType.HMD_POSE_INPUT, this._dispatchEventHMDPose, this);

    private _dispatchEventHMDPose(eventHMD: EventHMD) {
        const hmdInputDevice = eventHMD.hmdInputDevice;

        const _quatPose:Quat = hmdInputDevice.headMiddleOrientation.getValue();
        _quatPose.getEulerAngles(tempVec3_a);

        const horizontalRot = this.node.getRotation();
        horizontalRot.getEulerAngles(tempVec3_b);
        tempVec3_b.y = tempVec3_a.y;
        this.node.setRotationFromEuler(tempVec3_b);

        if (-tempVec3_a.x > this.viewDownAngle && -tempVec3_a.x < this.viewUpAngle) {
            const verticalRot = this.verticalViewNode.getRotation();
            verticalRot.getEulerAngles(tempVec3_b);
            tempVec3_b.x = -tempVec3_a.x;
            this.verticalViewNode.setRotationFromEuler(tempVec3_b);
        }
    }

    aValue = false;
    bValue = false;
    private _gamepadEvent(event: EventGamepad) {
        const gamepad = event.gamepad;
        const leftStickValue = gamepad.leftStick.getValue() as Vec2;
        if(this._velocity.z !=leftStickValue.y && this._velocity.x!=-leftStickValue.x){
            this._velocity.z = leftStickValue.y;
            this._velocity.x = -leftStickValue.x;
            if(leftStickValue.lengthSqr()>0){
                this.changeToAnimState(PlayerAnimState.Running);
            }else{
                this.checkToIdle();
            }
        }

        if (gamepad.buttonSouth.getValue() === 1 && !this.aValue) {
            this.aValue = true;
            this.doAction(ActionType.Shoot,true)
        } else if (gamepad.buttonSouth.getValue() === 0) {
            this.aValue = false;
        }
        if (gamepad.buttonEast.getValue() === 1 && !this.bValue) {
            this.bValue = true;
            this.doAction(ActionType.ThrowGrenade,true)
        } else if (gamepad.buttonEast.getValue() === 0) {
            this.bValue = false;
        }
    }
放上文章开头接入的资源包供大家参考学习
链接: https://pan.baidu.com/s/1dpvvTppaPFyvGqRzsyWEIA?pwd=3q68 提取码: 3q68 复制这段内容后打开百度网盘手机App,操作更方便哦
无冰大佬,厉害
AR与XR的贴很少,这是难得的好贴。学习!
给冰神大佬点赞!
冰哥哥又偷偷卷