
序
在同时浅入了unity 和 cocos以来,得到了以下个人观点
------------------------------

unity:

:优点:方便 好用,插件能帮你做80%,剩下的就是完善自己的逻辑,资源(免费)多,容易获取---我觉得这些已经够自己用了。

:缺点:由于个人游戏的环境来说,app也好、win也好,都不好传播,没有自然流量,只能通过各小游戏平台实现(或者H5),所以我选择了微信小游戏,unity有直接打包成微信小游戏的工具,打包以后,主包很小,分包10M+,也差不多,但是需要放服务器去加载,可能研究不足的原因,打包的过程以及结果,暂无法控制。 在运行的过程中,发热比较重,(跟者官方的教程走,优化不足,插件重导致运算高),控制也有插件(按钮控制,屏幕触控),但不能做到分手指进行使用,(在缩放或者移动时候,会和其他手指同时作用),想来还是得自己做轮子才能更合适自己用。

:总结:写的时候是很开心的,用的时候是比较糟心的(还有各糟心的理由就是团结要收费。。)而且发热比较重

------------------------------
cocos
:优点:界面操作简洁,编辑器加载快,(不知道怎么,确实编辑器面板看着比unity 会更舒心点),对于开发过程来说,流程是一条走的(ts 单线程的原因吧,无论是组件、脚本、单例也好,总会觉得就是顺序从上到下来的,这个对前端来说比较亲切),动画图对应unity的动画状态,效果也是很像很好的,暂时就想到这么多子。

:缺点:!!!啥都要自己做(大部分),社区环境也是可以的,但共享的、实用的东西大部分是没有的,也可能现在还是unity 等其他开发为主,池子就这么大,大佬也只有这么些。

:总结:基本上在开发和流程来说,是非常棒的 ,不过开发起来比较累,都要自己实现,有些确实不兼容微信小游戏,比如基于babylon的Navigation 寻路,在打包后就有问题,因为没有window,后面没研究, 就直接用胶囊角色控制器代替了。总之 很多要自己写。
概述
大概大家都想做一个和魔兽一样的开放世界游戏,而且要轻 随时能玩 (特别是自己的游戏可以给自己开挂~),所以历经一年多的空闲时间(当然不是所有…)进行想法实现,最后发现,要素材没素材,要逻辑太过庞大的,到真正完成,估计还需要···时间!大量时间!(一个人开发太难了。)。所以 我想记录下现在的开发进度,以及开发遇到的事情吧,
==以上文字较多,各位可选择后面基本代码实现来看,其他的可以省略掉,没关系==
第一步 创建环境,XForge 框架
我用 的是XForge框架,第一 他是免费的,第二 他好用,第三 作者 是 这个 (๑•̀ㅂ•́)و✧棒 。
这个框架理顺了你在开发时候的2d和3d的关系, 只做纯2d也完美, 他的资源复用、分包、manager控制、数据控制,封装的很让人舒心, 开发的时候你只要用就好了,我用下来没有发现问题,发现的都是方便、好用 推荐(XForge)
怎样搭建可以去看他的文档、也可以加qq,这里就不多说了 可以自行去看。
基础3D创建思路
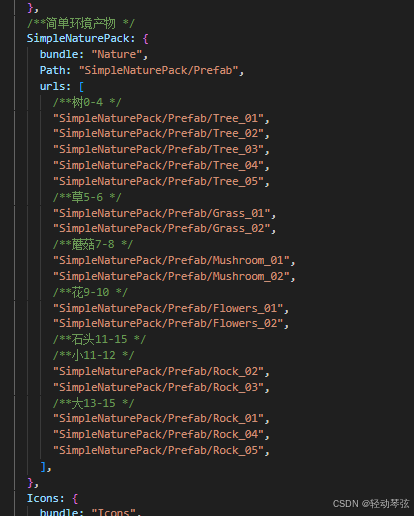
一个平台 、几棵树、一个自己、几个敌人,构成我所想的游戏环境,在cocos分包中,资源的分配管理是决定大小的最重要的东西,如果把要的素材全部在scene中放置的话, 所有用到的资源其实会打包两遍–资源管理分包-使用的战斗分包,所以一切的加载都要在初始化好基本环境以后,使用预加载、分包加载 去进行资源的管理加载、 最后 一个scene 只需要几百k 就可以显示几M,甚至十几M的内容。如:
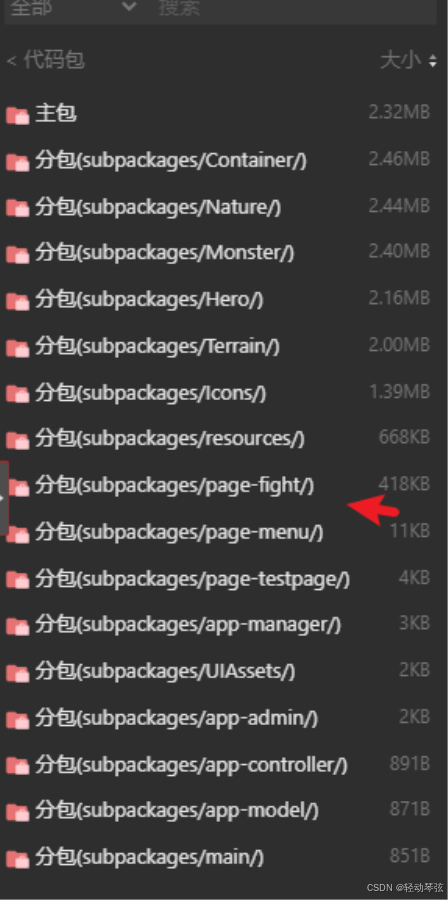
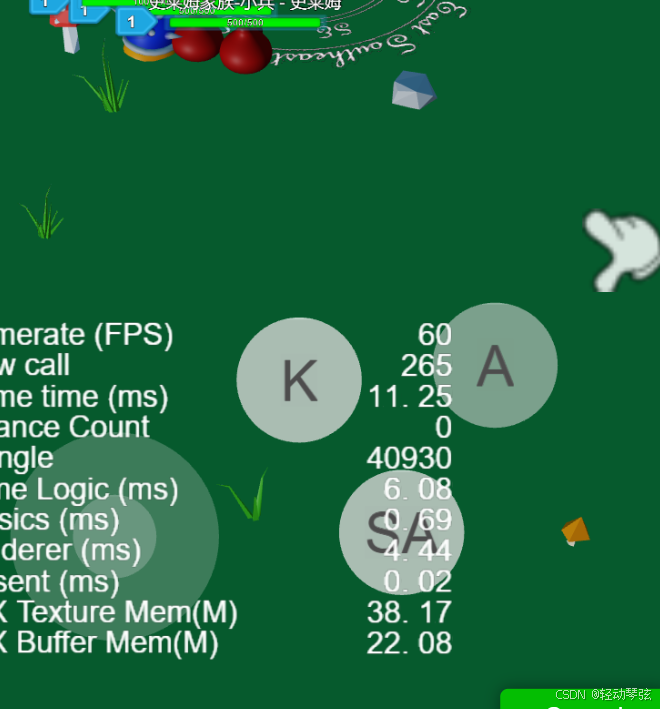
总大小有16M左右, 天空、角色、敌人、环境树木、Terrain等 占用比较大,不过没关系 微信小游戏可以30M以内,所以要控制每个分包要在4M以内,做好分包管理是最重要的事情,在我的想法中,就是角色、敌人、环境等, 都可以有多个分包,通过一个管理分包路径的目录来统一进行加载。
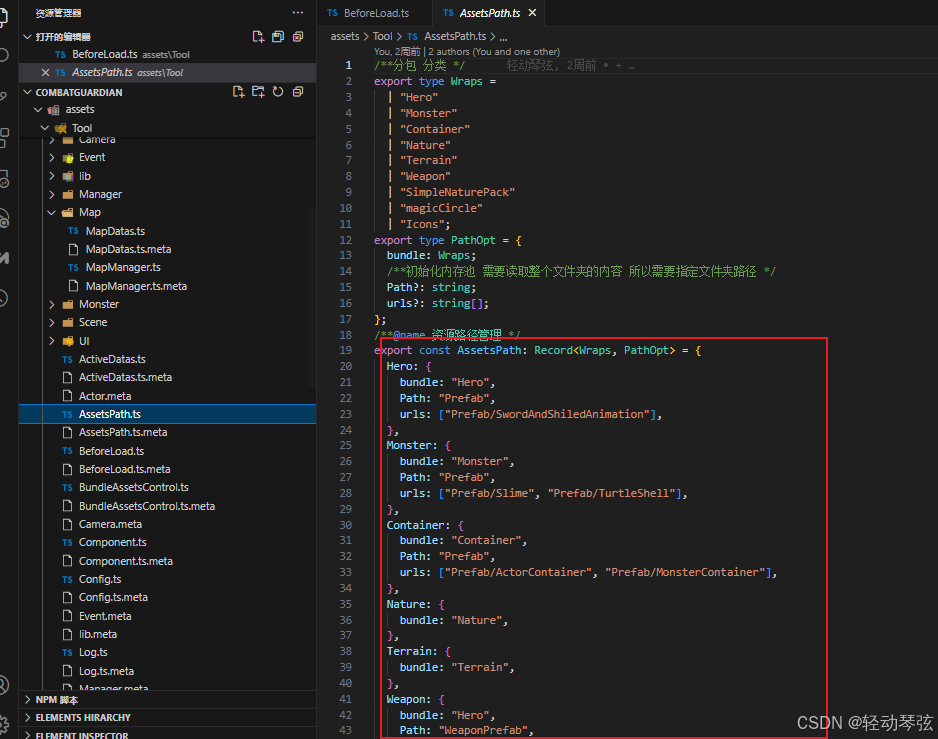
通过每次都访问这个文件进行加载对应的一类预制体以及分包。
做到这里,就差不多整个架构已经搭建好了,可以加上素材了
场景
地形
场景的话使用的是Terrain,Terrain资源很大,一个差不多100*100的都要1M 而且是在颜色贴图只有两个简单的几K的颜色块和塑型没有的情况下,所以 用动态方式进行加载
  // 创建地形节点

          const terrainNode = new Node(option.name);

          // 先加入场景再添加物理组件

          this.PlaneNode.addChild(terrainNode);

          // 添加地形组件

          const terrainComp = terrainNode.addComponent(Terrain);

          terrainComp._asset = terrain;

          // 添加碰撞体组件(此时节点已在场景中)

          const collider = terrainNode.addComponent(TerrainCollider);

          collider.setGroup(PhysicsGroupMap.Terrain);

          collider.terrain = terrain; // ✅ 此时onLoad已执行

          terrainNode.position.set(option.position);

          load && load();
这种方式加载所以这1M的Terrain 不会在fight分包里面![]()
效果正常
树木等环境
也是同样的道理,通过预加载和分包加载的方式来进行,
通过下面代码来实现同样的预制体有不同的呈现方式 角度 位置的偏差
 /**加载node - 通过不同形式进行坐标的生成后调用 */

  loadNatureNode(opt: EnvironmentConfig) {

    // 随机选择资源路径

    const nodePool = NatureLoadManager.instance.createNatrueNode(

      opt.paths

        ? opt.paths[Math.floor(Math.random() * opt.paths.length)]

        : opt.path

    );

    if (!nodePool) {

      console.error("节点创建失败,路径:", opt.path);

      return;

    }

    //缩放

    if (opt.offscale) {

      let scale =

        opt.offscale[0] + Math.random() * (opt.offscale[1] - opt.offscale[0]);

      nodePool[0].scale.set(scale, scale, scale);

    } else if (opt.scale) {

      nodePool[0].scale.set(opt.scale, opt.scale, opt.scale);

    }

    // 添加随机旋转(修复1:正确使用计算后的旋转值)

    if (opt.offRotation) {

      let randomRotation =

        opt.offRotation[0] +

        Math.random() * (opt.offRotation[1] - opt.offRotation[0]);

      this.randomRot_tmp.set(0, 0, randomRotation);

      nodePool[0].setRotationFromEuler(this.randomRot_tmp); // 使用临时变量而非原始数组

    }

    // 坐标计算(修复2:确保使用正确的坐标索引)

    if (opt.offSize) {

      opt.position[0] += Math.random() * opt.offSize[0];

      opt.position[2] += Math.random() * opt.offSize[1];

    }

    // 设置节点属性

    nodePool[0].position.set(opt.position[0], opt.position[1], opt.position[2]);

    this.PlaneNode.addChild(nodePool[0]);

  }
在资源配置上也用了分包管理的思想, 给每个关卡可以单独配置
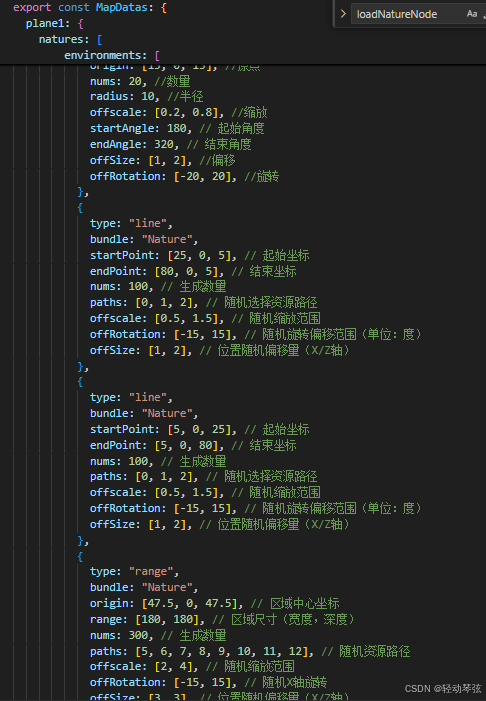
包括圆形、范围、直线随机生成树木或其他
这样的方式 我只需要管理关卡的map数据 以及这个预制体的加入就好了,是不是很方便
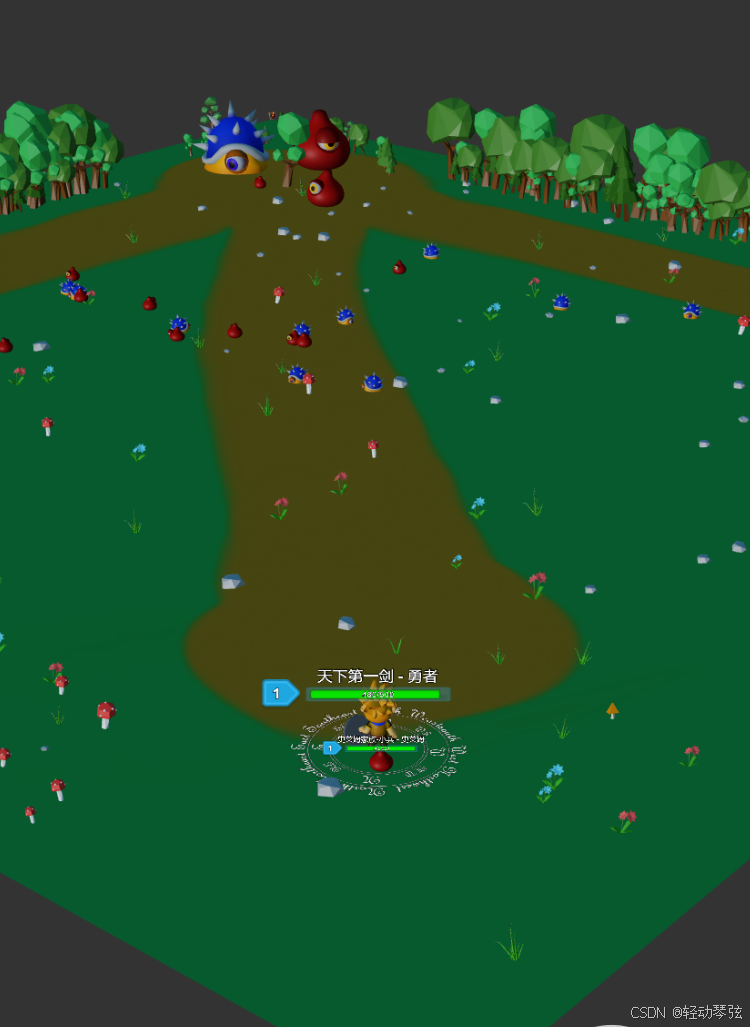
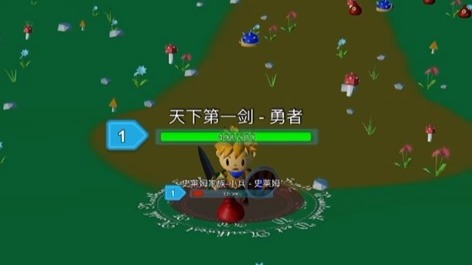
最终效果
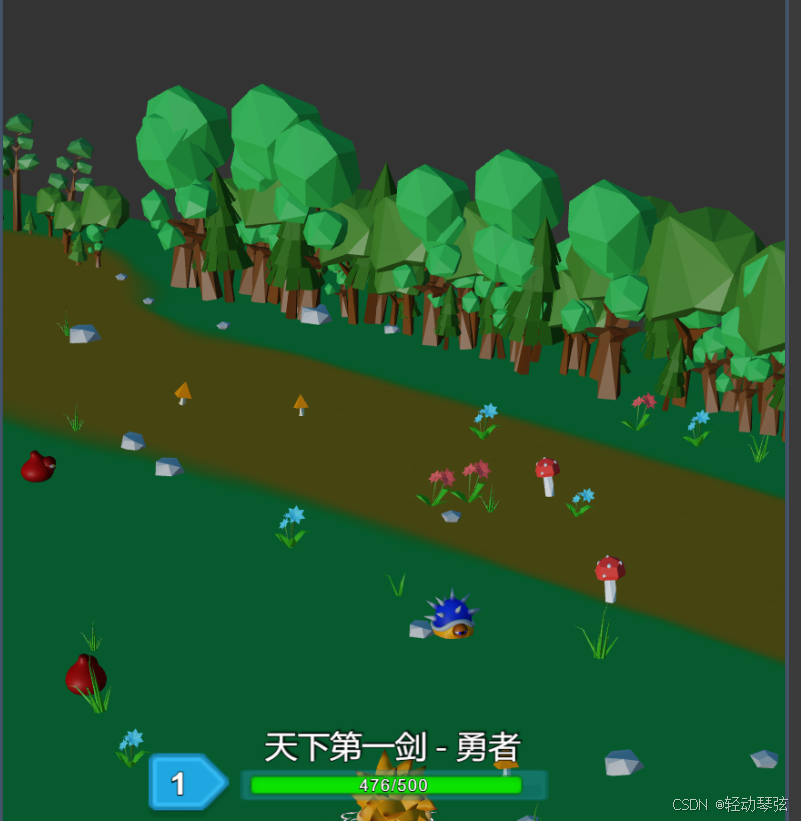
树是直线的 地面上的蘑菇草之类的是范围的, 后期也可以加上在放置的位置去获取Terrain这个位置的高度来确定位置(我的只是平面没考虑,有api是可以获取高度的)
环境已经搭建好了
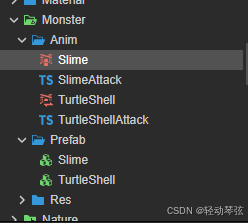
人物角色
在多次从头开始的情况下,我始终觉得应该拆分角色(控制器,实际模型)。在初始化时候,只有这个控制器才代表当前的玩家,里面的模型或者技能之类的都是附加的,是通过这个控制器来进行整个使用过程的控制,所以这个控制器就应该是一个预制体,每个模型也应该是额外的预制体, 并且每个比如角色类型, 是一套适配控制器的(模型,动画,数据,属性)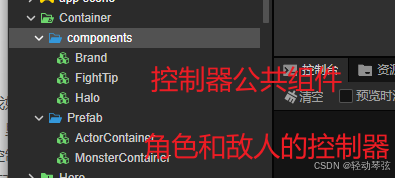
暂只考虑只有一个角色。其中我每个敌人也是公共用这个配置的控制器, 和角色同理

其实所有角色都是通过以上两个预制体实例出来的。
期间我使用了两种方法,一个是用内存池的方式来加载,但是每次加都或多或少有上次的属性残留,很麻烦, 所以后面我直接实例预制体了,就不通过内存池, 这样就方便多了,因为每个是新的,性能问题,哎暂时不考虑把
我给角色和敌人配置了不同的分包,避免后期滥用分包的问题,超过4M再进行加分包
角色实现
实现代码篇
这步,我一开始是完全敌人和角色是一体的,但是发现,从0到1 的过程 变数太多,重构太多,毕竟不是专业而且不知道哪个公用哪个不同, 在这个版本中, 我使用两套(大部分代码还是相同的)的方式来做
==这里说一句 ,整个js我都放在主包里,不进行分包,一方面做个2M以上的代码也比较多了,没必要,另一方面 ,运行时候不用太考虑js分包,是很爽的, 一开始我把js都放分包,有的地方主包又要用,代码会重复部分,后期代码成熟后再考虑==

基本上一个文件夹就一个功能的ts,文件名之所以都加上角色和敌人的区分,是为了编程时候不搞错,名字相同不好找而且容易混掉。
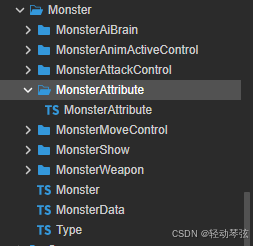
在总控实现加载各部分,reroop
export class Actor extends Component {

  /**挂载组件 */

  /**移动组件 */

  _moveControl: ActorMoveControl;

  /**动画组件 */

  _animControl: ActorAnimActiveControl;

  /**武器组件 */

  _weaponControl: ActorWeapon;

  /**攻击组件 */

  _attackControl: ActorAttackControl;

  /**属性组件 */

  _attribute: ActorAttribute;

  /**AI大脑实例 */

  _aiBrain: ActorAiBrain;

  /**事件控制器 */

  _eventControl: ActorEventControl;

    // 初始化AI

    this._aiBrain = new ActorAiBrain(this, opt.position);

    // 初始化攻击

    this._attackControl = new ActorAttackControl(this);

    //事件控制器

    this._eventControl = new ActorEventControl(this);

}
对 角色也包含ai部分,一开始我并不想希望全手动,但是有个ai进行自动化处理就更方便了
(位置关系、行为主动判断、目标自动选择)
空间管理篇
本身这个东西是应该在场景就说的,但是这个涉及到整个游戏关键流程,所以结合角色来说
在空间开辟每个实体的对应位置,然后计算距离(没了,就是这个功能);
但是!!!
为了不至于在每个实体ai计算时候,把很远的角色也要计算一次距离,就非常没必要了,所以会出现空间管理这个话题,通过空间分割, 距离判断,等方式 ,来确定周围哪些角色和敌人需要进行AI判断,
主要逻辑来了: ==九宫格 加上空间判断, 再进行距离判断, 再再再 每个角色的AI去判断相关的人物是否触发追击或者攻击==
这样 在每个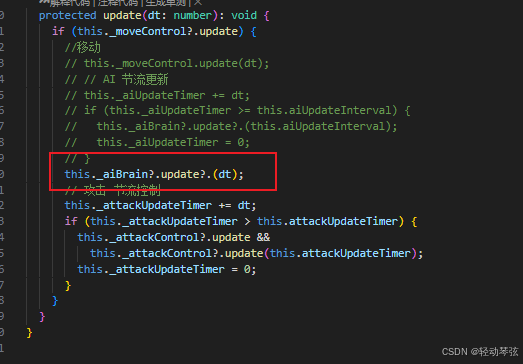
在每帧每个敌人的距离计算就会大幅度的减少
当这个敌人进入了角色的九宫格范围内, 才会出现distance数据,才需要去监听,其他情况就巡逻或者守卫就好了
动画逻辑篇
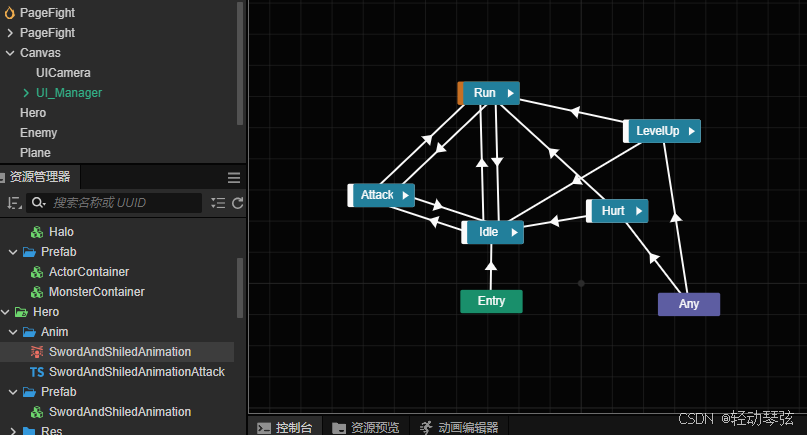
通过动画图的方式 整合所有的动画串起来,这里给一个自认为比较好的控制代码
import { animation, Animation, sp } from "cc";

import { app } from "db://assets/app/app";

/**角色动画控制类 */

export class ActorAnimActiveControl {

  _anim: animation.AnimationController;

  constructor(anim: animation.AnimationController) {

    this._anim = anim;

  }

  /** 动画状态集合 */

  animStates = {

    Speed: 0,

    Attack: false,

    Hurt: false,

    Gamespeed: 1,

    Die: false,

    Critical: false,

    Skill1: false,

    LevelUp: false,

  };

  /**@name 通用动画状态设置

   * @param key 动画变量名

   * @param value 动画参数值

   */

  setAnimState<T extends keyof typeof this.animStates>(

    key: T,

    value: (typeof this.animStates)[T],

    trigger?: boolean

  ) {

    if (trigger) {

      this._anim.setValue(key, value);

      return;

    }

    if (this.animStates[key] !== value) {

      this.animStates[key] = value;

      this._anim.setValue(key, value);

    }

  }

}
按钮实现篇
这个是操控方面重要的一环,
在之前是通过监听一个主canvas的全屏node进行事件判断分发,最后效果就是,不是这个逻辑错乱了就是那个逻辑串台了,多指处理也是很乱,所以干脆每个功能就在特定的地方进行事件的添加,互不干扰, 而且可以相互同时触发, 解决了之前在unity控制插件上比较难做到的-- 总归还是得自己写轮子…
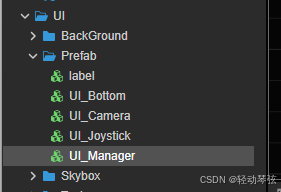
这UI_Bottom UI_Camera UI_Joystick 构成了全部所需
虚拟摇杆
这部分是基于网上的方式 自己整理了一遍的
import {

  __private,

  _decorator,

  Component,

  EventKeyboard,

  EventTouch,

  input,

  Input,

  KeyCode,

  Node,

  Touch,

  UITransform,

  Vec3,

} from "cc";

import { ActiveDatas } from "../../ActiveDatas";

import { SceneControl } from "../../Scene/SceneControl";

import { Events } from "../../Event/EventControl";

const { ccclass, property } = _decorator;

@ccclass("UI_Joystick")

export class UI_Joystick extends Component {

  /**@name 控制范围 */

  @property({ type: UITransform, tooltip: "摇杆控制区域节点" })

  private ctrlRoot: UITransform = null!;

  /**@name 指示器 */

  @property({ type: Node, tooltip: "摇杆指示器节点" })

  private ctrlPointer: Node = null!;

  private _ctrlRootRadius: number = 0;

  /**@name 摇杆触摸 临时数据 */

  private _movementTouch_tmp: Touch = null;

  protected start(): void {

    this._ctrlRootRadius = this.ctrlRoot.width / 2;

    //加入摇杆事件

    this.ctrlRoot.node.on(

      Input.EventType.TOUCH_START,

      this.onTouchStart_Movement,

      this

    );

    this.ctrlRoot.node.on(

      Input.EventType.TOUCH_MOVE,

      this.onTouchMove_Movement,

      this

    );

    this.ctrlRoot.node.on(

      Input.EventType.TOUCH_END,

      this.onTouchUp_Movement,

      this

    );

    this.ctrlRoot.node.on(

      Input.EventType.TOUCH_CANCEL,

      this.onTouchUp_Movement,

      this

    );

    // 初始化键盘监听

    this.initKeyboardEvents();

  }

  /**@name 摇杆触摸-开始 */

  onTouchStart_Movement(event: EventTouch) {

    //只取第一个也只有一个

    if (!this._movementTouch_tmp) {

      this._movementTouch_tmp = event.touch;

      this.doTouchMoveCtrl();

    }

  }

  /**@name 摇杆触摸-移动 */

  onTouchMove_Movement(event: EventTouch) {

    this.doTouchMoveCtrl();

  }

  // 增加临时变量缓存(减少重复计算)

  private _tempVec2 = new Vec3();

  private _lastOffset = 0;

  private _lastDegree = 0;

  /**@name 摇杆-计算触摸点位置 */

  doTouchMoveCtrl() {

    // 使用缓存变量替代 Reuse 实例

    const touchPos = this._tempVec2;

    touchPos.set(

      this._movementTouch_tmp.getUILocationX(),

      this._movementTouch_tmp.getUILocationY(),

      0

    );

    // 转换坐标系(保持单次调用)

    const localPos = this.ctrlRoot.convertToNodeSpaceAR(touchPos);

    // 使用向量长度计算(替代手动平方和开根)

    const len = Math.min(localPos.length(), this._ctrlRootRadius);

    // 方向计算优化(使用 Math.atan2 替代手动计算)

    const angle = (Math.atan2(localPos.y, localPos.x) * 180) / Math.PI;

    // 设置指示器位置(使用向量缩放)

    this.ctrlPointer.position = localPos.normalize().multiplyScalar(len);

    // 更新数据(增加变化检测)

    const offset = Math.round((len / this._ctrlRootRadius) * 10);

    if (offset !== this._lastOffset || angle !== this._lastDegree) {

      this._lastOffset = offset;

      this._lastDegree = angle;

      ActiveDatas.instance.offset = offset;

      ActiveDatas.instance.degree = (angle + 360) % 360; // 规范化角度值

    }

  }

  /**@name 摇杆触摸-结束 */

  onTouchUp_Movement(event: EventTouch) {

    ActiveDatas.instance.degree = 0;

    ActiveDatas.instance.offset = 0;

    this._movementTouch_tmp = null;

    this.ctrlPointer.setPosition(0, 0, 0);

  }

  /** 初始化键盘事件 */

  private initKeyboardEvents() {

    // WSAD 按下监听

    input.on(Input.EventType.KEY_DOWN, this.onKeyDown, this);

    // input.on(Input.EventType.KEY_PRESSING, this.onKeyPressing, this);

    input.on(Input.EventType.KEY_UP, this.onKeyUp, this);

  }

  // 新增键盘控制状态

  private keyboardActive = false;

  private keyboardShift = false;

  private keyboardVector = new Vec3();

  /** 键盘按下处理 */

  private onKeyDown(e: EventKeyboard) {

    switch (e.keyCode) {

      case KeyCode.KEY_W:

        this.keyboardVector.y = 1;

        this.keyboardActive = true;

        break;

      case KeyCode.KEY_S:

        this.keyboardVector.y = -1;

        this.keyboardActive = true;

        break;

      case KeyCode.KEY_A:

        this.keyboardVector.x = -1;

        this.keyboardActive = true;

        break;

      case KeyCode.KEY_D:

        this.keyboardVector.x = 1;

        this.keyboardActive = true;

        break;

      case KeyCode.KEY_F:

        SceneControl.instance.scene.emit(Events.UI_BottomAttack, false);

        break;

      case KeyCode.SHIFT_LEFT:

        this.keyboardShift = true;

        break;

    }

  }

  /** 键盘长按处理 */

  // private onKeyPressing(e: EventKeyboard) {

  //   if (this.keyboardActive) {

  //     console.log("this.keyboardActive", this.keyboardActive);

  //     // 计算键盘输入方向

  //     const angle =

  //       (Math.atan2(this.keyboardVector.y, this.keyboardVector.x) * 180) /

  //       Math.PI;

  //     ActiveDatas.instance.degree = (angle + 360) % 360;

  //     ActiveDatas.instance.offset = 10; // 与摇杆最大偏移量一致

  //   }

  // }

  /** 键盘释放处理 */

  private onKeyUp(e: EventKeyboard) {

    switch (e.keyCode) {

      case KeyCode.KEY_W:

      case KeyCode.KEY_S:

        this.keyboardVector.y = 0;

        break;

      case KeyCode.KEY_A:

      case KeyCode.KEY_D:

        this.keyboardVector.x = 0;

        break;

      case KeyCode.SHIFT_LEFT:

        this.keyboardShift = false;

        break;

      case KeyCode.KEY_F:

        SceneControl.instance.scene.emit(Events.UI_BottomAttack, true);

        break;

    }

    this.keyboardActive =

      this.keyboardVector.x !== 0 || this.keyboardVector.y !== 0;

    if (!this.keyboardActive) {

      ActiveDatas.instance.degree = 0;

      ActiveDatas.instance.offset = 0;

    }

  }

  protected update(dt: number): void {

    if (this.keyboardActive) {

      // 计算键盘输入方向

      const angle =

        (Math.atan2(this.keyboardVector.y, this.keyboardVector.x) * 180) /

        Math.PI;

      ActiveDatas.instance.degree = (angle + 360) % 360;

      ActiveDatas.instance.offset = this.keyboardShift ? 10 : 9; // 与摇杆最大偏移量一致

    }

  }

}
多功能按钮
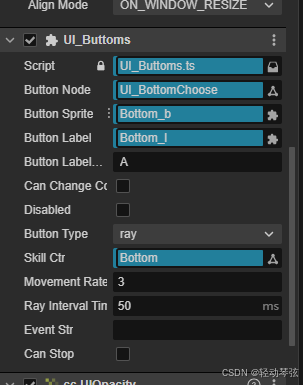
通过全配置方式来进行设置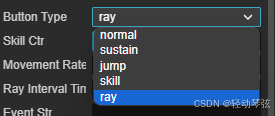
有屏幕拾取(图标会跟随拾取位置)、按钮(按下抬起算一组)、jump(按下触发)、sustain(持续触发,相隔时间可设置)、skill(返回方向和距离,以及控制最大输出距离,给指示器位置方向)
基本上够用了这些功能(一切手搓)
移动和目标篇
在角色移动时候,是和目标要相结合的, 比如我摇杆动了,就停止追随,敌人在判断了距离做出了动作以后,就更改当前运动状态,就要进行目标和移动的逻辑处理
角色:目标是第二权限,摇杆永远是第一权限,在ActorMoveControl类中-
 let moveOffset = ActiveDatas.instance.offset;

    let offset =

      this.trackToTargetCallbBack && this.trackTarget ? 11 : moveOffset;

    if (this.moveOnce && offset === 0) {

      this.moveOnce = false;

      this._parent._animControl?.setAnimState("Speed", 0);

    }

    if (offset) {

      if (!this.moveOnce) this.moveOnce = true;

      //调整正方向

      if (offset == 11 && moveOffset) {

        //如果在跟踪时候 进行了移动 那么就取消跟踪

        this.outTrackToTarget();

        offset = moveOffset;

      }

      this._parent._animControl?.setAnimState("Speed", offset);

      if (offset != 11) {

        this._faceView();

      } else {

        //跟踪转向 - 在开始的时候就要转向要不然近了就不会转向了 因为会马上攻击

        this._trackfaceView();

      }

      //移动

      //计算前进方向

      Vec3.transformQuat(

        this._movement,

        Vec3.FORWARD,

        this._parent.node.worldRotation

      );

      //这里加入移动数据

      Vec3.multiplyScalar(

        Reuse.instance.movedistment_tmp,

        this._movement,

        -dt * (offset < 10 ? this._moveSpeed : this._moveSpeedFast)

      );

      Reuse.instance.movedistment_tmp.y = this._movement.y;

    } else {

      Vec3.zero(Reuse.instance.movedistment_tmp);

    }

    //胶囊体重力手动

    //适应重力

    this.characterControllerDatas._velocityY +=

      -ConfigMapGame.instance.gravity * dt;

    Reuse.instance.movedistment_tmp.y +=

      this.characterControllerDatas._velocityY * dt;

    //进行移动

    this._parent.characterController.move(Reuse.instance.movedistment_tmp);

    let isGround = this._parent.characterController.isGrounded;

    if (offset) {

      if (offset == 11) {

        //移动以后 进行追踪回调

        this.trackToTarget();

      }

      // SpaceManager.instance.updateCurrentArea(

      //   this._parent._RoleModelNode.worldPosition

      // );

    }
有目标转向目标前进,在摇杆控制就取消
而敌人就只有目标 无论是守卫还是巡逻 跟踪还是攻击在MonsterAttackControl 有体现
import { Vec3 } from "cc";

import { Actor } from "../../Actor/Actor";

import { CoolingTimeType, CoolingTimeTypeKeys } from "../../Actor/ActorData";

import { Monster } from "../Monster";

export class MonsterAttackControl {

  _parent: Monster;

  constructor(monster: Monster) {

    this._parent = monster;

  }

  update(dt: number) {

    this.doCooling(dt);

  }

  /**进行攻击

   * proximityToTarget - 是否要判断是否到达过目的地

   */

  doAttack(proximityToTarget?: boolean) {

    if (proximityToTarget && this._proximityToTarget === false) {

      //   console.log("上次攻击还未靠近 - 进行节流");

      return;

    }

    this.checkEnemy();

  }

  _proximityToTarget: boolean = null;

  /**由于敌人的触发方式, 这一步必定有锁定的目标在 */

  checkEnemy() {

    this._proximityToTarget = false;

    let targetActor: Actor = this._parent._aiBrain.lockTarget;

    // console.log("attack", targetActor);

    //都丢给移动类去处理, 因为要修改方向 最终在持续回调里进行攻击处理

    targetActor &&

      this._parent._moveControl.trackToTarget(targetActor.node, () => {

        //回调 - 判断距离 - 因为锁定了 所以直接读取距离

        // console.log(

        //   "attack q",

        //   this._parent._aiBrain._targetActorRole?.distance.w,

        //   this._parent._attribute._attribute.normalRange

        // );

        if (

          this._parent._aiBrain._targetActorRole?.distance.w <=

          this._parent._attribute._attribute.normalRange

        ) {

          this._proximityToTarget = true;

          //先停止移动

          this._parent._moveControl.outTrackToTarget(true);

          // 保持追踪但攻击进行控制

          if (this._CoolingTime.attackCoolingTime > 0) {

          } else {

            //进行攻击

            this._parent._animControl.setAnimState("Attack", true, true);

          }

        }

        // console.log("jl", this._parent._aiBrain._targetEnemyRole?.distance.w);

      });

  }

  /**进行攻击 */

  attackActor() {

    if (this._CoolingTime.attackCoolingTime <= 0) {

      //进行攻击

      //判断暴击

      this.judgeCritical();

      this._parent._animControl.setAnimState("Attack", true, true);

    }

  }

  /**暴击判断 每次都需要运行 */

  judgeCritical() {

    if (Math.random() < this._parent._attribute._attribute.criticalChance) {

      this._parent._animControl.setAnimState("Critical", true);

    } else {

      this._parent._animControl.setAnimState("Critical", false);

    }

  }

  /**@name 冷却机制 */

  _CoolingTime: CoolingTimeType = {

    attackCoolingTime: 0,

  };

  /**@name 进行冷却 */

  doCooling(dt: number) {

    const keys = Object.keys(this._CoolingTime) as CoolingTimeTypeKeys[];

    for (const key of keys) {

      if (this._CoolingTime[key] > 0) {

        this._CoolingTime[key] -= dt;

        //给按钮进行冷却展示

        // console.log(`${key} 冷却中:` + this._CoolingTime[key]);

        // app.manager.ui.showToast(`${key} 冷却中:` + this._CoolingTime[key]);

      }

    }

  }

  /**伤害 */

  hurt(type: CoolingTimeTypeKeys) {

    //进行伤害和冷却处理

    this._parent._aiBrain.lockTarget._attackControl.Affected(this._parent);

    //冷却赋值

    this._CoolingTime[type] = this._parent._attribute._attribute[type];

  }

  /**被攻击后处理 */

  Affected(attacker: Actor, attackPower?: number) {

    //被攻击后处理

    // this._parent._animControl.setAnimState("Hurt", true, true);

    //给_attribute 进行数值计算

    this._parent._attribute.Affected(attacker._attribute, attackPower);

  }

}
这样就完美处理了目标和AI关联的逻辑问题
AI实现
ai的作用,就是判断位置 -状态管理 -空间位置维护 -发送清除目标 -攻击 -死亡 -复活
我把这些功能加入ai这个概念里面,后面会有更多的状态进入
update实时发送空间位置 去做九宫格的位置判断,如果选择了锁定了敌人,超出了九宫格范围,就直接点对点进行位置持续判断,就不用再遍历自身关联的多个敌人,
同时技能的范围伤害也可以通过这里来获取在范围内的所有敌人
这里区分了角色和敌人的逻辑
角色 暂时不需要巡逻等自动化,但需要锁定以及位置判断
敌人 需要整个接管操作,守卫 巡逻,观察周围,都是随机的,接近角色进行跟踪和攻击,也是直接发出命令进行实现
public update(dt: number) {
// if (this._stateTimeCooling > 0) {
// this._stateTimeCooling -= deltaTime;
// }
if (this.isDie) {
//处理死亡事件
return;
}
this._parent._moveControl.update(dt);
//检测周围
this.surroundingDetection();
//状态处理完以后进行位置的更新
this._setPositionToSpaceManager();
}
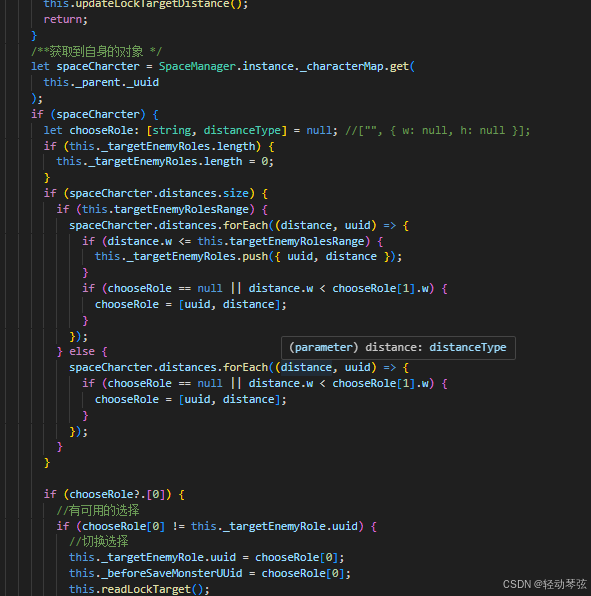
/**@name 锁定状态-实时进行目标的距离判断 */
updateLockTargetDistance() {
if (this._targetEnemyRole.uuid) {
this.readLockTarget();
if (!this.lockTarget) return;
//获取到了目标
//先获取没有超出的计算部分
let spaceCharcter = SpaceManager.instance._characterMap.get(
this._parent._uuid
);
if (this._targetEnemyRoles.length) {
this._targetEnemyRoles.length = 0;
}
//锁定时候恢复周围判断
if (this.targetEnemyRolesRange) {
spaceCharcter.distances.forEach((distance, uuid) => {
if (distance.w <= this.targetEnemyRolesRange) {
this._targetEnemyRoles.push({ uuid, distance });
}
});
}
let distance = spaceCharcter.distances.get(this._targetEnemyRole.uuid);
if (!distance) {
// 没有就要计算
distance = CalculateColliderDistanceOutWH(
this._parent.node.worldPosition,
this._parent._roleDatas.width_2,
this._parent._roleDatas.height_2,
this.lockTarget.node.worldPosition,
this.lockTarget._roleDatas.width_2,
this.lockTarget._roleDatas.height_2
);
// 展示
// this._parent.roleBrand?.changeTip(
// this._targetEnemyRole.uuid +
// "\\n-ao-" +
// distance.h +
// "\\n" +
// distance.w
// );
} else {
// 展示
// this._parent.roleBrand?.changeTip(
// this._targetEnemyRole.uuid +
// "\\n-a-" +
// distance.h +
// "\\n" +
// distance.w
// );
}
//更新当前数据缓存
this._targetEnemyRole.distance = distance;
// 联动敌人牌子
this.lockTarget._monsterShow.showBrand(true);
} else {
//解除锁定
this.lockTarget = null;
this._beforeSaveMonsterUUid = null;
}
}
/**清除锁定 */
unLockTarget() {
this._isLockTarget = false;
//清除一次对象 - 通过距离重新选择
this.clearLockTarget();
}
角色属性以及身份牌篇
身份牌是2d ,但主体是3d,这个纠结了很久,各种方法都可以实现,我最后选择了
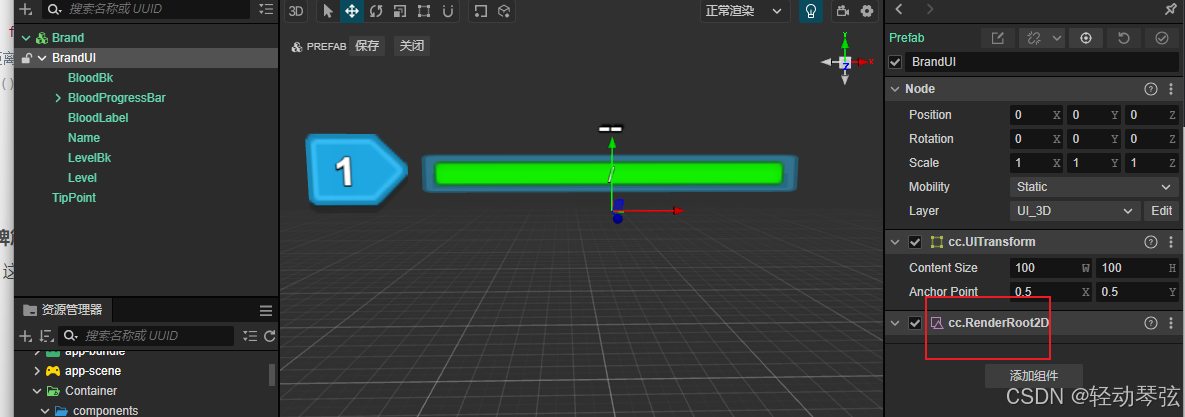
这样的方式来做,第一比较简单方便 第二也是比较简单方便 第三也是
(但是实际运行上 还是要考虑渲染顺序位置)
属性的话
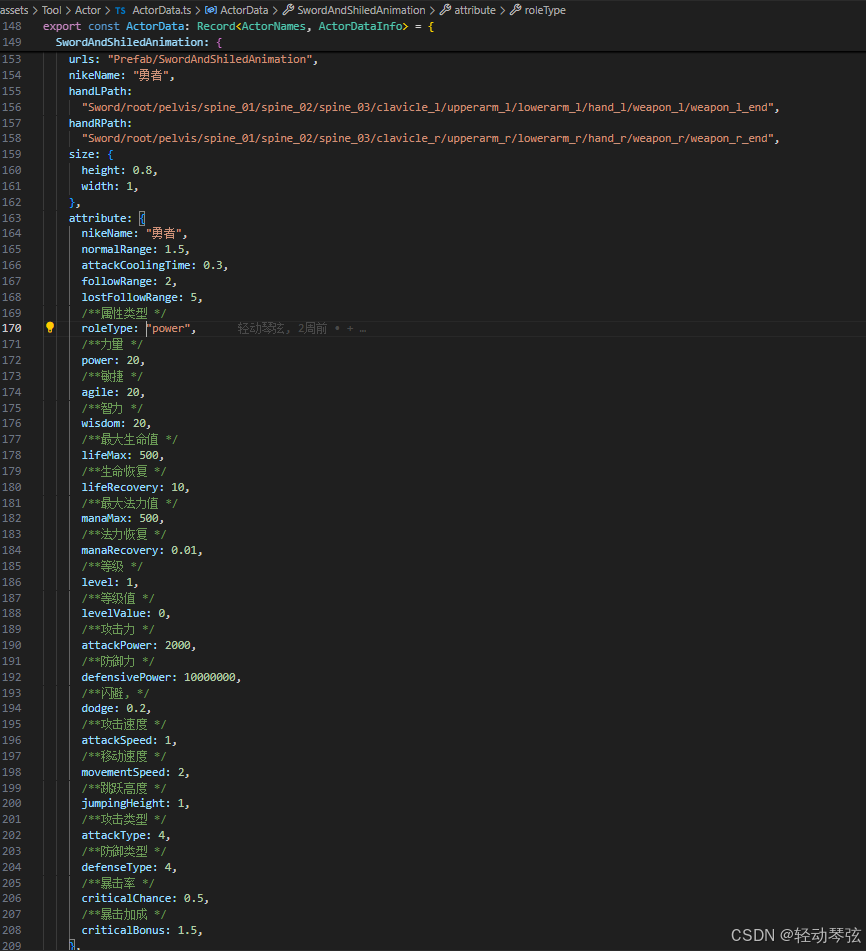
通过配置的方式来进行,在actor。ts进行实例化的时候,加载模型完成就要对对应的角色进行配置,初始等级,缩放大小等等
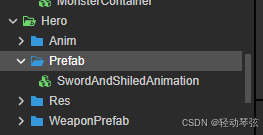
装备篇
我用的是动画图, 并不需要像骨骼动画一样挂点,但是也要实现自己的挂点,找到手的位置,封装好武器的角度和大小, 就直接add上去就好了 没什么其他的,我是加了一个武器的控制类, 可以自由切换武器
结尾
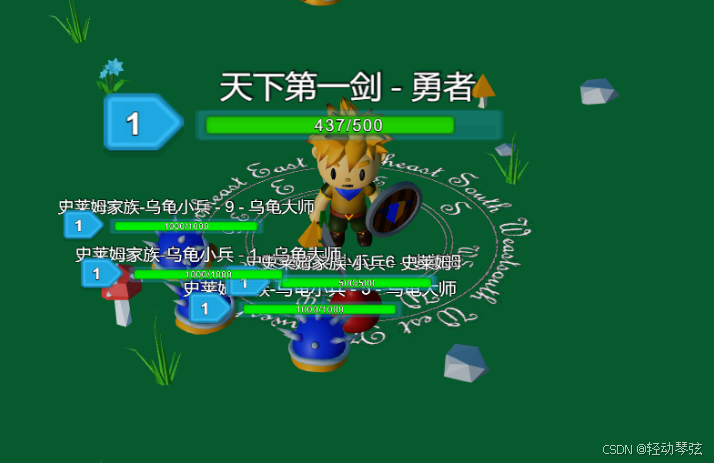
ok 到这里 已经可以看到,你可以控制你的角色 在这个平面上行走,打怪了。
[video(video-v4GhQnC3-1744685709590)(type-bilibili)(url-External Player - 哔哩哔哩嵌入式外链播放器)(image-https://i-blog.csdnimg.cn/img_convert/1406c37d4ef4ce2079b1e03d071bec74.jpeg)(title-守护域界-基础尝鲜版-3D自由开放世界逻辑基础)]