[image]
01
效果演示
Cocos Creator 版本:3.4.1
该 demo 演示了增加/删除角色、增加/删除障碍物、多角色寻路、动态规避障碍物、上/下坡度、显示/关闭导航网格及实时路径
[image]
02
导航网格简介
RecastNavigation :
https://github.com/recastnavigation/recastnavigation
谷歌开源的一款非常强大的寻路系统,被广泛的应用于各大游戏引擎中
demo 中的素材是取自该系统
Babylon.js:
https://doc.babylonjs.com/extensions/crowdNavigation
微软开源的基于 web 的 3D 游戏引擎
recast.js 也是取自该引擎
个人理解:
根据一系列 mesh 中的顶点信息,实时计算可达路径
03
准备工作
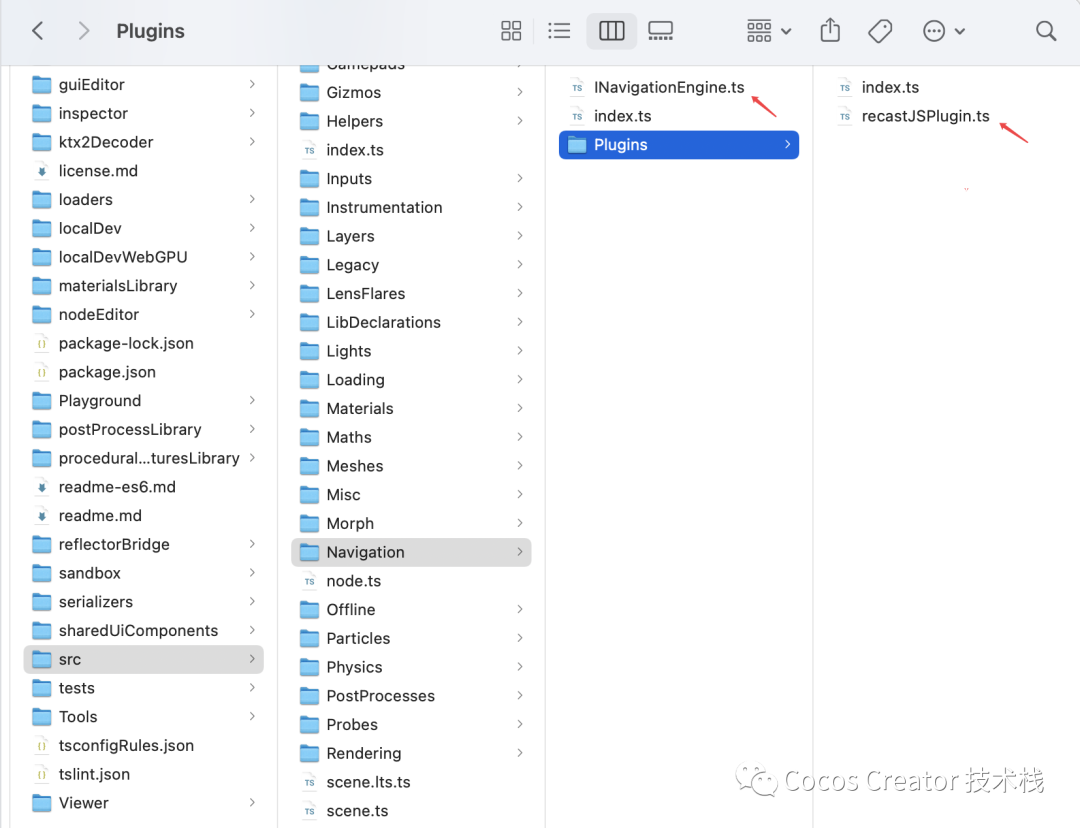
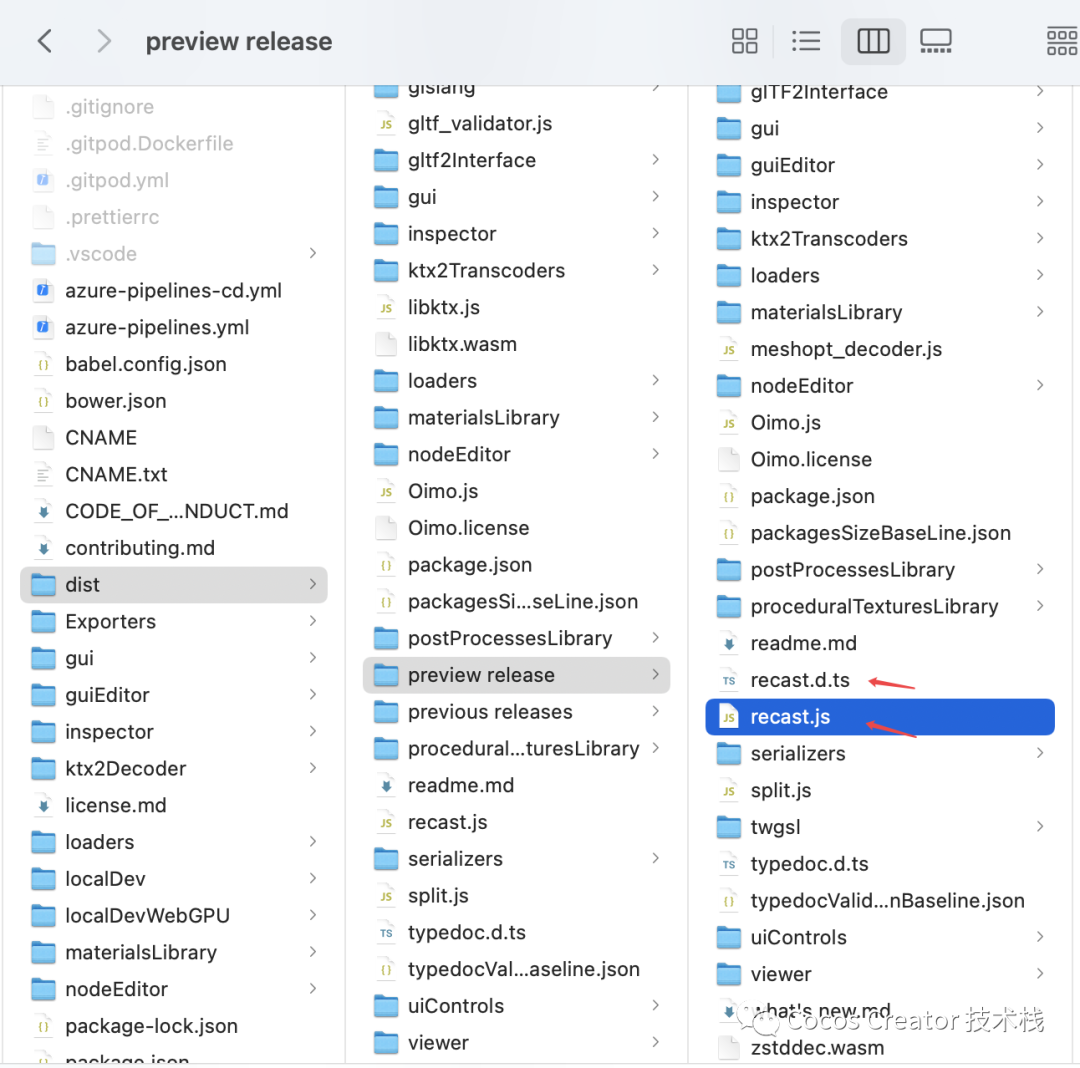
1拷贝相关代码
将 Babylon.js 源码中 recast.js 相关的代码拷贝到自己的项目中
[image]
[image]
把 INavigationEngine.ts 和 recastJSPlugin.ts 看一遍,便可以基本了解他们的使用方法
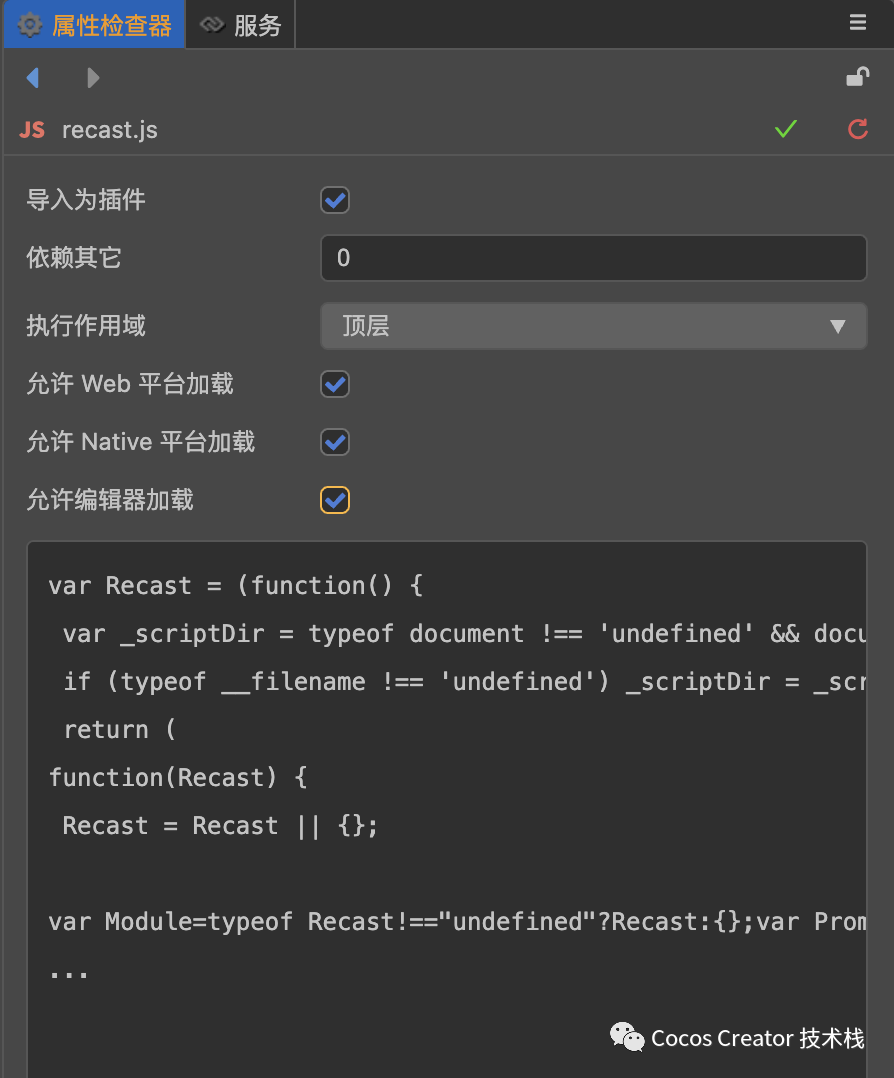
2 导入 recast.js
这里将 recast.js 以插件脚本的形式导入
关于插件脚本的官方文档:
https://docs.cocos.com/creator/manual/zh/scripting/external-scripts.html
[image]
04
实现方法
Babylon.js 中有详细的使用介绍以及参数说明:
https://doc.babylonjs.com/extensions/crowdNavigation/createNavMesh
1初始化 recast.js
之前已经将 recast.js 以插件脚本的形式导入了,这里可以直接使用
let recastInjection = await new Recast();
this.recastJSPlugin = new RecastJSPlugin(recastInjection);
2 初始化 NavMesh
根据场景需求设定合适的导航网格参数,每个参数的意义在 d.ts 中都有详细的说明
let navmeshParameters: INavMeshParameters = {
cs: 0.2,
ch: 0.2,
walkableSlopeAngle: 35,
walkableHeight: 3,
walkableClimb: 2,
walkableRadius: 1,
maxEdgeLen: 12.0,
maxSimplificationError: 1.3,
minRegionArea: 8,
mergeRegionArea: 20,
maxVertsPerPoly: 6,
detailSampleDist: 6,
detailSampleMaxError: 1,
tileSize: 16,
};
this.recastJSPlugin.createNavMesh(meshRenderers, navmeshParameters);
this.recastJSCrowd = this.recastJSPlugin.createCrowd(10, 1) as RecastJSCrowd;
这里需要对 recastJSPlugin.ts 中的 createNavMesh 做一下适配,根据 cocos 的 mesh 创建导航网格
其中 meshRenderers 的类型为 MeshRenderer[],我们收集需要的模型来构建导航网格
为了收集方便,我们可以将模型都集中到一个节点下,然后通过下面的代码来获取该节点下所有的 MeshRenderer 组件
node.getComponentsInChildren(MeshRenderer);
[image]
根据 MeshRenderer 组件可以获取该模型中 mesh 的顶点位置及索引数据
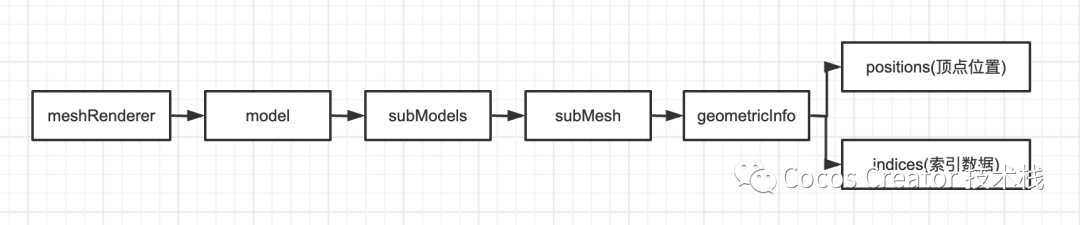
[image]
不过这里获得的顶点位置是相对坐标,我们需要转换成世界坐标
for (pt = 0; pt < info.positions.length; pt += 3) {
Vec3.fromArray(position, info.positions, pt);
Vec3.transformMat4(transformed, position, worldMatrix);
positions.push(transformed.x, transformed.y, transformed.z);
}
最后将收集到的所有顶点位置和索引数据传递给 NavMesh,以此来构建导航网格
let { positions, offset, indices } = this.getMeshData(meshRenderers);
this.navMesh.build(positions, offset, indices, indices.length, rc);
3 角色
· 创建角色
根据角色形象设定合适的角色参数,同样可以在 d.ts 中找到参数的详细说明
addAgent 返回该角色的唯一 ID,后续的一系列操作都要基于该 ID
addAgent(position: Vec3, agentParams?: IAgentParameters) {
position = this.recastJSPlugin.getClosestPoint(position);
if (!agentParams) {
agentParams = {
radius: 0.5,
height: 1,
maxAcceleration: 20,
maxSpeed: 6,
collisionQueryRange: 2.5,
pathOptimizationRange: 0,
separationWeight: 1,
};
}
let agentIndex = this.recastJSCrowd.addAgent(position, agentParams);
return agentIndex;
}
· 删除角色
根据角色 ID,删除该角色
this.recastJSCrowd.removeAgent(id);
[image]
4 寻路
根据角色 ID,导航至目的地,如果目的地不可达,会自动导航至离目的地最近的位置
this.navMeshAgent.agentGoto(agentID, targetPosition);
[image]
也可以主动获取目的地最近的可达位置,然后导航至此
this.recastJSPlugin.getClosestPoint(position);
[image]
需要在 update 中驱动导航网格,才能实时获取到角色的最新状态
update(deltaTime: number) {
if (this.recastJSCrowd) {
this.recastJSCrowd.update(deltaTime);
}
}
根据角色 ID,获取角色在导航网格中的坐标,设置其位置
node.setPosition(this.recastJSCrowd.getAgentPosition(id));
[image]
根据角色 ID,获取角色当前的速度向量,设置其朝向
为了避免发生一些鬼畜行为,这里对速度向量做一个过滤
let vel = this.navMeshAgent.getAgentVelocity(id);
if (vel.length() > 0.2) {
node.forward = vel;
}
5 障碍物
· 创建障碍物
recast.js 提供了两种障碍物类型的动态创建
圆柱体:
let obstacle = this.recastJSPlugin.addCylinderObstacle(position, radius, height);
[image]
立方体:
let obstacle = this.recastJSPlugin.addBoxObstacle(position, extent, angle);
[image]
· 删除障碍物
根据创建障碍时返回的信息可以直接删除
this.recastJSPlugin.removeObstacle(obstacle);
[image]
6 调试信息
· 导航网格
创建导航网格显示所需的节点及材质
initDebugNavMesh() {
this.debugMaterial = new Material();
this.debugMaterial.initialize({
effectName: "unlit",
defines: {
// USE_ALBEDO_MAP: true,
},
states: {
primitive: gfx.PrimitiveMode.LINE_STRIP,
rasterizerState: {
cullMode: gfx.CullMode.NONE,
}
},
});
this.debugMaterial.setProperty("mainColor", Color.RED);
this.nodeDebugNavMesh = new Node("DebugNavMesh");
let meshRenderer = this.nodeDebugNavMesh.addComponent(MeshRenderer);
meshRenderer.setMaterial(this.debugMaterial, 0);
this.nodeDebugNavMesh.parent = director.getScene();
}
recast.js 中获取导航网格信息后,使用 utils.createMesh 创建 mesh,然后赋值给 meshRenderer
let mesh = utils.createMesh({ positions: positions, indices: indices, doubleSided: false, primitiveMode: gfx.PrimitiveMode.LINE_STRIP });
meshRenderer.mesh = mesh;
· 路径
recast.js 可以根据起始点和目标点计算出当前路径,但该路径不是一成不变的
let pathPoints = this.recastJSPlugin.computePath(start, end);
[image]
然后使用 Line 组件将该路径画出来
let node = new Node();
node.parent = agent;
let linePath = node.addComponent(Line);
linePath.worldSpace = true;
linePath.width.constant = 0.2;
linePath.color.color = Color.GREEN;
linePath.positions = pathPoints;