Cocos Shader辍学笔记1-UV应用
本期效果预览:体验传送门
UV介绍
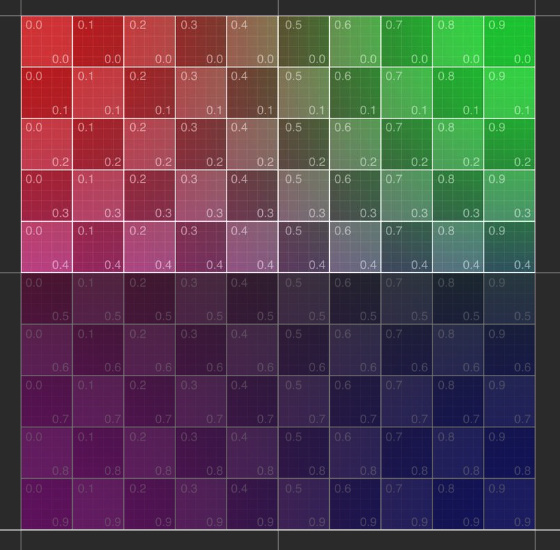
命名为UV的原因是x,y,z被3D用了, 为了和3D区分开, 所以用了UV命名。其中U是指水平方向坐标轴, V是竖直方向坐标轴,UV的范围都是0到1
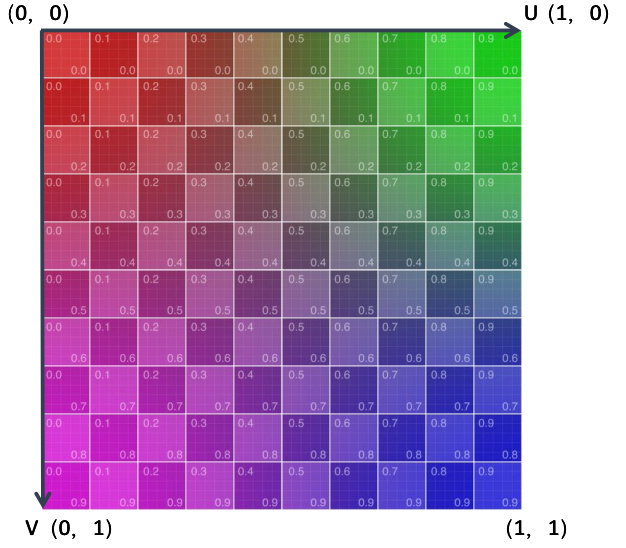
在Cocos内,纹理和图片像素的垂直轴,以及在着色器中对纹理进行采样时,都是下指向的,即从上到下,所以原点默认是在左上角。
这与大多数图像文件格式存储像素数据的方式一致,也与大多数图形 API 的工作方式一致(包括 DirectX、Vulkan、Metal、WebGPU,但 OpenGL 除外 )。
由于与 OpenGL(以及基于它的框架)不同。如果你以前的开发经验是基于 OpenGL,用同样的方式开发 Cocos 游戏的shader,你可能会发现你的网格上的纹理是垂直翻转的。你必须要以左上角作为UV的原点,做一下调整 。
UV 也与 Cocos 中其他地方使用的世界坐标系(Y 轴指向上方,如下图)不一致,通过世界坐标计算UV位置的时候也需要注意这个问题。

在Shader内使用UV
Cocos 2D 精灵的Shader和3D Mesh的的UV都是在顶点着色器(VS)中获得,并传入像素着色器中(FS)。
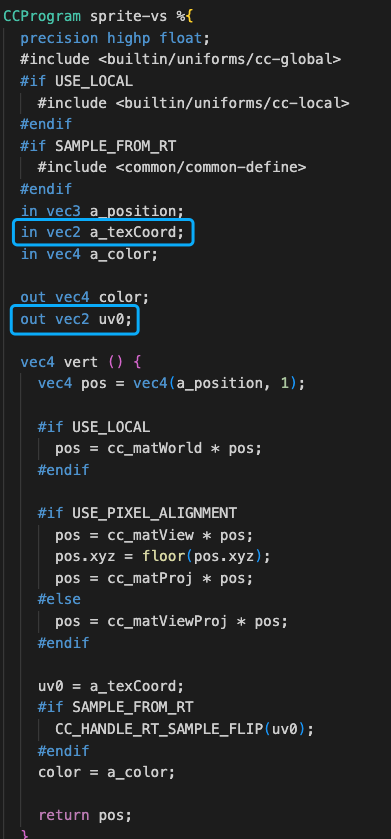
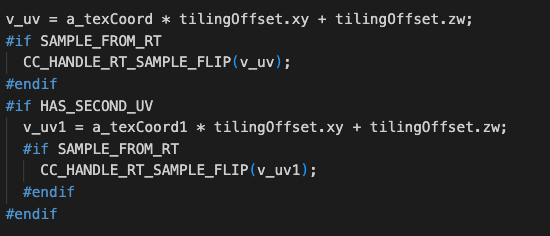
在Cocos的 3D的Shader 默认会乘以平铺Tilling系数并加上Offset偏移系数,同时支持RenderTexture的翻转修复。
下面展示一个UV应用的小效果
 vec4 frag () {
    vec4 col = mainColor * texture(mainTexture, v_uv);

    vec2 uv = v_uv;

    if(uv.y>0.5){
      col.rgb *= 0.5;
    }

    CC_APPLY_FOG(col, v_position);
    return CCFragOutput(col);
  }
当UV 的V大于 0.5 时候,这里把颜色的RGB都乘0.5,使颜色变暗。
动态改变这个数值,就可以实现简单的动画效果。
UV在Shader中的更多应用
UV可以广泛的使用在如帧动画,水波纹等效果中。
其中帧动画部分可以参考麒麟子的文章:传送门
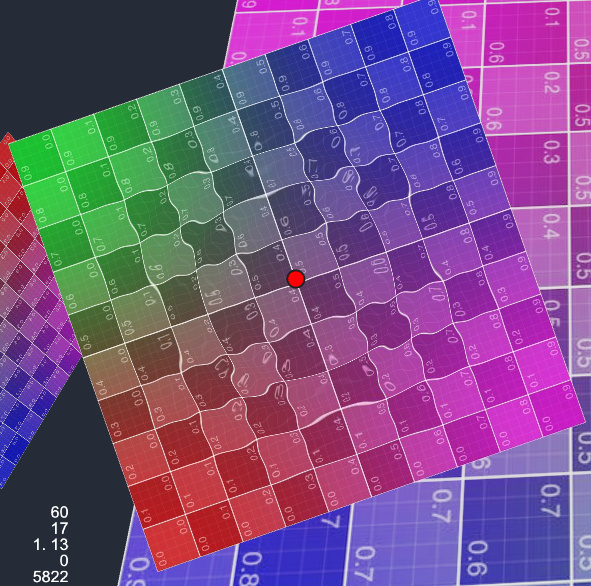
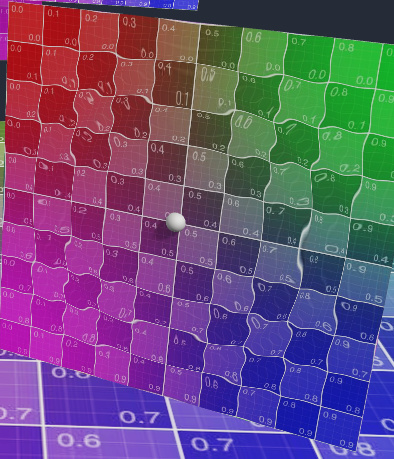
这里分别介绍下在2D精灵和3D的面片上实现水波纹效果:体验传送门
参考地址:传送门
实现思路大同小异,通过Sin函数波动模拟水波,再在Update函数内增加波动的范围。
vec2 waveOffset (in vec2 uv0) {
      float waveWidth = 0.25;
      vec2 uv = uv0;
      #if USE_WAVE
      vec2 clickPos = vec2(waveFactor.x-uv0.x,waveFactor.y-uv0.y);
      float dis = sqrt(clickPos.x * clickPos.x + clickPos.y * clickPos.y);
      float discardFactor = clamp(waveWidth - abs(waveFactor.w - dis), 0.0, 1.0)/waveWidth;
      float sinFactor =  sin(dis * 100.0 + waveFactor.z * 10.0) * 0.01;
      vec2 offset = normalize(clickPos) * sinFactor * discardFactor;
      uv += offset;
      #endif
      return uv;
  }
这里简单做了一些优化,UV在外部提前计算好(为了方便动画效果),使用1个Vec4进行Shader参数设置,减少开销。
2D精灵上实现水波纹效果
@ccclass('spTouchExample')
export class spTouchExample extends Component {

    @property
    waveDis = 0.4;
    @property
    waveSpeed = 1;
    @property
    waveStr = 0.5;
    @property(Node)
    debug: Node = null;

    @property(Label)
    debugText: Label = null;

    public waveProp: Vec4 = new Vec4();

    private _trans: UITransform;
    private _pass: renderer.Pass;
    private _handle: number;

    start() {
        this._trans = this.node.getComponent(UITransform);

        this._pass = this.node.getComponent(Sprite).material.passes[0];

        this.waveProp.w = 100;

        this.waveProp.z = this.waveStr;

        this._handle = this._pass.getHandle("waveFactor");

    }

    onEnable() {

        this.node.on(Node.EventType.TOUCH_START, this.onTouchStart, this);
    }

    onDisable() {

        this.node.off(Node.EventType.TOUCH_START, this.onTouchStart, this);

    }

    onTouchStart(event: EventTouch) {

        const touch = event.touch;

        touch.getUILocation(v2_0);

        v3_0.set(v2_0.x, v2_0.y);

        this._trans.convertToNodeSpaceAR(v3_0, v3_0);

        this.debug.setPosition(v3_0);

        const size = this._trans.contentSize;

        const x = size.x;

        const y = size.y;

        v4_0.x = (x * 0.5 + v3_0.x) / x;

        v4_0.y = 1 - (y * 0.5 + v3_0.y) / y;

        v4_0.w = 0;

        this.waveProp.set(v4_0);

        this.debugText.string = "Clicked: " + this.node.name + "  UV: " + v4_0.x.toFixed(2) + ", " + v4_0.y.toFixed(2);

    }


    update(dt) {

        if (this.waveProp.w < 100) {

            this.waveProp.w += dt * this.waveSpeed;
            if (this.waveProp.w > this.waveDis) {
                this.waveProp.w = 100;
            }
            this._pass.setUniform(this._handle, this.waveProp);

        }

    }


}
这里在图片节点上添加了点击的监听,把点击的UI世界坐标,转换成了图片的本地坐标,再用本地坐标和图片的长宽算出UV的位置,在update里设置材质的uniform参数。
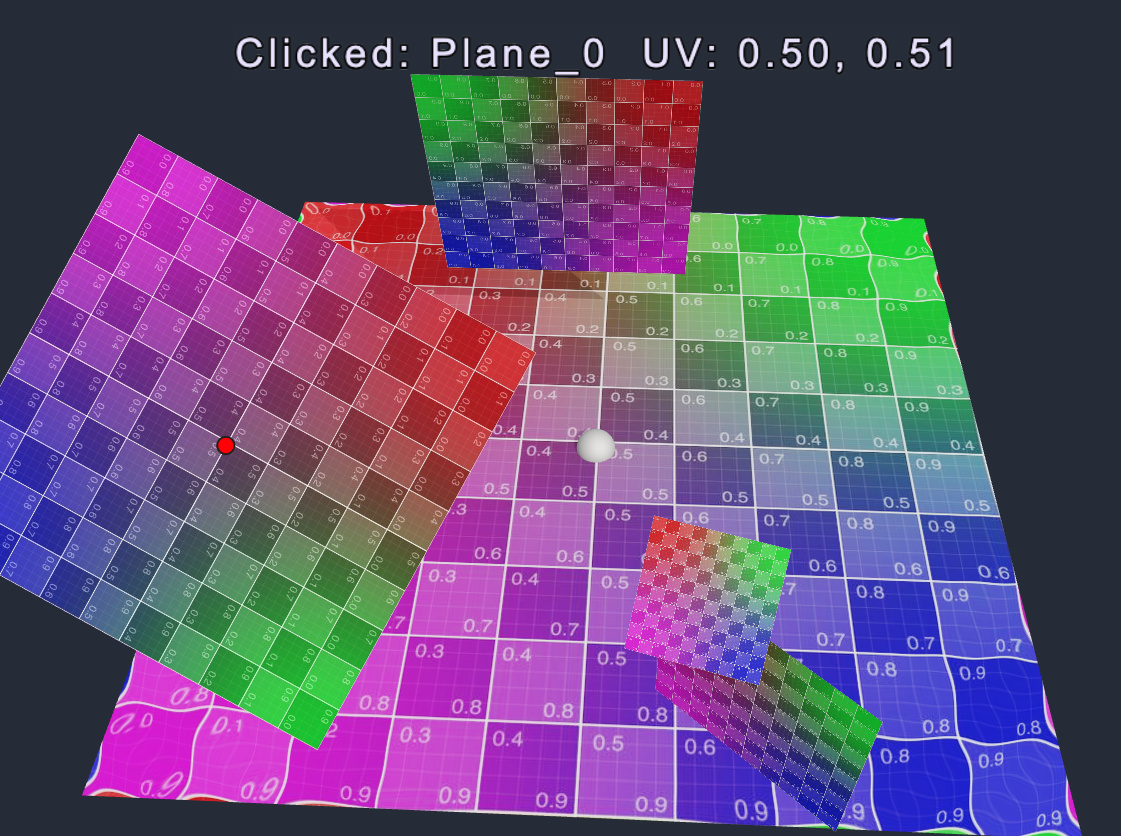
3D面片上实现水波纹效果
这里只针对UV Mapping时候平铺的3D面片。
onTouchStart(event: EventTouch) {
        const touch = event.touch!;
        this.cameraCom.screenPointToRay(touch.getLocationX(), touch.getLocationY(), this._ray);
        this.rayHit();

    }

    /* check model hit */
    rayHit() {
        let distance = 300;
        let mesh: MeshRenderer
        for (let v of this.meshes) {
            let dis = geometry.intersect.rayModel(this._ray, v.model);
            if (dis && dis < distance) {
                distance = dis;
                mesh = v;
            }
        }

        if (mesh) {
            this._ray.computeHit(v3_0, distance);
            const node = mesh.node;
            m4_0.set(node.worldMatrix);
            const halfSize = mesh.model.modelBounds.halfExtents;

            const scale = halfSize.x * 0.1 * node.scale.x;

            this.debug.setWorldPosition(v3_0);

            this.debug.setScale(scale, scale, scale);

            m4_0.invert();
            Vec3.transformMat4(v3_0, v3_0, m4_0)


            if (halfSize.y == 0) {

                const x = halfSize.x;
                const z = halfSize.z;

                v4_0.x = (x + v3_0.x) / (x * 2);
                v4_0.y = (z + v3_0.z) / (z * 2);
            } else {
                const x = halfSize.x;
                const y = halfSize.y;
                v4_0.x = (x + v3_0.x) / (x * 2);
                v4_0.y = (y - v3_0.y) / (y * 2);
            }

            v4_0.w = 0.1;

            const meshCtrl = node.getComponent(meshTouchCtrl);

            meshCtrl.waveProp.set(v4_0);

            this.debugText.string = "Clicked: " + node.name + "  UV: " + v4_0.x.toFixed(2) + ", " + v4_0.y.toFixed(2);

        }
    }
这里通过屏幕射线检测到点击的位置。
在计算UV的时候会有所不同,通过点击位置的世界坐标乘以面片节点的世界矩阵的逆矩阵,把点击位置的世界坐标转换为在面片节点的下的本地坐标,这里还需要点击的物体判断是面片Quad还是地面Plane(Cocos内置的基础几何体,通过半包围确认),算出点击位置所在的UV坐标。
写在最后
还在假期综合症,先水到这里,喜欢的同学可以顶贴或点赞支持一下喔
源码版本3.7:
learnShader.zip (145.5 KB)
下期预告!Cyberpunk的斯安威斯坦,军用义体的残影渐变效果,如何分别在2D游戏和3D游戏实现?如何借助instancedarribute 合批各种效果?