
接上篇:
小白也能写框架之【六、音频管理器】
说明:
这个事件管理器借鉴了商城的一个事件系统
之前自己写了N个,但是实际开发中都不理想,包括使用了cocos自带的EventTarget都差点效果
目前这个事件管理器除了常规的监听订阅、发布、销毁,还有一个很重要的数据持久化功能。
举个例子:
我使用websocket通信需要进行加密,那么和服务端握手后,会得到来自服务端发送的通信加密key
然后我又不想把key暴露到本地保存,但是可以使用数据持久化保存这个key
一、上主菜
assets\Core\Scripts\Managers\EventMgr.ts
/**

 * 事件管理器

 * 该类用于管理事件的注册、触发和注销。

 */

class EventMgr {

    /** 唯一ID生成器,用于为每个事件处理器分配唯一的ID */

    private uniqueId = 0;

    /** 存储所有事件处理器,键为唯一ID */

    private handlers: { [id: number]: { callback: Function, target: any, key: string; }; } = {};

    /** 存储每个目标对象对应的事件处理器ID集合 */

    private targetMap: Map<any, Set<number>> = new Map();

    /** 存储每个事件名对应的事件处理器ID集合 */

    private keyMap: Map<string, Set<number>> = new Map();

    /** 存储每个目标对象对应的事件名和处理器ID的映射 */

    private targetKeyMap: Map<any, { [key: string]: number; }> = new Map();

    /** 存储持久化的数据,键为事件名 */

    private persistentData: { [key: string]: any; } = {};

    /** 存储粘性事件的数据,键为事件名 */

    private stickyData: { [key: string]: any; } = {};

    /** 私有构造函数,确保外部无法直接通过new创建实例 */

    private constructor() {}

    /** 单例实例 */

    public static readonly instance: EventMgr = new EventMgr();

    /**

     * 注册事件

     * @param key 事件名

     * @param callback 回调函数,当事件触发时调用

     * @param target 回调函数的上下文(默认值为 {})

     */

    public on(key: string, callback: (data: any) => void, target: any = {}) {

        const id = this.getOrCreateId(key, target);

        this.handlers[id] = { callback, target, key };

        this.addIdToMap(this.targetMap, target, id);

        this.addIdToMap(this.keyMap, key, id);

        const sticky = this.stickyData[key];

        if (sticky) {

            callback.call(target, sticky);

            delete this.stickyData[key];

        }

    }

    /**

     * 触发事件

     * @param key 事件名

     * @param data 传递给回调函数的数据

     * @param options 其他参数

     *  persistence 是否持久化数据

     *  sticky 传1则为粘性事件

     */

    public emit(key: string, data?: any, options: { persistence?: boolean, sticky?: number; } = {}) {

        if (options.persistence) this.persistentData[key] = data;

        const ids = this.keyMap.get(key);

        if (ids) {

            ids.forEach(id => {

                const { callback, target } = this.handlers[id];

                callback.call(target, data);

                if (options.sticky === 1) options.sticky = -1;

            });

        }

        if (options.sticky === 1) this.stickyData[key] = data;

    }

    /**

     * 获取持久化数据

     * @param key 事件名

     * @returns 持久化的数据

     */

    public getPersistentData(key: string) {

        return this.persistentData[key];

    }

    /**

     * 注销事件

     * @param key 事件名

     * @param target 目标对象

     */

    public off(key: string, target: any) {

        const targetKeys = this.targetKeyMap.get(target);

        if (targetKeys) this.removeHandler(targetKeys[key]);

    }

    /**

     * 注销目标对象的所有事件

     * @param target 目标对象

     */

    public offAllByTarget(target: any) {

        this.removeAllHandlers(this.targetMap.get(target));

    }

    /**

     * 注销某个事件名的所有事件

     * @param key 事件名

     */

    public offAllByKey(key: string) {

        this.removeAllHandlers(this.keyMap.get(key));

    }

    /**

     * 获取或创建唯一ID

     * @param key 事件名

     * @param target 目标对象

     * @returns 唯一ID

     */

    private getOrCreateId(key: string, target: any): number {

        let targetKeys = this.targetKeyMap.get(target) || {};

        const id = targetKeys[key] || ++this.uniqueId;

        targetKeys[key] = id;

        this.targetKeyMap.set(target, targetKeys);

        return id;

    }

    /**

     * 移除处理器

     * @param id 处理器ID

     */

    private removeHandler(id: number) {

        const handler = this.handlers[id];

        if (!handler) return;

        const { target, key } = handler;

        delete this.targetKeyMap.get(target)[key];

        this.targetMap.get(target).delete(id);

        this.keyMap.get(key).delete(id);

        delete this.handlers[id];

        delete this.persistentData[key];

    }

    /**

     * 移除所有处理器

     * @param ids 处理器ID集合

     */

    private removeAllHandlers(ids: Set<number>) {

        if (ids) ids.forEach(id => this.removeHandler(id));

    }

    /**

     * 将ID添加到映射中

     * @param map 映射

     * @param key 键

     * @param id ID

     */

    private addIdToMap(map: Map<any, Set<number>>, key: any, id: number) {

        const set = map.get(key) || new Set();

        set.add(id);

        map.set(key, set);

    }

}

/** 事件管理器实例 */

export const eventMgr = EventMgr.instance;
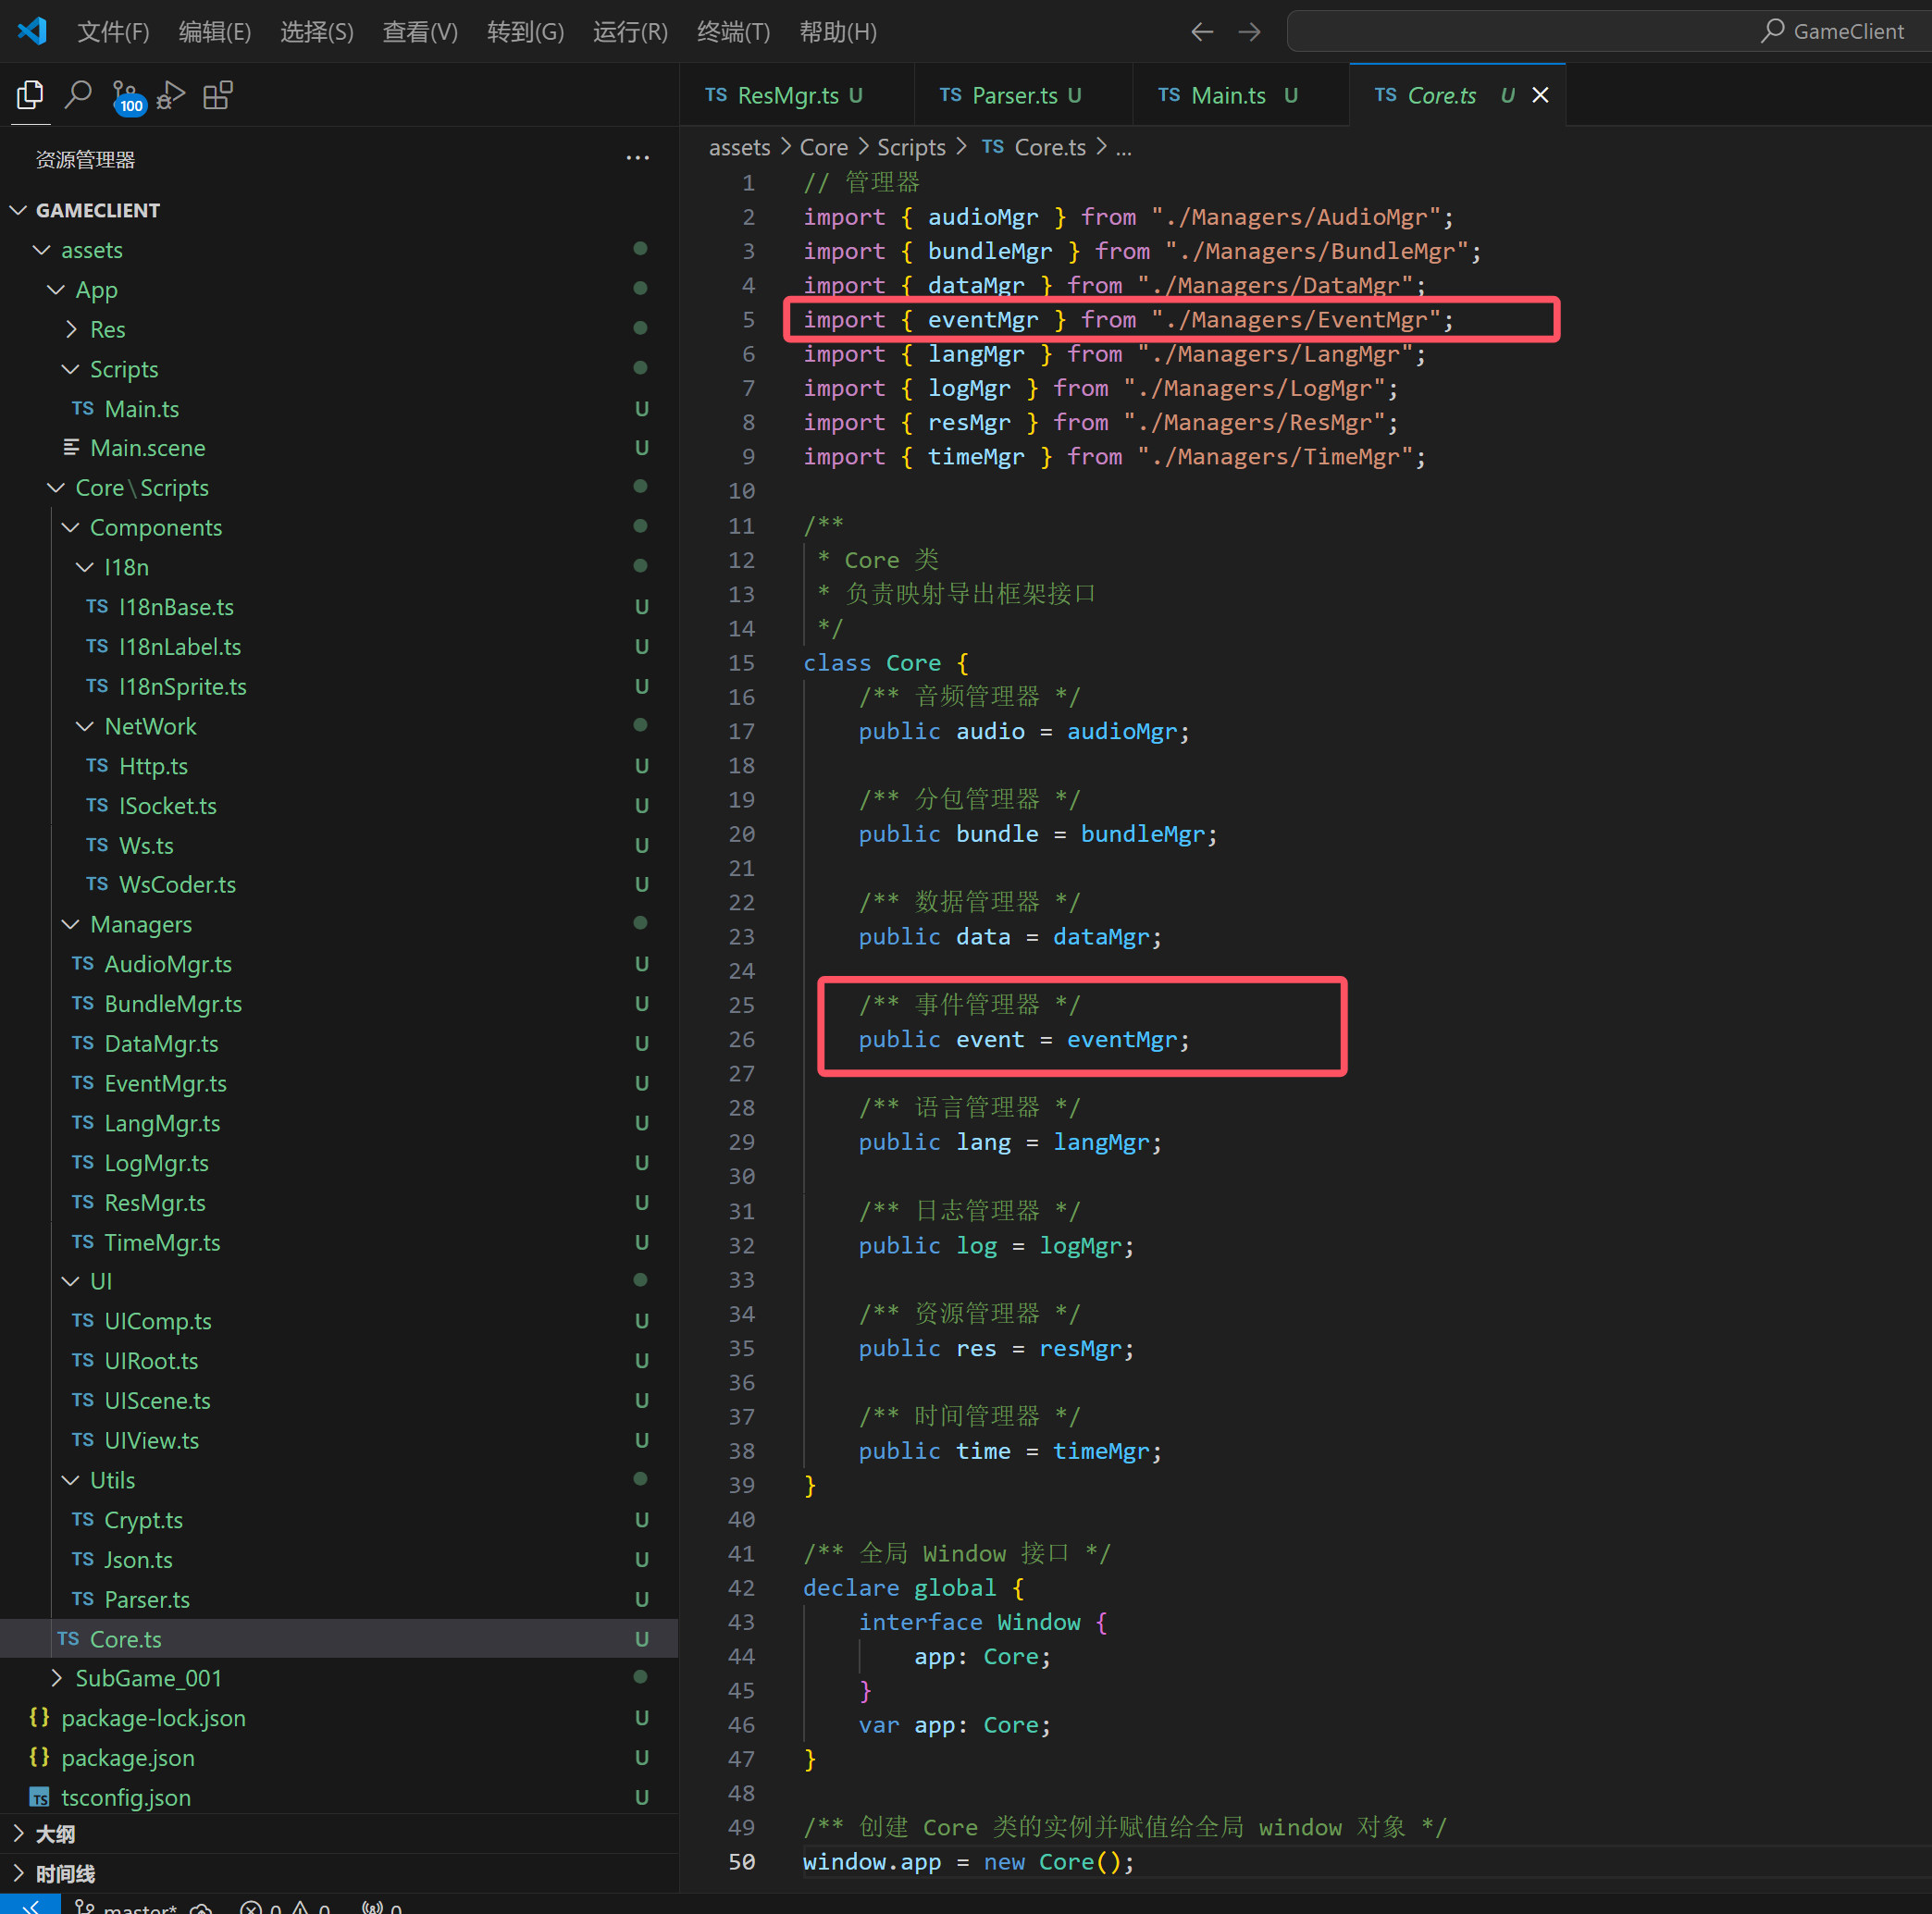
二、全局映射
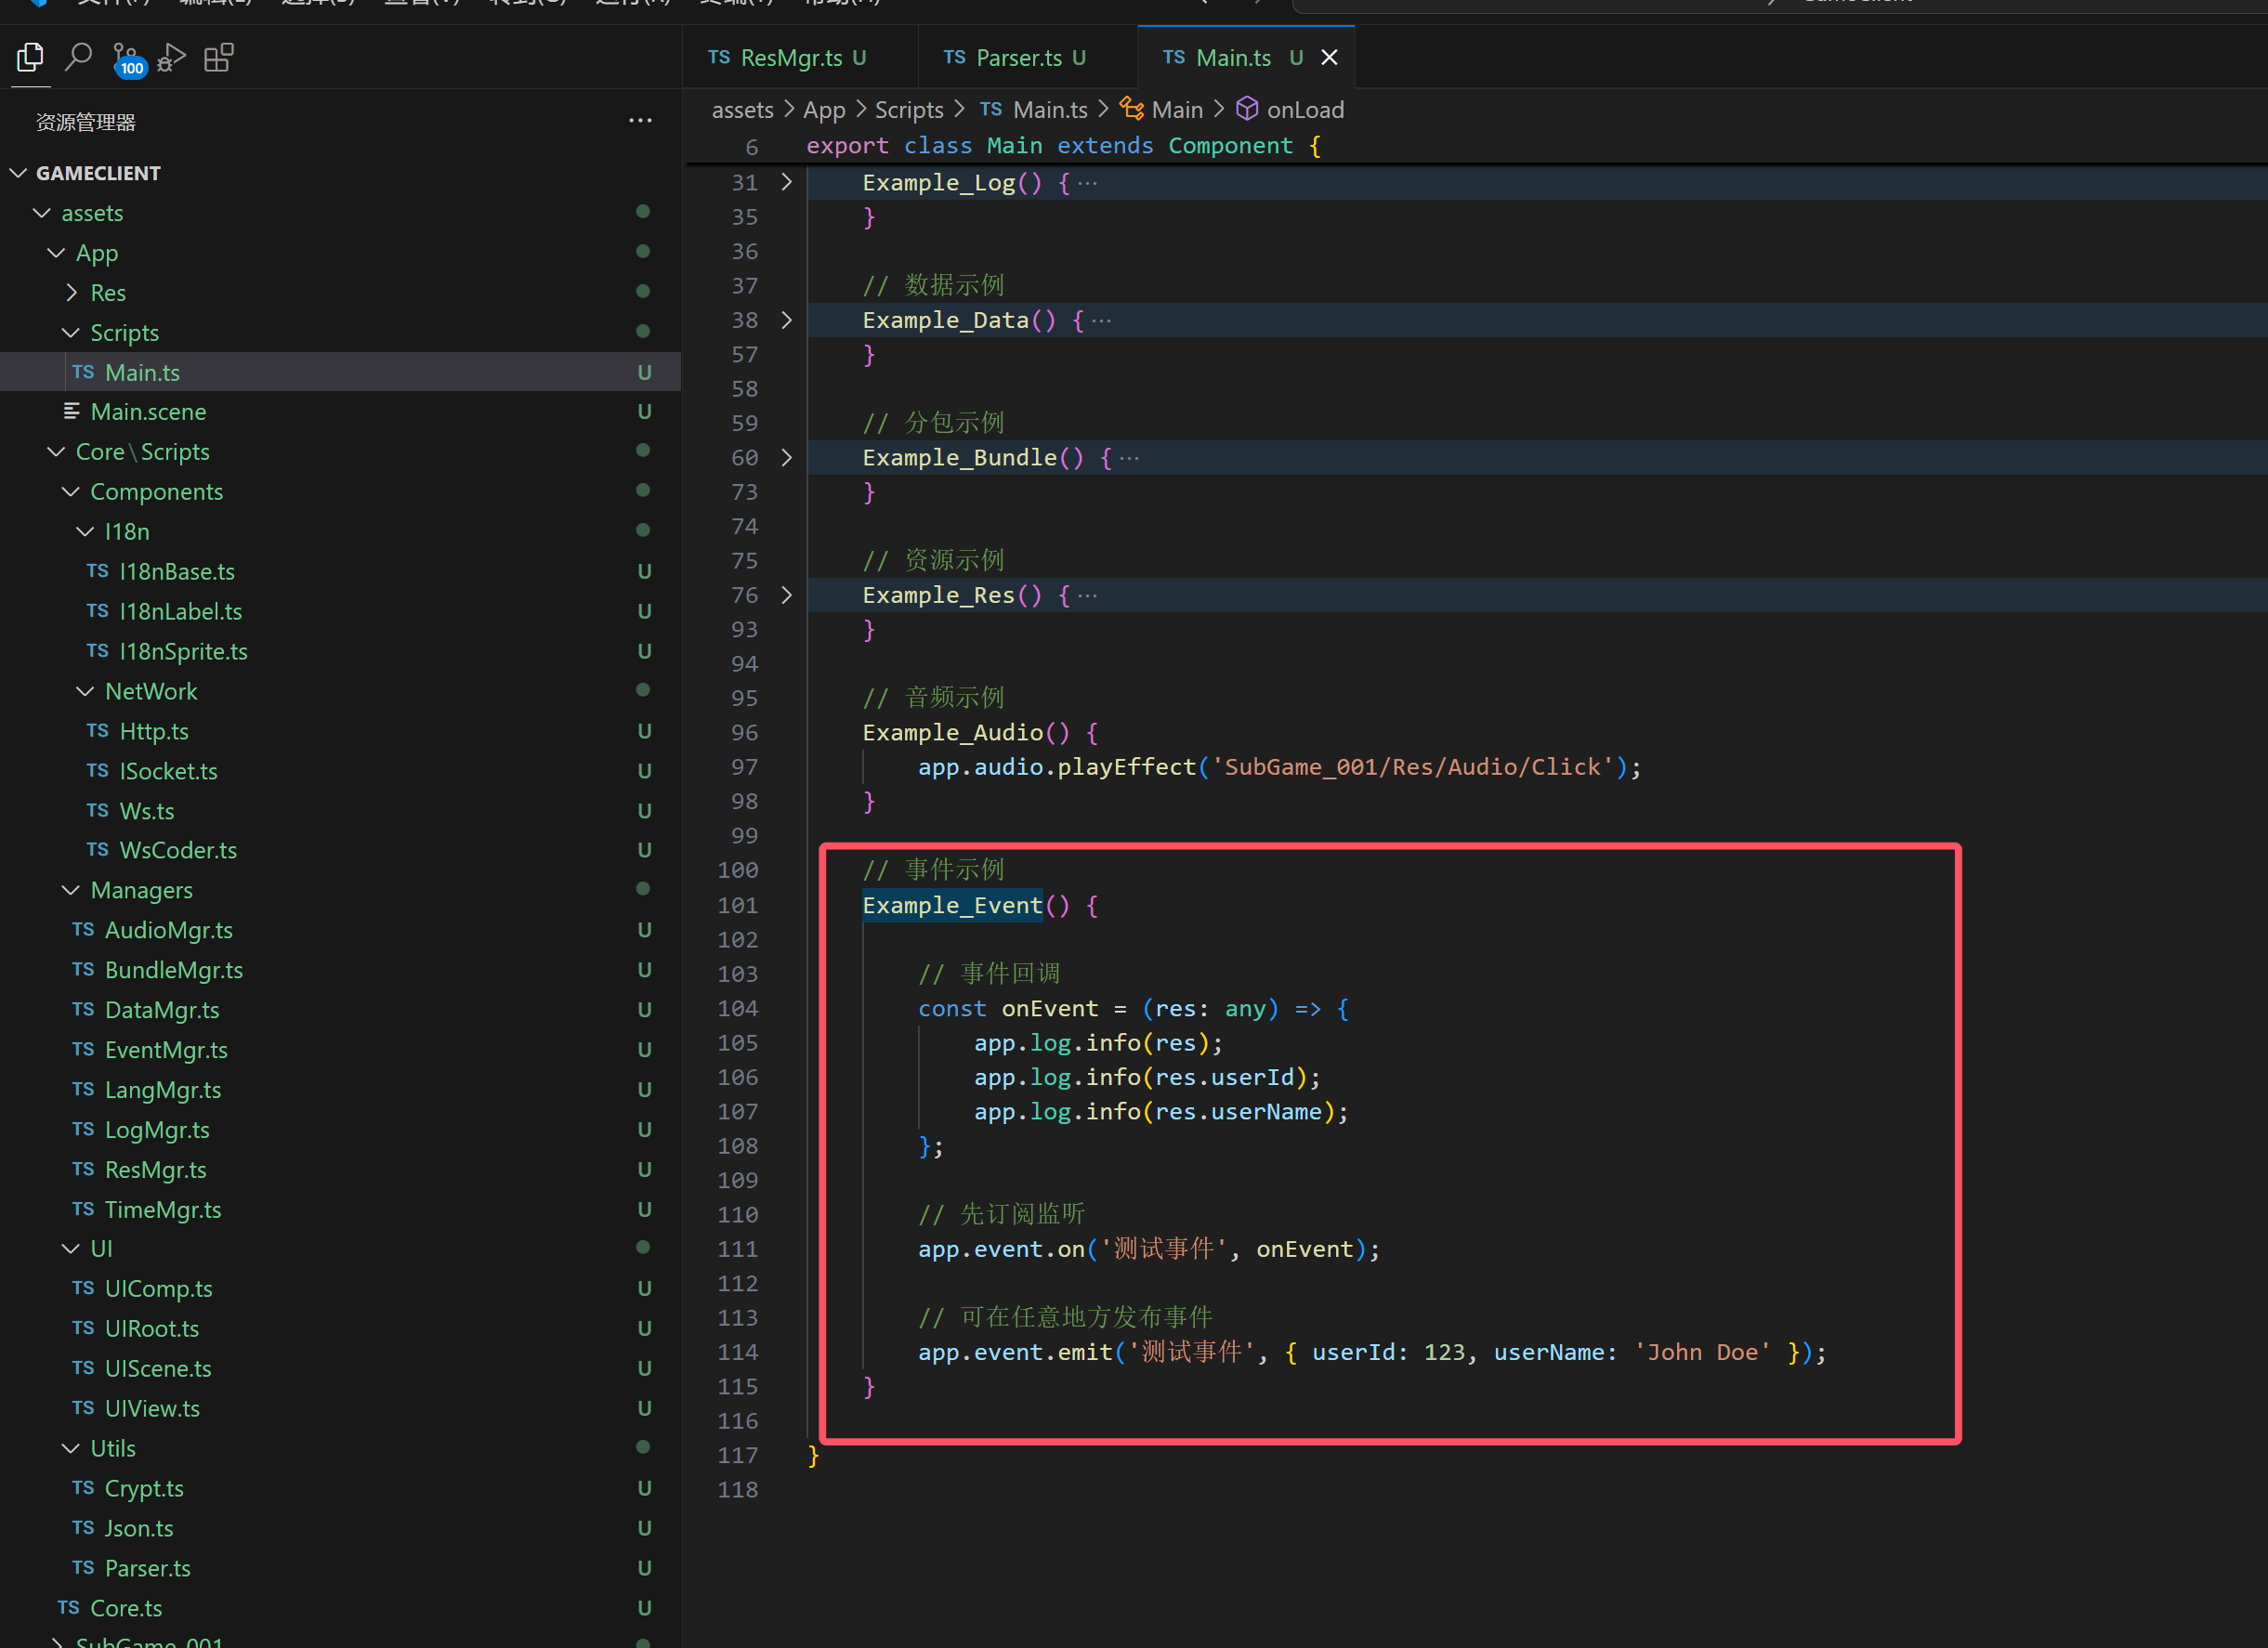
三、使用示例
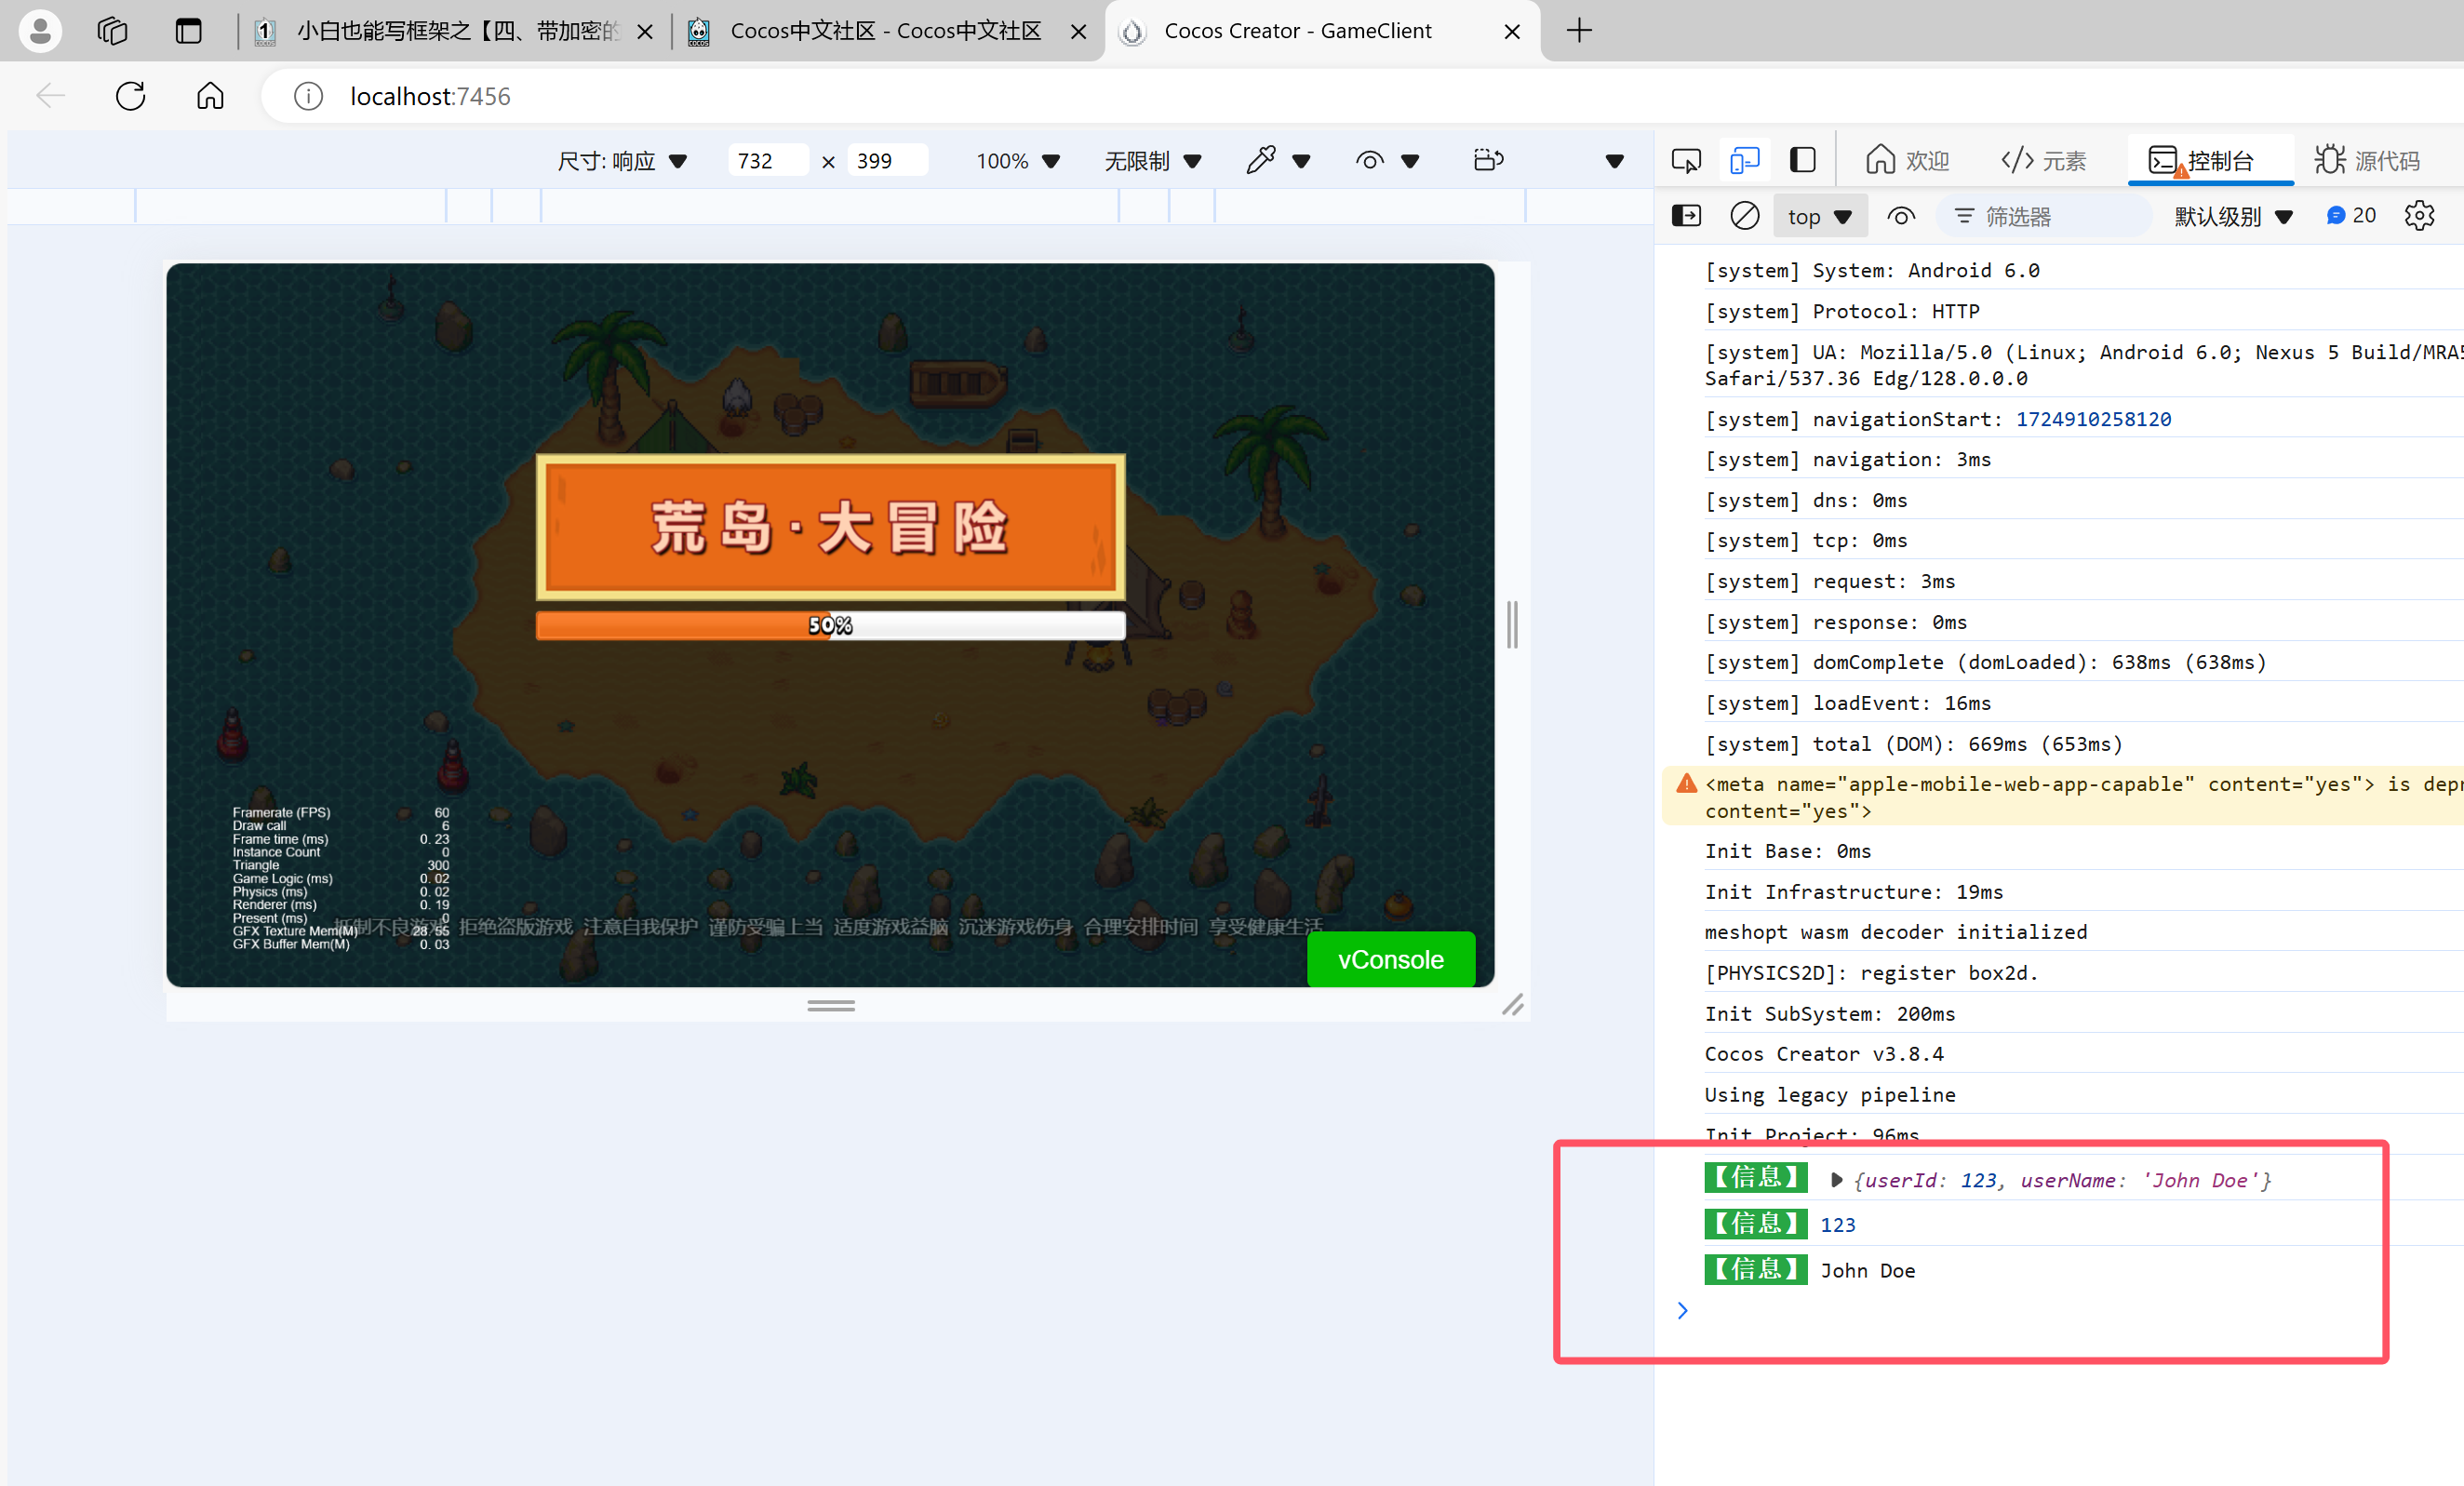
四、效果展示
下一篇预告:
小白也能写框架之【八、任务管理器】
