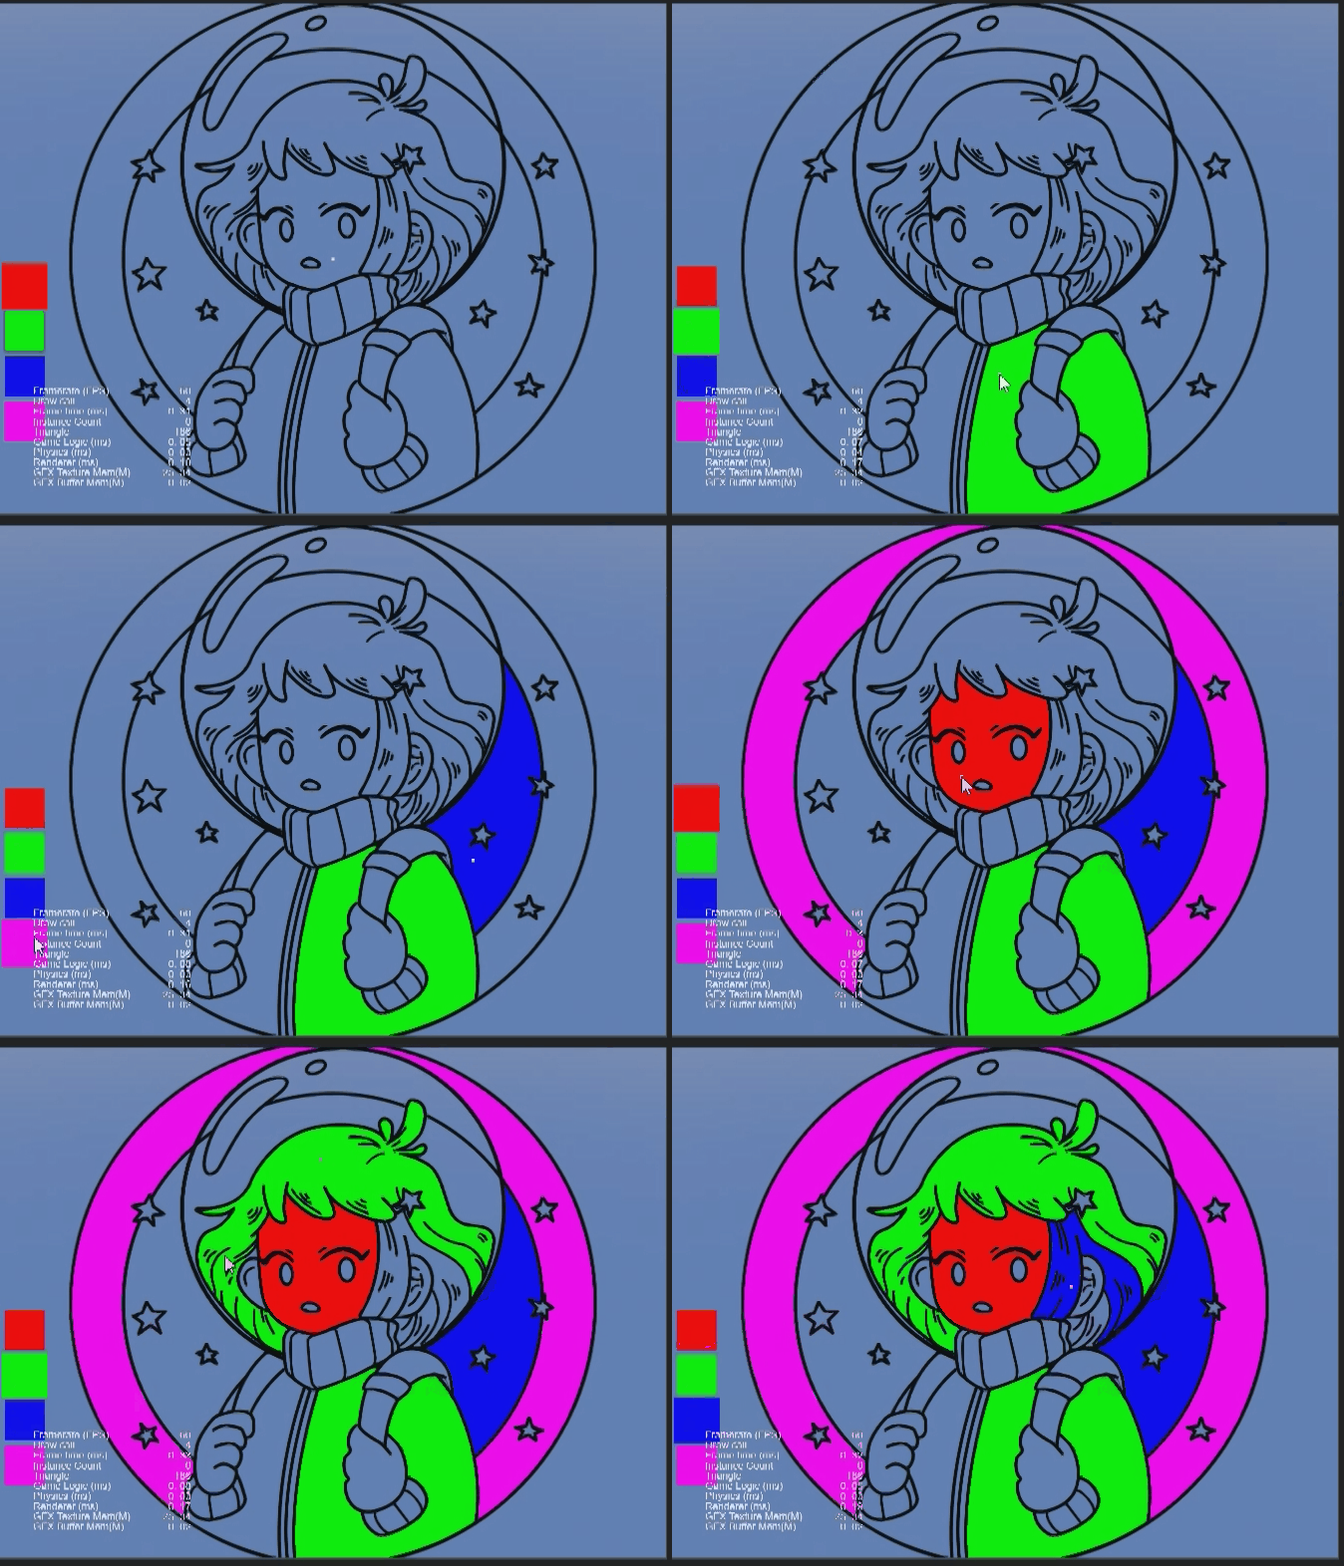
你这主意,怕是要被美术打
获取全部像素,然后用的洪水填充算法算出区域,然后在用RenderTexture 来把数据渲染出来的

这么久的贴还有人翻呀,是要做这种效果吗。
4赞
大佬,快贴代码,上demo吧,孩子们都馋哭了
馋哭了,真的太好看了
蹲代码蹲代码蹲代码蹲代码蹲代码
吨吨吨~~~
3、2、1,上链接
插眼等待大佬代码
Flood Fill, 看下这个https://forum.gamemaker.io/index.php?threads/flood-fill-using-shaders.102664/
来吧,大家兴趣这么浓,我把核心代码帖出来。
import { Color, director, gfx, IVec2, Texture2D, v2 } from "cc";
import Timer from "framework/extention/Timer";

enum GridIndex { Center, Up, Down, Left, Right }
const gridIndexOffset: readonly IVec2[] = [null, v2(0, +1), v2(0, -1), v2(-1, 0), v2(+1, 0)];
const gridIndexNeighbors: Array<GridIndex>[] = [];
gridIndexNeighbors[GridIndex.Center] = [GridIndex.Up, GridIndex.Down, GridIndex.Left, GridIndex.Right];
gridIndexNeighbors[GridIndex.Up] = [GridIndex.Up, GridIndex.Left, GridIndex.Right];
gridIndexNeighbors[GridIndex.Down] = [GridIndex.Down, GridIndex.Left, GridIndex.Right];
gridIndexNeighbors[GridIndex.Left] = [GridIndex.Left, GridIndex.Up, GridIndex.Down];
gridIndexNeighbors[GridIndex.Right] = [GridIndex.Right, GridIndex.Up, GridIndex.Down];

export default class ColorFillTexture {
    public readonly texture: Texture2D;
    public readonly sourceData: Uint8Array;
    public readonly targetData: Uint8Array;
    public readonly width: number;
    public readonly height: number;

    public constructor(source: Texture2D, public alphaThreshold: number = 100, public maxFillCount: number = 30) {
        this.sourceData = ColorFillTexture.readTexturePixels(source);
        this.targetData = Uint8Array.from(this.sourceData);
        this.texture = ColorFillTexture.createTextureFromPixels(this.targetData, source.width, source.height);
        this.width = this.texture.width;
        this.height = this.texture.height;
    }

    public setTextureColor(color: Color, x: number, y: number): boolean {
        x = ColorFillTexture.translateX(this.width, x);
        y = ColorFillTexture.translateY(this.height, y);
        return this.setColor(color, x, y);
    }

    private setColor(color: Color, x: number, y: number): boolean {
        if (x < 0 || y < 0 || x > this.width || y > this.height) return false;

        if (ColorFillTexture.getAlphaColor(this.sourceData, this.width, x, y) > this.alphaThreshold) return false;

        ColorFillTexture.setBufferColor(this.targetData, this.width, x, y, color);
        return true;
    }

    public updateTextureData(): void {
        this.texture.uploadData(this.targetData);
    }

    public fillTextureColor(color: Color, x: number, y: number) {
        x = ColorFillTexture.translateX(this.width, x);
        y = ColorFillTexture.translateY(this.height, y);

        this.fillColor(color, x, y, gridIndexNeighbors[GridIndex.Center]);
    }

    private async fillColor(color: Color, x: number, y: number, gridIndexTypes: readonly GridIndex[]) {
        let colorPointList1 = [{ x, y, neighborTypes: gridIndexTypes }];
        let colorPointList2 = [];
        let filleCount = 0;
        do {
            for (const item of colorPointList1) {
                const result = this.setColor(color, item.x, item.y);
                if (!result) continue;

                for (const type of item.neighborTypes) {
                    const offset = gridIndexOffset[type];
                    const nx = item.x + offset.x, ny = item.y + offset.y;

                    if (ColorFillTexture.getAlphaColor(this.targetData, this.width, nx, ny) == color.a) continue;

                    if (colorPointList2.find(v => v.x == nx && v.y == ny) == null)
                        colorPointList2.push({ x: nx, y: ny, neighborTypes: gridIndexNeighbors[type] });
                }
            }

            let temp = colorPointList1;
            colorPointList1 = colorPointList2;
            colorPointList2 = temp;
            colorPointList2.length = 0;

            if (++filleCount > this.maxFillCount) {
                filleCount = 0;
                this.updateTextureData();
                await Timer.instance.waitForTime(0);
            }
        } while (colorPointList1.length > 0);

        this.updateTextureData();
    }

    /**
     * 转成到图片坐标系,Cocos默认坐标系是图片的中心点,X方向向右,Y方向向上,而图片格式的坐标默认是在左上角,X方向向右,Y方向向下。
     * @param width
     * @param x
     * @returns
     */
    public static translateX(width: number, x: number): number {
        return Math.trunc(x + width * 0.5);
    }

    /**
     * 转成到图片坐标系,Cocos默认坐标系是图片的中心点,X方向向右,Y方向向上,而图片格式的坐标默认是在左上角,X方向向右,Y方向向下。
     * @param height
     * @param y
     * @returns
     */
    public static translateY(height: number, y: number): number {
        return Math.trunc(-y + height * 0.5);
    }

    /**
     * 获得该颜色buffer的alpha
     * @param buffer 颜色buffer
     * @param width 图片宽度
     * @param x x坐标
     * @param y y坐标
     * @returns 该坐标的alpha
     */
    public static getAlphaColor(buffer: Uint8Array, width: number, x: number, y: number): number {
        const index = ColorFillTexture.positionToBufferIndex(width, x, y);
        return buffer[index + 3];
    }

    public static setBufferColor(buffer: Uint8Array, width: number, x: number, y: number, color: Color): void {
        const index = ColorFillTexture.positionToBufferIndex(width, x, y);
        buffer[index + 0] = color.r;
        buffer[index + 1] = color.g;
        buffer[index + 2] = color.b;
        buffer[index + 3] = color.a;
    }

    /**
     * 点坐标转换成图片buffer的索引
     * @param width 图片的宽度
     * @param x x坐标
     * @param y y坐标
     * @param colorSize 颜色是RGB还是RGBA组成
     * @returns buffer索引
     */
    public static positionToBufferIndex(width: number, x: number, y: number, colorSize: 3 | 4 = 4): number {
        return Math.trunc(x + y * width) * colorSize;
    }

    /**
     * 读取texture的像素到一个buffer
     * @param texture texture原图
     * @param width
     * @param height
     * @param x
     * @param y
     * @returns
     */
    public static readTexturePixels(texture: Texture2D, x = 0, y = 0): Uint8Array {
        const gfxTexture = texture.getGFXTexture();
        if (gfxTexture == null) return null;

        const bufferSize = 4 * texture.width * texture.height;
        const buffer = new Uint8Array(bufferSize);

        const region = new gfx.BufferTextureCopy();
        region.texOffset.x = x;
        region.texOffset.y = y;
        region.texExtent.width = texture.width;
        region.texExtent.height = texture.height;

        director.root.device.copyTextureToBuffers(gfxTexture, [buffer], [region]);
        return buffer;
    }

    /**
     * 从像素的buffer中创建一个texture
     * @param buffer 像素buffer
     * @param width 图片宽度
     * @param height 图片高度
     * @param format 图片格式
     * @param mipmapLevel 图片的mipmap等级
     * @returns 新的texture
     */
    public static createTextureFromPixels(buffer: ArrayBufferView, width: number, height: number, format = Texture2D.PixelFormat.RGBA8888, mipmapLevel?: number): Texture2D {
        const texture = new Texture2D();
        texture.reset({ width, height, format, mipmapLevel });
        texture.uploadData(buffer);
        return texture;
    }
}
使用方法,因为是在项目里面抽出来,所以不是完全,大家可以自己整理一下:
    private createColorFill(texture: Texture2D): void {
        this.colorFillTexture = new ColorFillTexture(texture, logicConfig.alphaThreshold, logicConfig.maxFillCount);
        let spriteFrame = new SpriteFrame();
        spriteFrame.texture = this.colorFillTexture.texture;
        this.sprite.spriteFrame = spriteFrame;
    }

    private onImageLoad(data: string): void {
        const image = new Image();
        image.src = data;
        image.addEventListener('load', () => {
            const texture = new Texture2D();
            texture.image = new ImageAsset(image);
            this.createColorFill(texture);
        });
    }

    private onTouchStart(event: EventTouch): void {
        const location = event.touch.getUILocation(_vec2_temp1);
        const uiTransform = this.sprite.getComponent(UITransform);
        const position = uiTransform.convertToNodeSpaceAR(_vec3_temp1.set(location.x, location.y), _vec3_temp1);
        this.colorFillTexture.fillTextureColor(colors[this.indexColor], position.x, position.y);
    }
9赞
什么游戏,可以玩玩吗?
好人一生平安!
我之前做曼陀罗画板的时候,也是用的你这个方式。
mark一下
内部技术储备,没有出游戏。
使用的是什么版本的引擎啊
文章里写有,3.8.1
mark学习一下

