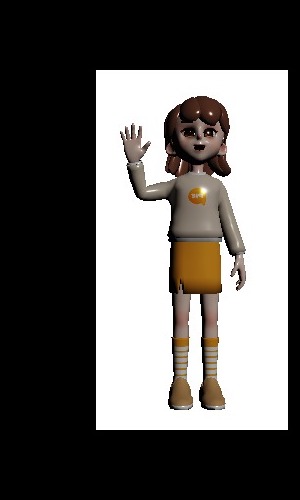
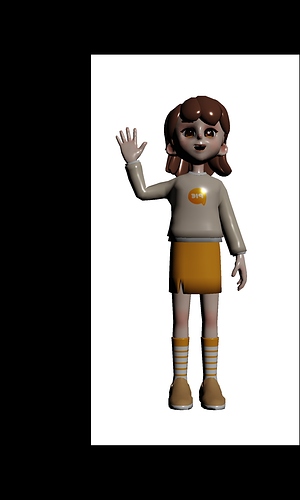
- Creator 版本: 3.0.1
为了实现 3.x 版本给 3D 模型拍照,我们参考了这个解决方案 creator3.0 camera怎么截图
目前遗留问题如下,想请教下引擎组应该如何解决: @panda @Wtaotaovip
- 目前只能是有色值的背景图。「将 2D背景 camera 的清除色设置为透明」 和 「2D 背景图片设置为透明」这两种方法都无法使得背景色是透明。
- camera 拍摄出来的结果锯齿十分严重

2.x 版本有相关文档介绍,但 3.x 没有找到比较好用的 API
https://docs.cocos.com/creator/manual/zh/render/camera.html
大致思路:
【前提: UI_3D 层和 UI_2D 层是用不同camera分别照射的。UI_3D 层未设置 skybox,所以 camera 照出来的texture 无像素部分是黑色,即使 camera 的清除颜色设置为透明,只能保证我们通过这个 camera 看到的视觉结果,但实际上 texture 的信息并未改变,所以通过将 framebuffer 传给 buffer 去保存图片信息的时候,结果无法达到背景透明的效果,所以目前的解决方式是用两个 camera 去渲染一张 RT,一个 camera 照射 3D 模型,一个 camera 照射背景图】
-
新建一个 camera 单独作为捕捉 3D 内容相机,设置其 targetTexture 使之成为离屏相机。新建一个 RenderTexture,并且设置 camera 的 targetTexture 为新建的 RenderTexture,这样 camera 的内容将会渲染到新建的 RenderTexture 中,之后就是对这个RenderTexture的各种处理。注意camera的 backgroundColor 和 clearFlags 根据实际情况定。
// 摄像机背景色设置为透明。清除颜色时会使用设定的背景色 camera.backgroundColor = cc.Color.TRANSPARENT // 指定渲染摄像机时的清除操作。清除颜色、深度、模版缓存,不然当前帧会有上帧3个缓存的遗留 camera.clearFlags = cc.Camera.ClearFlags.DEPTH | cc.Camera.ClearFlags.STENCIL | cc.Camera.ClearFlags.COLOR -
新建一个 camera 作为捕捉 2D 背景相机,同上设置其 targetTexture。注意这两个 camera 的 targetTexture 需要是同一个 RT。由于 RT 在目前的版本取消了 ColorAttachment 的序列化和自定义编辑,会默认设置为 CLEAR,所以每次绘制都会固定的更新颜色值进行清空,如果需要多个相机进行绘制,需要在 reset 的时候进行自定义。
const colorAttachment = new gfx.ColorAttachment(); colorAttachment.loadOp = gfx.LoadOp.LOAD; colorAttachment.endLayout = gfx.TextureLayout.SHADER_READONLY_OPTIMAL; const depthStencilAttachment = new gfx.DepthStencilAttachment(); const passInfo = new gfx.RenderPassInfo([colorAttachment], depthStencilAttachment); texture.reset({width: 300, height: 500, passInfo: passInfo}); -
在 scheduleOnce 里将上述两个 camera 的 targetTexture 为 null,并且在这里去保存 RT 的内容。
-
RenderTexture 的信息在之前的版本中有 readPixels 这个 api,现在需要拿到 texture 的 framebuffer, copy 给 arrayBuffer,然后存下这个 arrayBuffer。需要的 jsb 有 jsb.fileUtils.getWritablePath 和 jsb…fileUtils.writeDataToFile。
注意这里还有一步「图片翻转」的操作。let arrayBuffer = new ArrayBuffer(texture.width * texture.height * 4); let region = new GFXBufferTextureCopy(); region.texOffset.x = 0; region.texOffset.y = 0; region.texExtent.width = texture.width; region.texExtent.height = texture.height; director.root?.device.copyFramebufferToBuffer(texture.window?.framebuffer!, arrayBuffer, [region]); // todo // for native // let filePath = jsb.fileUtils.getWritablePath() + 'name' + '.png' // this.saveImageData(arrayBuffer,texture.width,texture.height,filePath)
现在的问题:
- 目前只能是有色值的背景图。「将 2D背景 camera 的清除色设置为透明」 和 「2D 背景图片设置为透明」这两种方法都无法使得背景色是透明。
- camera 拍摄出来的结果锯齿十分严重
待验证/解决:
- 【针对问题一】给 3D 层设置skybox,看下捕捉 3D 的相机是否可以成功设置透明背景色。这种如果可以成功的话就不需要多一个照射背景的 2D 摄像机。
- 【针对问题一】再拿到 RenderTexture 信息之后,不知道可不可以去设置这个 RenderTexture 的无像素部分的显示。
- 调整摄像机 fov,去获得不同视角:半身照和全身照
- 测试 native 的 保存图片 bridge,图片翻转也需要验证下
参考链接:
- creator3.0 camera怎么截图 creator3.0 camera怎么截图
- 3.0版本 renderTexture 截图后如何保存 3.0版本 renderTexture 截图后如何保存
- https://docs.cocos.com/creator/manual/zh/render/camera.html# 2.4版本的截图方式

