前言
Hello大家好,我是Nowpaper,一爸学游戏,越来越有趣
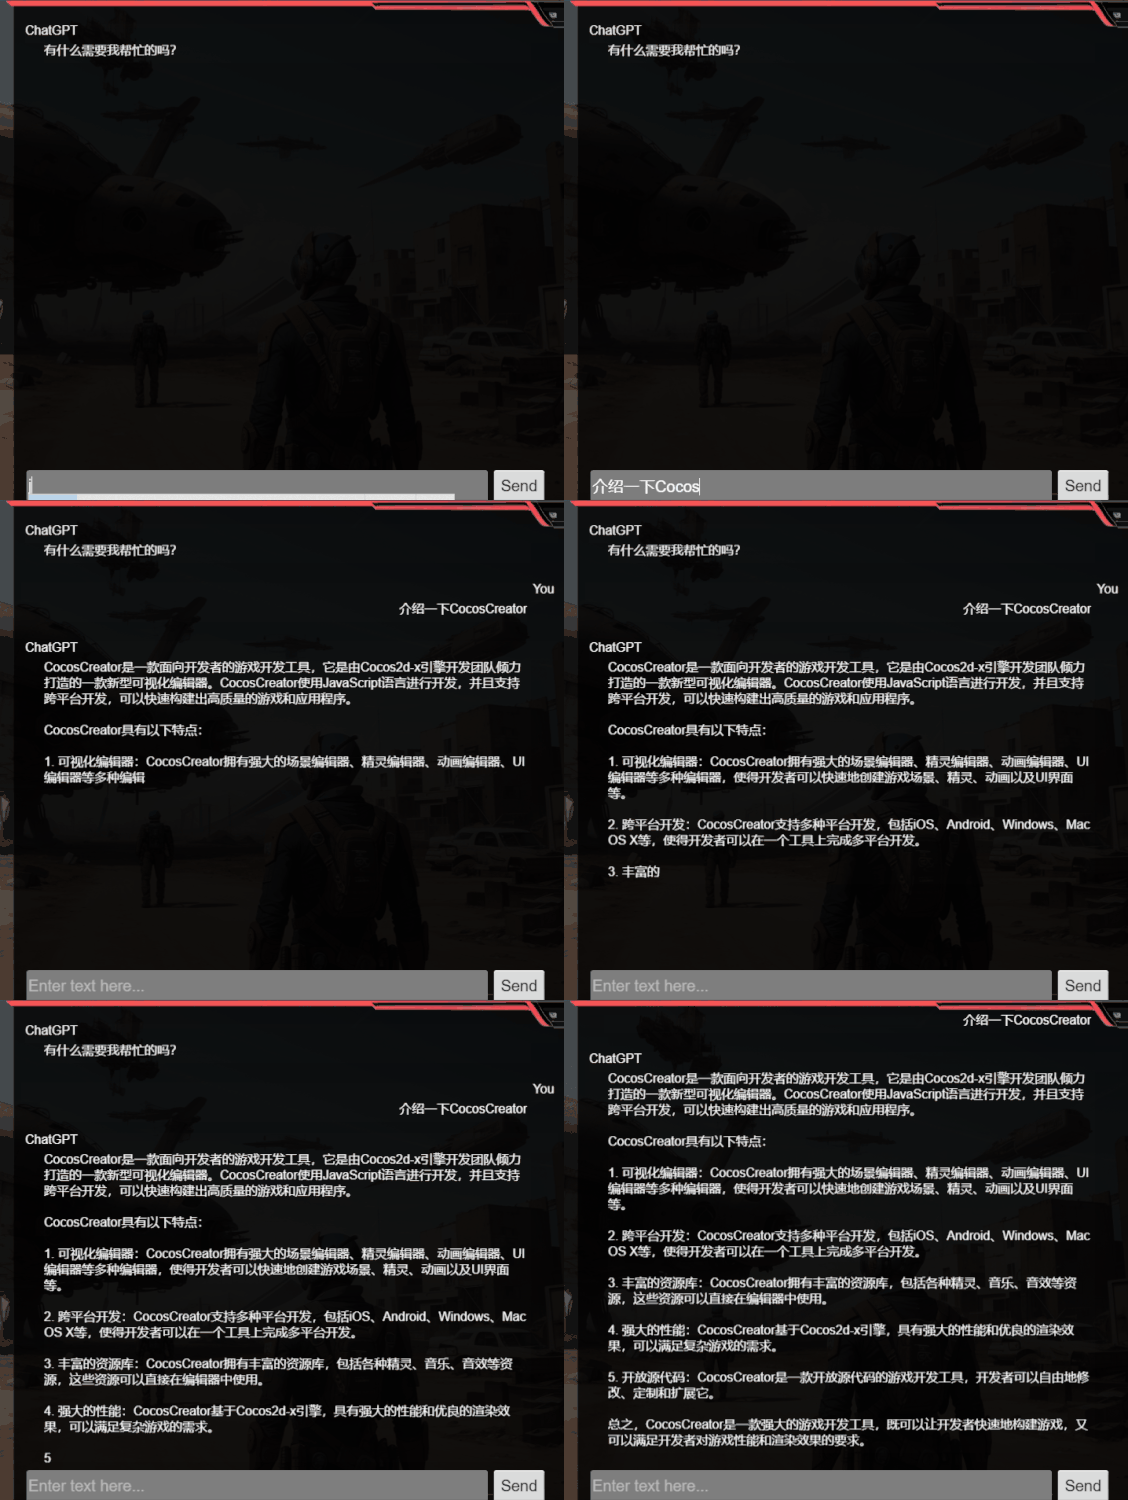
ChatGPT直到现在热度不减,衍生出来的各种应用也越来越有创造性,甚至利用它制作出来一个自我发展的小镇,就目前来说,ChatGPT最强大的是自然语言模型下的聊天,你完全可以把它当成不错的聊天助手,那么,在CocosCreator创造的游戏中,能否也可以加入一个ChatGPT呢?答案肯定是可以的,今天本篇就给大家带来如何接入OpenAI的API,来实现游戏项目里调用ChatGPT的能力。
运行效果
解说视频
项目资源
已经提交到了Cocos市场,如果找不到说明还没有审核完成,请搜索“ChatGPT接入示例”,或者尝试访问这个地址:https://store.cocos.com/app/detail/4860
场景搭建
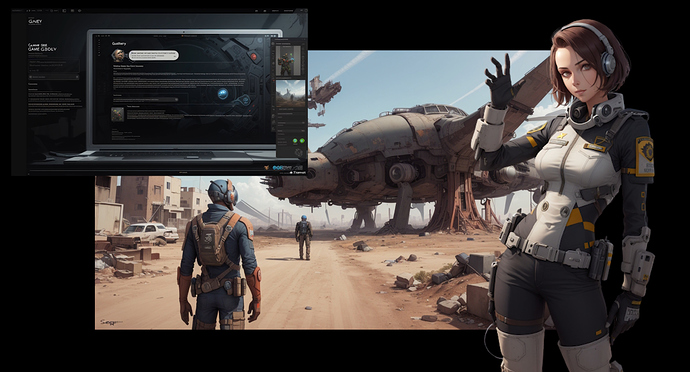
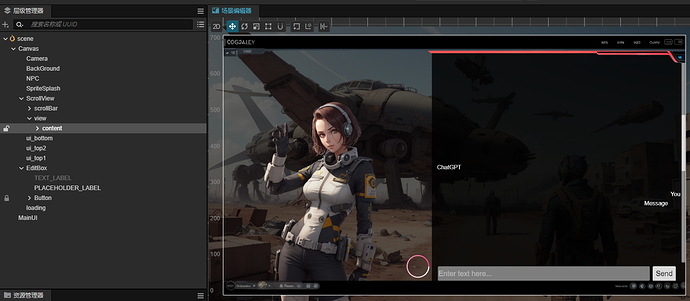
本片中的素材来自Midjourney生成,包含背景图、人物、UI等,还利用了AI抠图技术和修饰,具体方法就不罗嗦了,最终呈现了如下素材,我们使用这些素材搭建了一个场景,该场景使用CocosCreator3的2D项目模式
在Canvas节点下,规划好滚动视图,视图内的消息输出,输入栏和发送按钮,以及一个的Loading标记,至于其他方面的动态,大家可以自行创造和脑补
OpenAI APIKey
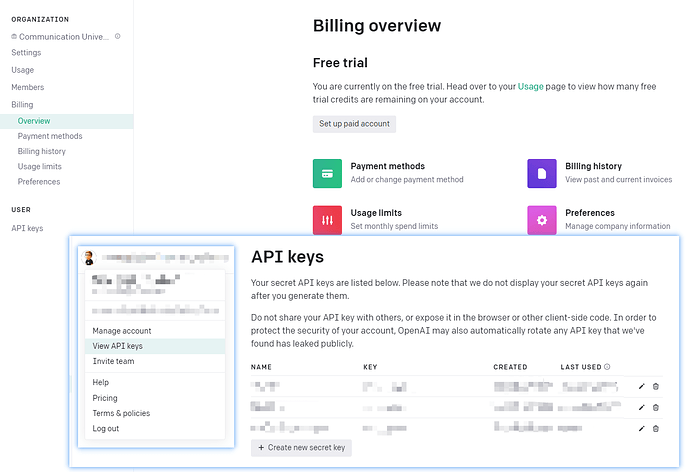
现在你需要到OpenAI的网站上,开启一个APIKey,这个可以说是最麻烦的一部分,你需要一些魔法,才能正常穿越到目标页面,同时,你还得需要一张异世界的信用卡,完成支付绑定后才可以,否则的话,你的API访问可能是不通畅的状态,地址打开:https://platform.openai.com/docs/api-reference
如果这个部分不是难题,现在打开APIKeys,选择创建一个新的密钥,创建后复制保存它,下面开始写代码了
ChatGPT组件
打开CocosCreator,在资产界面中点击右键,创建一个名叫ChatGPTService的组件,实现它的功能
import { _decorator, Component, Node } from 'cc';
const { ccclass, property } = _decorator;

@ccclass('ChatGPTService')
export class ChatGPTService extends Component {
    private apiurl: string = "接口地址";
    private apikey: string = "你的OpenAI Key";
    // 发送POST请求
    public async Post(data: any): Promise<any> {
        const self = this;
        return new Promise(function (resolve, reject) {
            const xhr = new XMLHttpRequest();
            xhr.onreadystatechange = function () {
                if (xhr.readyState == 4 && (xhr.status >= 200 && xhr.status < 400)) {
                    const response = xhr.responseText;
                    if (response) {
                        const d = JSON.parse(response);
                        resolve(d);
                    } else {
                        resolve(null);
                    }
                }
            };
            xhr.open("POST", self.apiurl, true);
            xhr.setRequestHeader("Content-Type", "application/json");
            xhr.setRequestHeader("Authorization", "Bearer " + self.apikey);
            xhr.send(JSON.stringify(data));
        });
    }
}
这里使用了通用的 XMLHttpRequest,作了简单的Post请求实现
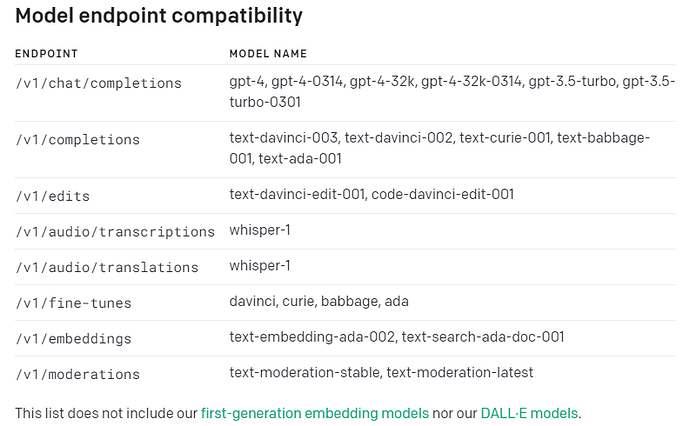
打开OpenAI的文档 https://platform.openai.com/docs/models/model-endpoint-compatibility
找到有关模型终端的部分,可以看到对应的接口,将使用Chat模型,下面将对应的接口复制,替换掉对应部分
private apiurl: string = "https://api.openai.com/v1/chat/completions";
通过观察OpenAI的例子代码,请求内容里,需要包含如下参数,为了更加规范,我们将请求类型定义一下,返回值类型也定义一下
export type GPTResquest = {
    model: string,//gpt-3.5-turbo
    messages: { role: string, content: string }[],
    temperature: number
}
export type GPTResult = {
    id:string,
    object:string,
    created: number,
    model: string,
    usage: {
        prompt_tokens: number,
        completion_tokens: number,
        total_tokens: number
    },
    choices: {
        message: {
            role: string,
            content:string
        },
        finish_reason: string,
        index:number
    }[]
}
替换掉Post请求函数的参数,这样就看起来舒服多了
public async Post(data: GPTResquest): Promise<GPTResult>{
UI接入
对UI进行处理,添加一个MainUI的组件脚本,编写一下处理代码,需要对滚动视图,和发送按钮等处理
本项目的代码如下:
import { _decorator, Button, Component, EditBox, instantiate, Node, ScrollView } from 'cc';
import { MessageItem } from './MessageItem';
import { ChatGPTService } from './ChatGPTService';
const { ccclass, property } = _decorator;

@ccclass('MainUI')
export class MainUI extends Component {
    @property(Node)
    loading:Node = null;
    @property(EditBox)
    editbox:EditBox = null;
    @property(Button)
    btnSend:Button = null;
    @property(ScrollView)
    scrollView:ScrollView = null;
    @property(Node)
    messageItemGPT:Node = null;
    @property(Node)
    messageItemYou:Node = null;
    @property(Node)
    content:Node = null;
    start() {
        this.loading.active = false;
        this.messageItemGPT.active = this.messageItemYou.active = false;
        this.addOneMessage("有什么需要我帮忙的吗?",this.messageItemGPT);
    }

    update(deltaTime: number) {
        this.btnSend.enabled = this.editbox.enabled = !this.loading.active;
        this.loading.angle -= deltaTime * 150;
    }
    private addOneMessage(msg:string,prefab:Node,show:boolean = false){
        while(msg[0] == "\n"){
            msg = msg.substring(1);
        }
        const clone = instantiate(prefab);
        clone.getComponent(MessageItem).setMsg(msg,show);
        this.content.addChild(clone);
        clone.active = true;
    }
    async Send(msg:string){
        this.loading.active = true;
        const result = await this.getComponent(ChatGPTService).Post(
            {
                model:"gpt-3.5-turbo",
                messages:[{role:"user",content:msg}],
                temperature : 0.7
            }
        );
        console.log(result);
        this.addOneMessage(result.choices[0].message.content,this.messageItemGPT,true);
        this.loading.active = false;
    }
    onClickSend(){
        if(this.editbox.string){
            this.addOneMessage(this.editbox.string,this.messageItemYou);
            this.Send(this.editbox.string);
            this.editbox.string = "";
        }
    }
}
其中涉及到一个MessageItem的脚本,代码如下:
import { _decorator, Component, Label, Node } from 'cc';
const { ccclass, property } = _decorator;

@ccclass('MessageItem')
export class MessageItem extends Component {

    @property(Label)
    message: Label = null;
    @property
    msg: string = "";
    private timespan: number = 0.1;
    public setMsg(str: string, show: boolean) {
        if (show)
            this.msg = str;
        else
            this.message.string = str;
        this.timespan = 2 / str.length;
    }
    private timer = 0;
    update(deltaTime: number) {
        this.timer += deltaTime;
        if (this.timer >= this.timespan) {
            if (this.msg.length > 0) {
                if (this.message.string.length < this.msg.length) {
                    this.message.string += this.msg[this.message.string.length];
                }
            }
        }
    }
}
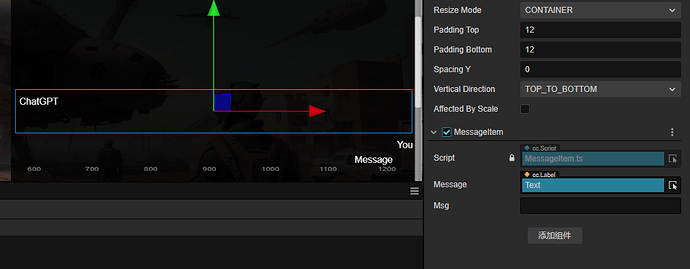
它被挂在在卷动视图中的两个Item上,作为预制体提供显示能力
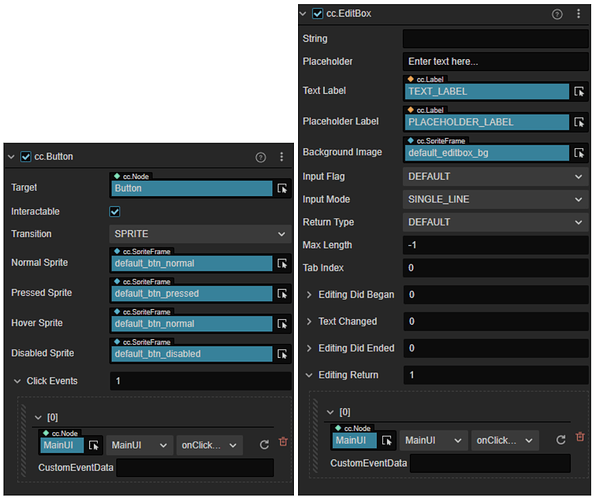
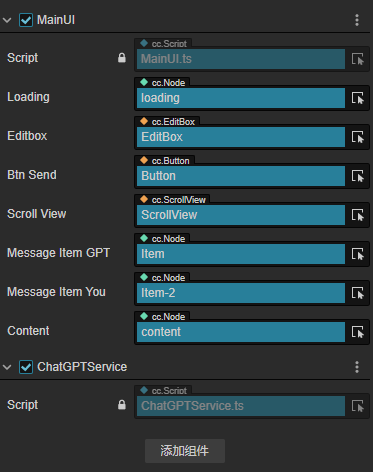
将MainUI脚本和ChatGPTService脚本添加到同一个节点上,然后为它们添加对应场景中的对象引用
在Creator中添加对应的按钮事件
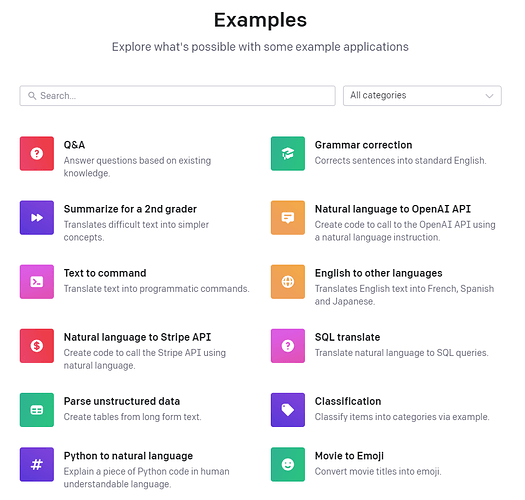
好了,咱们的ChatGPT已经可以在自己的项目中集成了,如果你想了解更多,可以参看官方的文档和示例,其中还有各种参数的传输,能够实现更多有趣的内容
https://platform.openai.com/examples
注意事项
- 该项目运行在Web浏览器正常流畅,其他平台由于OpenAI的策略可能失败
- API Secret Key 你需要自行取得,本篇没有提供
- POST请求没有作异常处理,如果运行失败请参看console log,以确认Request的返回错误
- 请求参数请参看其他文章说明,本篇是以最小示例为基础的项目
结语
AIGC为我们带来了很多想象,但那毕竟是工具,还需要人的创造力借助它们完成伟大的创作,对于目前的情况而言,AIGC并不能完全代替人完成全部的工作,这次的选题,原本我想用AI结合CocosCreator创作一个游戏,但是结果并不能如设想般完全依赖AI完成,如有机会专门写一个文章讲述这段心路历程
今天就到这里了,我是Nowpaper,一个混迹游戏行业的老爸,如果您喜欢我的视频,不妨三连一下,您的支持就是我更新的动力,那么我们下次再见
本人喜欢研究各种有趣的玩法,以下是往期制作,可以移步研究
多维空间视错实现《笼中窥梦》,可渲染纹理和自定义着色器结合实现视觉方盒
游戏中射击的最酷实现,Creator3如何作出《守望先锋》同级的枪弹射击体验
时间倒放的有趣实现,在Creator中作物理回溯,开发《时空幻境》一样的倒退玩法
用RenderTexture实现Sprite版小地图和炫酷的传送门

