
【本文参与征文活动】
date: 2020/05/03
updated: 2020/06/05
前言
来了来了,今天给大家分享的绝对是 好东西 !!!
相信很多人都遇到需要 在图片上挖孔(镂空) 的需求,最常见的例子就是 新手引导中的镂空遮罩 。虽然可以用 Mask 实现,但是效果太勉强,也不好控制,而且很不优雅,更好的解决方案就是用 Shader 来实现。
所以皮皮今天给大家带来的是 可以满足几乎所有挖孔需求的 Shader 和炒鸡方便的配套组件 !
矩形、圆形、圆角、边缘虚化,位置可控,统统 打包带走 ,而且可通过代码轻松控制!
什么?想要三角形和五角星?
不,你不想。
效果展示
HollowOut
镂空 Shader 与 HollowOut 组件搭配使用效果顶呱呱~


实现新手引导
下图是我配合 TouchBlocker 组件实现的 新手引导 功能。
TouchBlocker 是 Eazax-CCC 中一个用来 限制可点击的节点 的独立组件,传送门 TouchBlocker.ts
而 Eazax-CCC 是我目前维护的一个 开源游戏开发脚手架 ,包含各种实用的组件,目前也在不断更新中,有需要的童鞋在公众号发送 “开源” 即可获取链接,不要忘记 Star 哦~
实现上面的新手引导需要的核心代码还不到 15 行,嗐!苏福~
// 以下为新手引导实现核心代码,多简单啊

protected onLoad() {
    this.startBtn.on('touchend', this.onStartBtnClick, this);
    this.oneBtn.on('touchend', this.onOneBtnClick, this);
    this.twoBtn.on('touchend', this.onTwoBtnClick, this);
}

protected start() {
    this.hollowOut.nodeSize(); // 将遮罩镂空设为节点大小
    this.touchBlocker.setTarget(this.startBtn); // 设置可点击节点
}

private async onStartBtnClick() {
    this.touchBlocker.blockAll(); // 屏蔽所有点击
    await this.hollowOut.rectTo(1, this.oneBtn.getPosition(), this.oneBtn.width + 10, this.oneBtn.height + 10, 5, 5);
    this.touchBlocker.setTarget(this.oneBtn); // 设置可点击节点
}

private async onOneBtnClick() {
    this.hollowOut.nodeSize(); // 将遮罩镂空设为节点大小
    this.touchBlocker.blockAll(); // 屏蔽所有点击
    await this.hollowOut.rectTo(1, this.twoBtn.getPosition(), this.twoBtn.width + 10, this.twoBtn.height + 10, 5, 5);
    this.touchBlocker.setTarget(this.twoBtn); // 设置可点击节点
}

private onTwoBtnClick() {
    this.hollowOut.nodeSize(); // 将遮罩镂空设为节点大小
    this.touchBlocker.passAll(); // 放行所有点击
}
正文
整体思路
-
镂空的具体实现思路无非就是渲染时判断每个点的位置,是否符合我们的要求,符合的设为透明或者直接放弃渲染,否则正常渲染即可。
-
由于 Shader 在渲染时使用的是标准屏幕坐标系(左上角为原点),与我们平时在 Creator 中使用的笛卡尔坐标系(左下角为原点)和本地坐标系(中间为原点)不同,使用时需要经过坐标转换。
-
同时 Shader 中的点的坐标使用的不是相对于坐标系的位置,坐标范围为 (0.0, 0.0) 到 (1.0, 1.0),比如在编辑器中间的位置为(0, 0),在纹理坐标中就为 (0.5, 0.5),这也是需要我们自己去计算的地方。
-
由于我接触 Shader 的时间还不是很长,很多地方都不熟悉,一路跌跌撞撞边学边写花了几个晚上才把这个 Shader 和配套组件做完,而且我觉得还有优化的空间。
以后我也会持续学习并深入理解 Shader 的编写,自己学习的同时也不忘记把知识分享给大家。后面我会写一系列入门文章,给同样想要学习 Shader 的童鞋参考,感兴趣的童鞋可以关注下哦~
代码实现
注:本 Shader 基于 Cocos Creator 2.3.3 开发
使用自定义 Effect 请禁用目标贴图的 packable 属性,否则会因为动态合图后无法正确计算纹理 uv 而导致 effect 失效
详情请看:https://docs.cocos.com/creator/manual/zh/asset-workflow/sprite.html#packable或者禁用动态合图功能(不推荐)
cc.dynamicAtlasManager.enabled = false;
Shader
由于完整 Shader 代码过于冗长,这里只贴出来比较关键的 片段着色器部分 。完整的代码在这里 eazax-hollowout.effect
// 以下为镂空 Shader 中的片段着色器部分

CCProgram fs %{
  precision highp float;

  in vec2 v_uv0;
  in vec4 v_color;

  uniform sampler2D texture;

  uniform Properties {
    vec2 center;
    vec2 size;
    float width;
    float height;
    float round;
    float feather;
  };

  void main () {
    vec4 color = v_color;
    color *= texture(texture, v_uv0);
    // 边缘
    float ratio = size.x / size.y;
    float minX = center.x - (width / 2.0);
    float maxX = center.x + (width / 2.0);
    float minY = center.y - (height * ratio / 2.0);
    float maxY = center.y + (height * ratio / 2.0);
    if (v_uv0.x >= minX && v_uv0.x <= maxX && v_uv0.y >= minY && v_uv0.y <= maxY) {
      if (round == 0.0) discard; // 没有圆角则直接丢弃
      // 圆角处理
      float roundY = round * ratio;
      vec2 vertex;
      if (v_uv0.x <= minX + round) {
        if (v_uv0.y <= minY + roundY) {
          vertex = vec2(minX + round, (minY + roundY) / ratio); // 左上角
        } else if (v_uv0.y >= maxY - roundY) {
          vertex = vec2(minX + round, (maxY - roundY) / ratio); // 左下角
        } else {
          vertex = vec2(minX + round, v_uv0.y / ratio); // 左中
        }
      } else if (v_uv0.x >= maxX - round) {
        if (v_uv0.y <= minY + roundY){
          vertex = vec2(maxX - round, (minY + roundY) / ratio); // 右上角
        } else if (v_uv0.y >= maxY - roundY) {
          vertex = vec2(maxX - round, (maxY - roundY) / ratio); // 右下角
        } else {
          vertex = vec2(maxX - round, v_uv0.y / ratio); // 右中
        }
      } else if (v_uv0.y <= minY + roundY) {
        vertex = vec2(v_uv0.x, (minY + roundY) / ratio); // 上中
      } else if (v_uv0.y >= maxY - roundY) {
        vertex = vec2(v_uv0.x, (maxY - roundY) / ratio); // 下中
      } else {
        discard; // 中间
      }
      float dis = distance(vec2(v_uv0.x, v_uv0.y / ratio), vertex);
      color.a = smoothstep(round - feather, round, dis);
    } else {
      color.a = 1.0;
    }

    color.a *= v_color.a;
    gl_FragColor = color;
  }
}%
HollowOut
然后是配套使用的 HollowOut 组件,开箱即用~组件中已经实现了坐标以及距离的转换,使用非常的方便快捷。传送门 HollowOut.ts
这个组件的代码也比较多,这里只贴出较为关键的代码,大多数的情况处理我都已经封装好了,通过下面的代码大家可以轻易得知我是如何转换参数的,所以你也可以参照实现自己需要的特效或功能~
/**
 * 渲染
 * @param keepUpdating 是否每帧自动更新
 */
private render(keepUpdating: boolean) {
    switch (this.shape) {
        case Shape.Rect:
            this.rect(this.center, this.width, this.height, this.round, this.feather, keepUpdating);
            break;
        case Shape.Circle:
            this.circle(this.center, this.radius, this.feather, keepUpdating);
            break;
    }
}

/**
 * 矩形镂空
 * @param center 中心坐标
 * @param width 宽
 * @param height 高
 * @param round 圆角半径
 * @param feather 边缘虚化宽度
 * @param keepUpdating 是否每帧自动更新
 */
public rect(center?: cc.Vec2, width?: number, height?: number, round?: number, feather?: number, keepUpdating: boolean = false) {
    this.shape = Shape.Rect;
    if (center !== null) this.center = center;
    if (width !== null) this.width = width;
    if (height !== null) this.height = height;
    if (round !== null) {
        this.round = round >= 0 ? round : 0;
        let min = Math.min(this.width / 2, this.height / 2);
        this.round = this.round <= min ? this.round : min;
    }

    if (feather !== null) {
        this.feather = feather >= 0 ? feather : 0;
        this.feather = this.feather <= this.round ? this.feather : this.round;
    }

    this.material.setProperty('size', this.getNodeSize());
    this.material.setProperty('center', this.getCenter(this.center));
    this.material.setProperty('width', this.getWidth(this.width));
    this.material.setProperty('height', this.getHeight(this.height));
    this.material.setProperty('round', this.getRound(this.round));
    this.material.setProperty('feather', this.getFeather(this.feather));

    this.keepUpdating = keepUpdating;
}

/**
 * 圆形镂空
 * @param center 中心坐标
 * @param radius 半径
 * @param feather 边缘虚化宽度
 * @param keepUpdating 是否每帧自动更新
 */
public circle(center?: cc.Vec2, radius?: number, feather?: number, keepUpdating: boolean = false) {
    this.shape = Shape.Circle;
    if (center !== null) this.center = center;
    if (radius !== null) this.radius = radius;
    if (feather !== null) this.feather = feather >= 0 ? feather : 0;

    this.material.setProperty('size', this.getNodeSize());
    this.material.setProperty('center', this.getCenter(this.center));
    this.material.setProperty('width', this.getWidth(this.radius * 2));
    this.material.setProperty('height', this.getHeight(this.radius * 2));
    this.material.setProperty('round', this.getRound(this.radius));
    this.material.setProperty('feather', this.getFeather(this.feather));

    this.keepUpdating = keepUpdating;
}

/**
 * 缓动镂空(矩形)
 * @param time 时间
 * @param center 中心坐标
 * @param width 宽
 * @param height 高
 * @param round 圆角半径
 * @param feather 边缘虚化宽度
 */
public rectTo(time: number, center: cc.Vec2, width: number, height: number, round: number = 0, feather: number = 0): Promise<void> {
    return new Promise(res => {
        cc.Tween.stopAllByTarget(this);
        this.tweenRes && this.tweenRes();
        this.tweenRes = res;
        if (round > width / 2) round = width / 2;
        if (round > height / 2) round = height / 2;
        if (feather > round) feather = round;
        this.shape = Shape.Rect;
        cc.tween<HollowOut>(this)
            .call(() => this.keepUpdating = true)
            .to(time, {
                center: center,
                width: width,
                height: height,
                round: round,
                feather: feather
            })
            .call(() => {
                this.scheduleOnce(() => {
                    this.keepUpdating = false;
                    this.tweenRes();
                    this.tweenRes = null;
                });
            })
            .start();
    });
}

/**
 * 缓动镂空(圆形)
 * @param time 时间
 * @param center 中心坐标
 * @param radius 半径
 * @param feather 边缘虚化宽度
 */
public circleTo(time: number, center: cc.Vec2, radius: number, feather: number = 0): Promise<void> {
    return new Promise(res => {
        cc.Tween.stopAllByTarget(this);
        this.tweenRes && this.tweenRes();
        this.tweenRes = res;
        this.shape = Shape.Circle;

        cc.tween<HollowOut>(this)
            .call(() => this.keepUpdating = true)
            .to(time, {
                center: center,
                radius: radius,
                feather: feather
            })
            .call(() => {
                this.scheduleOnce(() => {
                    this.keepUpdating = false;
                    this.tweenRes();
                    this.tweenRes = null;
                });
            })
            .start();
    });
}

/**
 * 取消所有挖孔
 */
public reset() {
    this.rect(cc.v2(), 0, 0, 0, 0);
}

/**
 * 挖孔设为节点大小(就整个都挖没了)
 */
public nodeSize() {
    this.rect(this.node.getPosition(), this.node.width, this.node.height, 0, 0);
}

/**
 * 获取中心点
 * @param center
 */
private getCenter(center: cc.Vec2) {
    let x = (center.x + (this.node.width / 2)) / this.node.width;
    let y = (-center.y + (this.node.height / 2)) / this.node.height;
    return cc.v2(x, y);
}

/**
 * 获取节点尺寸
 */
private getNodeSize() {
    return cc.v2(this.node.width, this.node.height);
}

/**
 * 获取挖孔宽度
 * @param width
 */
private getWidth(width: number) {
    return width / this.node.width;
}

/**
 * 获取挖孔高度
 * @param height
 */
private getHeight(height: number) {
    return height / this.node.width;
}

/**
 * 获取圆角半径
 * @param round
 */
private getRound(round: number) {
    return round / this.node.width;
}

/**
 * 获取边缘虚化宽度
 * @param feather
 */
private getFeather(feather: number) {
    return feather / this.node.width;
}
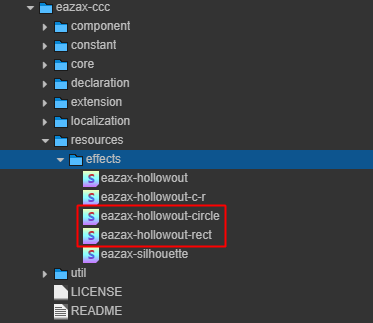
- 另外我还提供了矩形和圆形的独立版本 Shader ,独立版本需要自行设置 Material 才能使用,同时不适用于 HollowOut 组件,当然可以自行实现。传送门
使用方法
在带有 Sprite 组件的节点上添加 HollowOut 组件。如果使用了 Eazax-CCC 脚手架则组件会自动绑定资源
// 编辑器环境下自动绑定 Effect 资源
// 依赖于 EditorAsset 模块,没有模块请将此代码块以及顶部导入语句注释
if (CC_EDITOR && !this.effect) {
    await new Promise(res => {
        EditorAsset.load('eazax-ccc/resources/effects/eazax-hollowout.effect', 'effect', (err: any, result: cc.EffectAsset) => {
            if (err) cc.warn('请手动指定 HollowOut 组件的 Effect 文件!');
            else this.effect = result;
            res();
        });
    });
}
如果是单独导入项目的,则需要将 镂空 Shader 文件 eazax-hollowout.effect 拖到 HollowOut 组件的 Effect 属性上

最后在编辑器上调整需要的属性,或者使用代码获取 HollowOut 组件来设置属性。
传送门
更多分享
公众号
菜鸟小栈
我是陈皮皮,这是我个人运营的公众号,专注但不仅限于游戏开发、前端和后端技术记录与分享。
虽不高产,但是每一篇原创都非常用心,而你的关注就是我原创的动力!
Input and output.


